
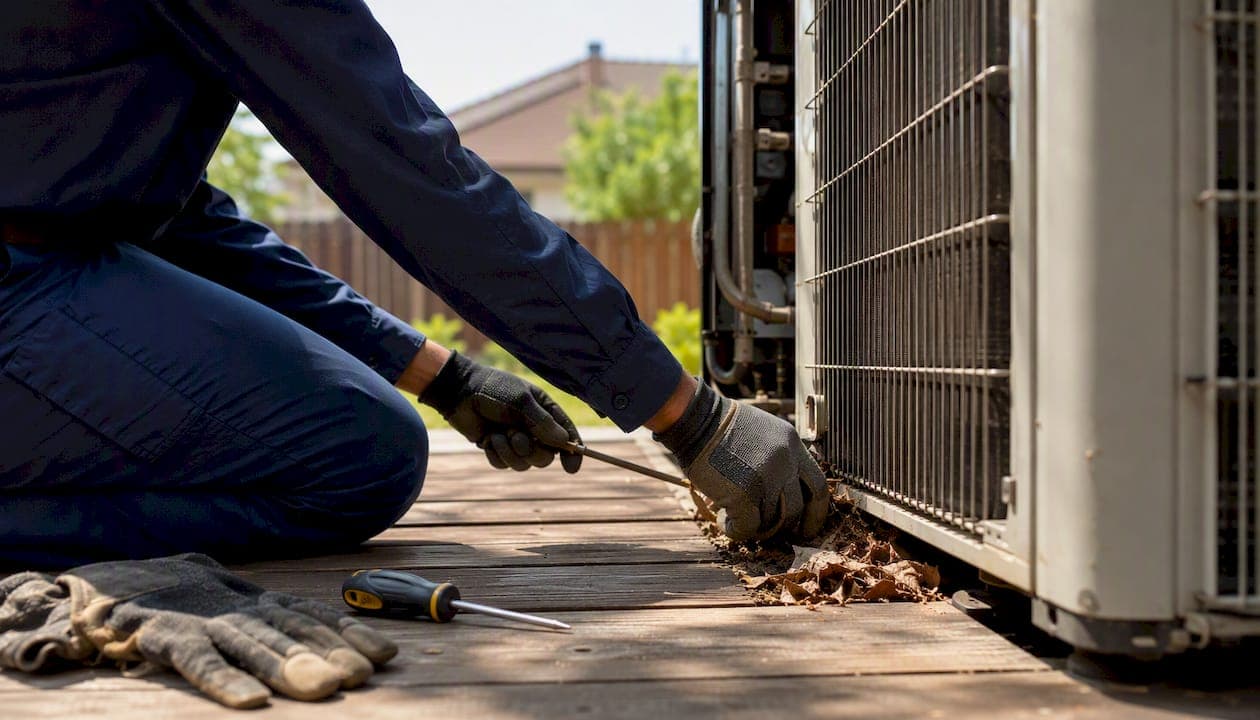
Most loud AC compressor noises come down to three categories: electrical faults (failing capacitors or contactors), mechanical wear (bearings, pistons, or mounts), or airflow problems (debris, bent fan blades, blocked coils). Some noises are harmless. Others mean you should shut the unit off right now.
Here's what to do immediately:
- Listen and note the sound type. Buzzing, rattling, grinding, hissing, and banging each point to different problems with different urgency levels.
- Shut the unit off if you hear grinding, loud banging, a burning smell, or persistent hissing. Running a failing compressor can turn a moderate repair into a very expensive replacement.
- Do a safe visual check with the power off at the disconnect: look for debris in the fan path, ice on refrigerant lines, loose panels, or cracked rubber isolation pads. Then call a licensed HVAC technician if anything looks wrong or the noise returns.
According to industry guidance, most compressor failures that result in full system replacement could have been caught earlier with routine professional diagnostics. Simple electrical fixes usually cost significantly less than compressor replacement, which is a major expense.
Key Takeaways
A loud AC compressor almost always traces to an electrical fault, mechanical wear, or debris, and catching it early is the difference between a $200 repair and a $2,000+ replacement.
| Point | Details |
|---|---|
| Match the sound to the cause | Buzzing points to electrical faults; grinding means internal failure; rattling usually means debris or loose parts. |
| Shut down for serious noises | Grinding, banging, hissing, or a burning smell means turn the unit off immediately to prevent further damage. |
| Safe DIY checks first | Clear debris, tighten screws, inspect isolation pads, and replace the filter before calling a technician. |
| Know the repair cost range | Capacitor or contactor repairs are generally less expensive than compressor replacement, which can be quite costly. |
| E320air for professional diagnosis | E320air provides documented diagnostics, written estimates, and full repair or replacement services in the Inland Empire. |
Table of Contents
- What causes a loud AC compressor?
- How to match the sound to the problem
- Safe troubleshooting steps you can do yourself
- When to call a licensed HVAC technician
- Maintenance steps that prevent compressor noise
- A pro's note on noisy compressors
- E320air can diagnose and fix your noisy AC
- Sources
What causes a loud AC compressor?
A noisy air conditioner almost always traces back to one of six root causes. Knowing which one you're dealing with tells you whether to grab a screwdriver or pick up the phone.
Electrical problems: capacitors, contactors, and low voltage
A failing capacitor or contactor is the single most common source of an AC making a loud buzzing noise. The capacitor stores the charge needed to start the compressor and fan motors. When it weakens, the motors struggle to start and produce a loud electrical hum or buzz. Contactors are the relay switches that complete the circuit; worn contacts arc and buzz under load. Low voltage from a shared circuit or undersized wire makes both problems worse.
Mechanical wear and internal compressor failure
Worn bearings produce a grinding or growling sound that tends to get louder over time. A failing piston or connecting rod inside the compressor creates a clanking or banging noise. Both are serious. Running the unit with internal metal-on-metal contact pushes debris into the refrigerant lines, which can contaminate the entire system and force a full outdoor-unit replacement.
Loose parts and debris
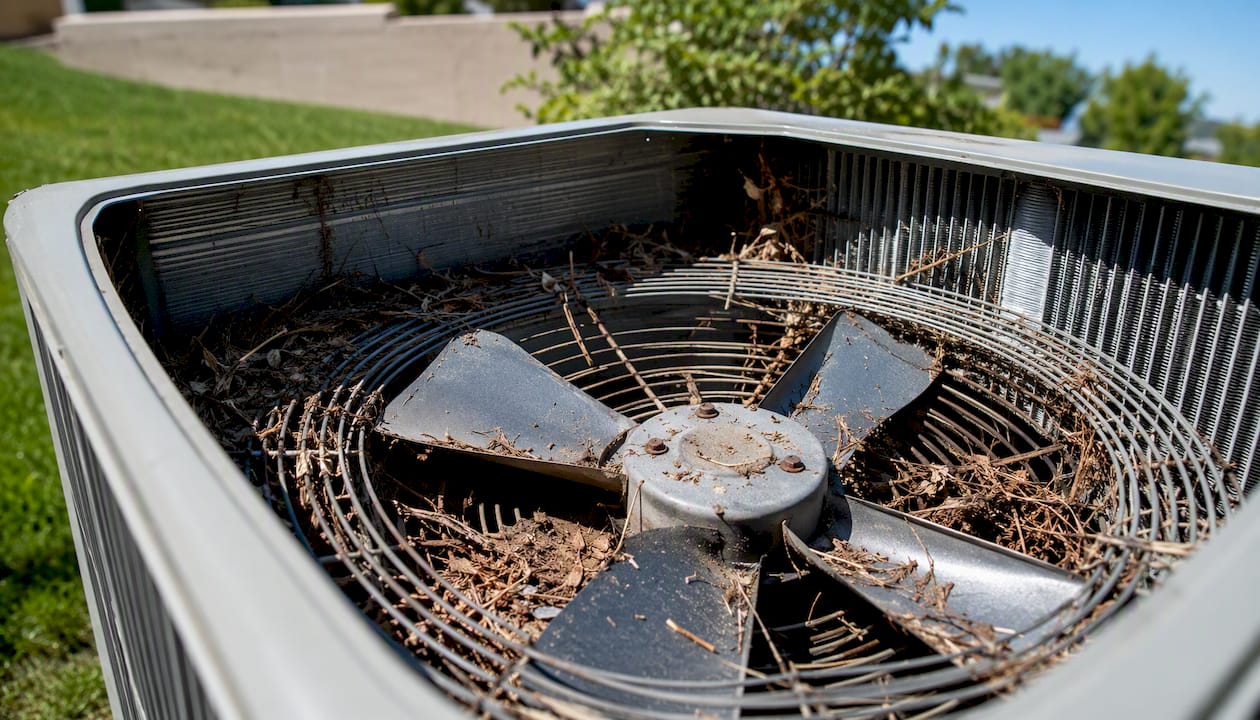
Leaves, sticks, and small stones can get pulled into the condenser cabinet and rattle against the fan blades or housing. Loose access panels and fan guards vibrate at operating frequency and produce a rhythmic rattling. These are often the easiest fixes: power off, clear the debris, tighten the screws.
Fan motor issues and bent blades
A squealing or screeching sound from the outdoor unit usually points to worn fan motor bearings. A bent fan blade creates an intermittent clacking or ticking as it clips the housing on each rotation. Either one puts extra load on the motor and, left alone, can burn it out.
Refrigerant and pressure problems
A hissing or bubbling sound often means refrigerant is escaping through a leak. Ice forming on the refrigerant lines is a related symptom: low refrigerant causes the evaporator coil to freeze, which forces the compressor to work harder and run louder. Refrigerant work requires an EPA 608 certification, so this is strictly a licensed-tech job.
Isolation mount failures
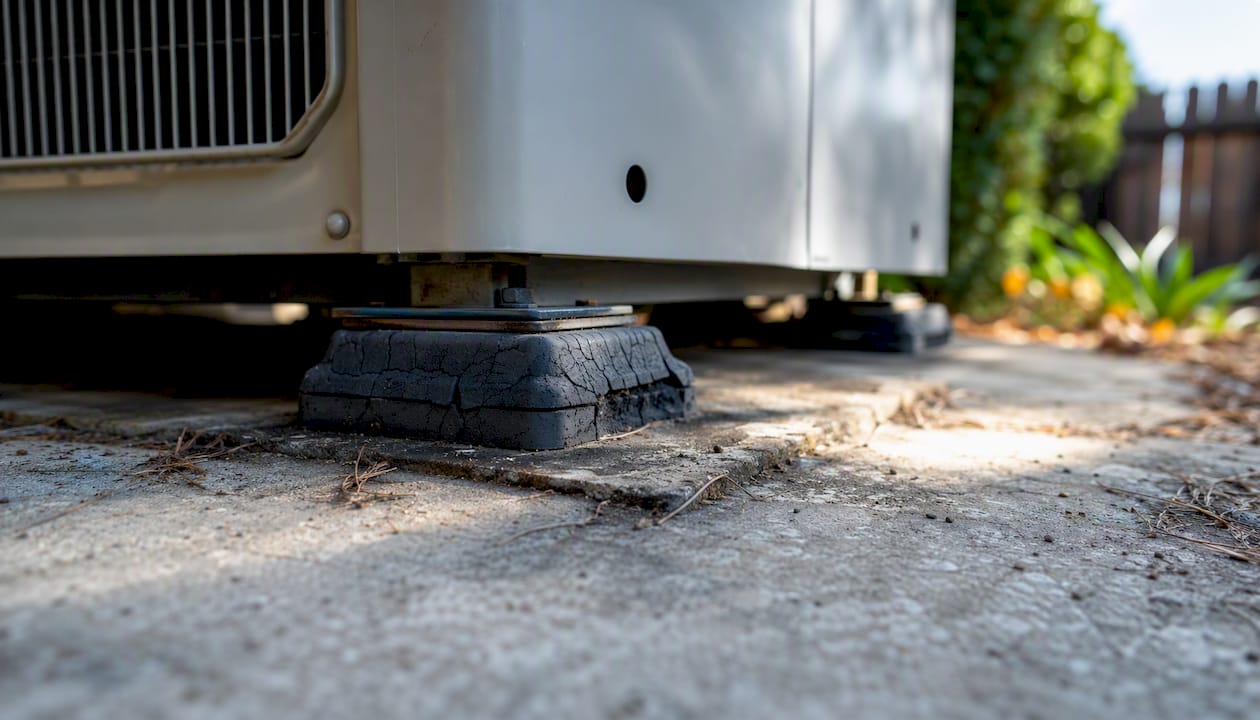
The compressor and condenser unit sit on rubber isolation pads designed to absorb vibration. When those pads crack or compress flat with age, vibration transfers directly to the concrete pad or mounting surface and creates a rhythmic, low-frequency rattle that you can sometimes feel through the floor. Replacing cracked isolation pads is a straightforward fix covered in the maintenance section below.
How to match the sound to the problem
Modern outdoor residential units typically operate between 50–65 dB. Older or basic units can reach 75 dB. A noticeable jump in volume from your unit's normal baseline almost always signals something has changed mechanically or electrically.
Buzzing or humming Most likely cause: failing capacitor, contactor, or motor struggling to start. If the fan isn't spinning but you hear a buzz, that's a strong indicator of a failed capacitor or seized motor. Urgency: inspect with power off, then call a tech. Don't let the unit keep attempting to restart.
Grinding or growling Most likely cause: internally failing compressor or worn fan motor bearings. A grinding noise from the outdoor unit often means metal components are contacting each other inside the compressor. Urgency: shut down immediately. Continuing to run it risks contaminating the refrigerant lines with metal debris, which multiplies repair costs significantly.
Rattling or clanking Most likely cause: loose panels, debris in the fan path, or cracked isolation pads. Urgency: safe to inspect with power off. Clear debris, tighten accessible screws, check isolation pads.
Screeching or squealing Most likely cause: worn fan motor bearings or a belt-drive issue on older systems. Urgency: call a technician soon. The motor is telling you it's close to failure.
Hissing Most likely cause: refrigerant leak. Urgency: shut down and call a licensed tech. Do not attempt to handle refrigerant lines yourself.
Thump or bang on startup/shutdown A single thump when the unit starts or stops is often normal refrigerant pressure equalization. Repeated banging during operation points to a loose internal component or a piston/rod failure. Urgency: if it's only on startup and stops immediately, monitor it. If it continues during operation, shut down and call.
Intermittent clicking A few clicks on startup and shutdown are normal relay behavior. Rapid clicking that continues after startup usually means a failing relay or a compressor that's trying and failing to start, a condition called locked-rotor. Repeated locked-rotor attempts can damage the start capacitor and compressor windings.
A note on inverter compressors: If you have a newer variable-speed or inverter-driven system, LG's support guidance notes that these units produce normal frequency-change noises as they modulate speed. A soft whooshing or varying hum is expected behavior. Treat it as a fault only if the sound is new, louder than usual, or paired with poor cooling or vibration.
Pro tip for locating the noise source: Stand near the outdoor condenser with the system running. Then go inside and listen near the air handler. Finally, walk the duct runs. Narrowing the noise to one location, outdoor unit vs. indoor air handler vs. ductwork, cuts the technician's diagnostic time significantly. You can read more about how to diagnose AC noise before the tech arrives.
Safe troubleshooting steps you can do yourself
Before you call anyone, run through this checklist. These steps are safe for homeowners and take about 15 minutes.
- Turn the thermostat to "off" and then cut power at the outdoor disconnect box (the gray box mounted on the wall near the condenser). Never work near the unit with power on.
- Clear debris from around and inside the condenser. Remove leaves, sticks, or grass clippings from the top grille and around the base. If you can see debris inside the fan path through the grille, use a gloved hand or a soft brush to remove it.
- Inspect the fan blades through the top grille. Look for bent, cracked, or missing blades. A blade that's even slightly bent will clip the housing and create a clacking noise.
- Check the access panels and screws. Vibration loosens sheet-metal screws over time. Tighten any that are visibly loose with a nut driver.
- Look at the rubber isolation pads under the unit. If they're cracked, compressed flat, or missing, that's a likely source of vibration noise. Replacement pads are inexpensive and widely available at hardware stores.
- Check the refrigerant lines (the insulated copper pipes running into the house). Ice on those lines means low refrigerant or an airflow problem. Do not touch the lines themselves.
- Replace the air filter if it's overdue. A clogged filter restricts airflow, which makes the system work harder and run louder.
- Clear vegetation from around the condenser. Shrubs or tall grass within 18 inches of the unit restrict airflow and force the compressor to run harder.
What not to touch: Capacitors hold a lethal electrical charge even after the power is off. Do not open the electrical compartment, handle wiring, or touch refrigerant lines. Those tasks require a licensed HVAC technician with proper tools and certifications.
Pro Tip: Before calling a technician, record a short video of the unit running with the noise audible. Note the time of day, outdoor temperature, and your thermostat settings. This information helps the tech arrive with the right parts and cuts diagnostic time, which saves you money on the service call.
For a deeper walkthrough of homeowner-safe checks, the air conditioner troubleshooting guide on the E320air blog covers additional steps and documentation tips.
When to call a licensed HVAC technician
Some noise problems are beyond safe homeowner territory. A licensed technician will run a structured set of tests that you simply can't replicate with a screwdriver and a flashlight.
What a technician will check:
- Capacitor microfarad values (a weak capacitor reads below its rated spec and is the most common cause of startup buzzing)
- Contactor condition: pitting, arcing, or worn contacts
- Voltage and amperage at the compressor and fan motor terminals
- Compressor lock-rotor amperage test to check for internal mechanical failure
- Refrigerant pressure readings on both the high and low sides
- Fan motor amp draw compared to nameplate rating
- Leak detection using electronic or UV-dye methods
- Coil condition and airflow restriction
Typical repair costs and timelines (U.S. estimates):
| Repair | Approximate Cost | Typical Timeline |
|---|---|---|
| Capacitor replacement | $150–$300 | Same day |
| Contactor replacement | $150 | Same day |
| Fan motor replacement | $300 | 1–2 days |
| Refrigerant leak repair + recharge | $400 | 1–3 days |
| Compressor replacement | $1,200 | 2–5 days |
| Full outdoor unit replacement | $2,500 | 1–3 days |
Repair vs. replace: the $5,000 rule
A widely used HVAC industry guideline: multiply the unit's age in years by the estimated repair cost. If the product of the unit's age and repair cost exceeds a certain financial threshold, replacement is often the smarter choice, especially for older, less efficient units or those using phased-out refrigerants. A newer system with a $300 capacitor repair is worth fixing. For replacement options, the HVAC installation page at E320air covers current equipment and efficiency tiers. You can also read more about what causes AC breakdowns to understand when small issues escalate.
Pro Tip: Always ask for a written estimate before any work begins. A reputable contractor will document the test results (capacitor readings, refrigerant pressures, amp draws) alongside the proposed repair. That paperwork protects you and gives you a baseline for future service calls.
Maintenance steps that prevent compressor noise
Most compressor noise problems don't appear overnight. They develop over months of deferred maintenance. These steps keep the system quiet and extend its life.
Monthly or as needed:
- Replace the air filter (every 1–3 months depending on filter type and household conditions)
- Clear debris from around the outdoor condenser after storms or heavy wind
Each spring before startup:
- Rinse the condenser coils with a garden hose (low pressure, top-down) to remove winter buildup
- Inspect and replace cracked rubber isolation pads
- Check and tighten accessible cabinet screws
- Clear any vegetation that grew close to the unit over winter
- Review the steps to winterize HVAC systems in reverse to confirm the unit is ready for cooling season
Each fall before shutdown:
- Inspect fan blades for chips or bends
- Check refrigerant line insulation for cracks or gaps
- Note any new sounds before the unit sits idle for winter
Annual professional tune-up tasks: These are the checks that ACCA guidance consistently identifies as the most effective way to catch developing failures before they become expensive ones: capacitor testing, electrical connection inspection, refrigerant pressure check, coil cleaning, and motor lubrication where the manufacturer specifies it. A technician who finds a capacitor reading at 80% of rated spec can replace it for $150 before it fails and takes the compressor with it.
Pro Tip: Modern outdoor units typically run at 50–65 dB. If your unit has always been quiet and suddenly sounds noticeably louder, that change in baseline is worth a service call even if the noise doesn't fit neatly into any of the categories above. New noise is almost always a developing problem.
Vibration-reduction principles that apply to HVAC isolation pads are similar to those used in other home mechanical systems. If you've dealt with a noisy garage door, the isolation and fastener-tightening logic translates directly.
A pro's note on noisy compressors
The most common call we get at E320air isn't a catastrophic failure. It's a homeowner who noticed a buzz or rattle three weeks ago, figured it would go away, and is now looking at a compressor that locked up over the weekend. The electrical faults that cause most compressor noise, weak capacitors and worn contactors, are genuinely inexpensive to fix when caught early. The same problem left running trips the thermal overload repeatedly, stresses the windings, and eventually kills the compressor.
My honest recommendation: if the noise is new and you can't trace it to something obvious like debris in the fan, turn the unit off and get a technician out within a day or two. Don't run a buzzing or humming unit overnight hoping it clears up. The diagnostic visit costs far less than the repair it prevents.
For homeowners in the Inland Empire, E320air publishes localized guides on AC upgrades for Moreno Valley homeowners and repair guidance for Claremont homeowners that cover regional equipment considerations and seasonal timing.
E320air can diagnose and fix your noisy AC
When the noise is beyond a debris clear-out or a filter swap, E320air handles the full range of compressor noise repairs for homeowners in the Inland Empire: capacitor and contactor replacements, fan motor swaps, refrigerant leak detection and repair, and full compressor or system replacements when the repair-vs-replace math doesn't favor fixing.

A diagnostic visit includes voltage and amperage testing, capacitor microfarad checks, refrigerant pressure readings, and a written estimate with documented findings before any work begins. No guesswork, no surprise invoices. If the repair cost approaches replacement territory, we'll tell you that directly and walk you through current equipment options.
Schedule a diagnostic visit or get a same-day quote at E320air. You can also browse the problem-solving gallery to see documented repair examples from real service calls.
Sources
- Why Is My Air Conditioner Making A Loud Buzzing Noise? (2026) | Today's Homeowner
- LG: Air conditioner sound guide — identifying normal vs problematic noises
- Why is my air conditioner loud when starting? | PickComfort
- AC Making Loud Noise? Identify Sound + Cause + Fix | National HVAC Parts
- ACCA