
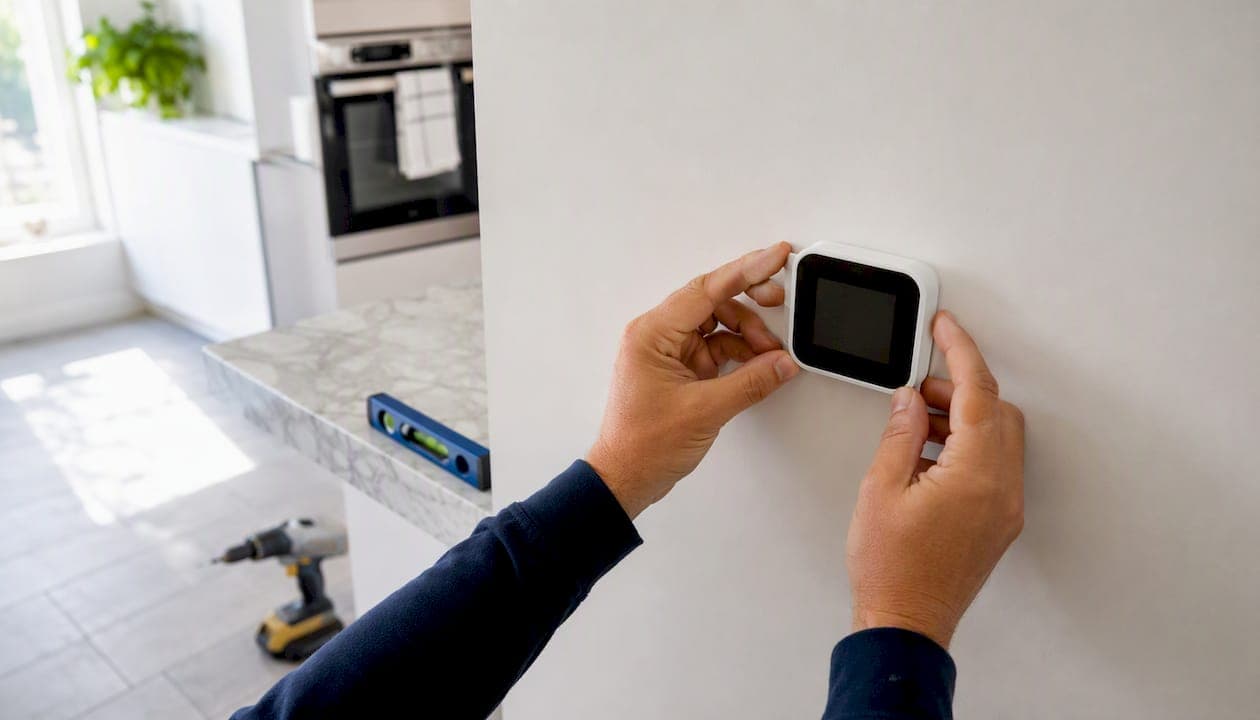
Mount your thermostat on an interior wall in a central, frequently used room (living room, family room, or main hallway) at roughly five feet off the floor. That single decision affects how accurately your HVAC reads your home's actual temperature and, by extension, how much you spend running it.
Quick checklist before you pick a spot:
- Do: Choose an interior wall in a room you use daily, at about five feet from the floor.
- Don't: Place it near windows, vents, exterior walls, the kitchen, or any heat source.
- Do: Keep it unobstructed so air can circulate freely around the sensor.
Key Takeaways
Correct thermostat placement on an interior wall at 52–60 inches in a central living area is the single most effective step homeowners can take to improve temperature accuracy and reduce unnecessary HVAC cycling.
| Point | Details |
|---|---|
| Best location | Interior wall, central living room or hallway, away from vents and exterior walls. |
| Ideal mounting height | 52–60 inches (about 5 feet) from the floor for accurate ambient air sampling. |
| Top spots to avoid | Direct sunlight, near vents or heat sources, exterior walls, kitchens, and bathrooms. |
| Quick accuracy test | Place a digital thermometer next to the thermostat for 15–30 minutes; a gap over 3°F signals a placement problem. |
| E320air | Handles thermostat relocation, C-wire installation, and smart thermostat setup across the Inland Empire. |
Table of Contents
- Where should you place a thermostat in your home?
- Mounting height, clearances, and what the manual tells you
- Spots that will throw off your thermostat's readings
- How your floor plan changes the ideal thermostat spot
- How to test whether your thermostat is reading accurately
- Smart thermostats and remote sensors change the placement equation
- When thermostat relocation requires a professional
- The trade-off most homeowners don't think about
- E320air handles thermostat relocation and wiring the right way
- Sources
Where should you place a thermostat in your home?
The goal is a location that reflects your home's average temperature, not a microclimate. HVAC professionals consistently recommend an interior wall in a frequently used main living area, away from direct sunlight, vents, exterior walls, doors, windows, and heat-generating appliances.
Key rules to follow when choosing the best thermostat location:
- Central living areas first. The living room, family room, or a central hallway gives the thermostat access to the air most people actually occupy.
- Interior walls only. Exterior walls conduct outdoor temperatures into the wall cavity, which skews readings even when the room feels fine.
- First floor in two-story homes. Heat rises, so a second-floor thermostat tends to read warmer than the ground floor where most activity happens, as explained in detail by heat-pump systems. A first-floor placement better represents the average comfort level across the home.
- Easy access matters. You'll adjust it, replace batteries, and occasionally troubleshoot it. Don't bury it behind a door or in a corner that requires moving furniture.
Centrality isn't just about convenience. A thermostat in a corner bedroom or a rarely used formal dining room will trigger heating and cooling cycles based on that room's temperature, not the temperature where your family actually spends time. That mismatch drives unnecessary HVAC cycling and higher energy bills, and it's one of the most common placement mistakes in homes.
Mounting height, clearances, and what the manual tells you
Recommended height
HVAC experts recommend mounting at chest height, roughly five feet from the floor, so the thermostat samples air at the level where people actually feel it.
| Placement Parameter | Recommended Value |
|---|---|
| Mounting height | about five feet from the floor |
| Distance from supply vents | At least 4–6 feet |
| Distance from return air vents | At least 4–6 feet |
| Distance from windows and exterior doors | At least 5 feet |
| Distance from heat-generating appliances | At least 5–6 feet |
Clearances and orientation
Keep the thermostat away from supply and return air vents. A thermostat near a return air vent gets blasted with unconditioned air pulled from other parts of the house, which makes it read incorrectly and triggers short-cycling. The same logic applies to supply vents: conditioned air blowing directly at the sensor tells the system the room is already at setpoint before it actually is.
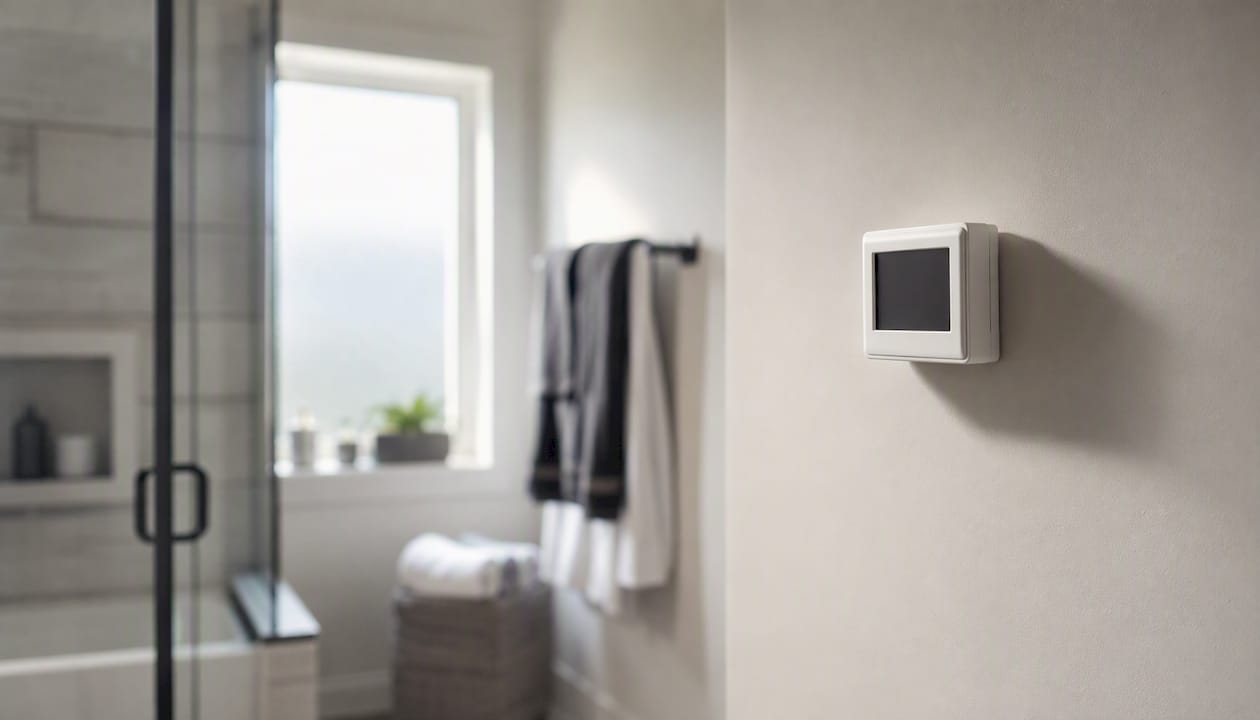
Mount it on a flat, unobstructed section of wall. Recessed niches, inside cabinet doors, or behind large furniture all restrict airflow around the sensor. The thermostat needs to sample ambient room air freely.
Check your manual. Most manufacturers include model-specific wiring diagrams and mounting notes. Smart thermostats in particular often require a C-wire (common wire) for continuous power. If your current wiring doesn't include one, that's a constraint worth knowing before you pick a new location.
Spots that will throw off your thermostat's readings
Certain locations create microclimates that make your thermostat read a temperature that doesn't match the rest of the house. The result: your HVAC runs too long, shuts off too early, or cycles constantly.
Avoid these locations:
- Direct sunlight. A sun-drenched wall can read 10°F or more above the room's actual air temperature, causing the AC to run far longer than needed.
- Near heat sources. Ovens, stoves, fireplaces, floor lamps, and even large TVs all radiate heat. A thermostat picking up that warmth will cut the heat cycle short in winter.
- Above or below heating/cooling registers. Both supply and return vents distort readings. A thermostat near a return air vent is especially problematic because it samples air drawn from multiple zones, not the room it's in.
- Exterior walls, drafty doors, and windows. Cold infiltration in winter makes the thermostat think the house is colder than it is, causing the furnace to overrun.
- Kitchens and bathrooms. Cooking heat, steam, and humidity all bias the sensor. These rooms also have localized temperature swings that don't represent the rest of the home.
- Rarely used rooms. A guest bedroom or formal dining room may sit at a very different temperature than the main living areas. Placing the thermostat there means the whole house is conditioned to match a room nobody's in.
- Behind furniture or in tight hallways. Blocked airflow means the sensor reads stale, stratified air rather than the circulating room temperature.
How your floor plan changes the ideal thermostat spot
The core rules stay the same across layouts, but where you apply them shifts depending on how your home is built.
Single-story homes are the straightforward case. Pick a central interior wall in the main living area, and you're done. Open-plan homes are similar: choose the zone with the best natural air circulation, typically near the center of the open space rather than against a perimeter wall.
Two-story homes introduce the heat-rise problem. A thermostat on the second floor will almost always read warmer than the ground floor, which means the AC runs longer while the downstairs stays cool and the upstairs stays comfortable. First-floor placement in the main living area is the standard recommendation. The exception is a zoned HVAC system, where each floor has its own thermostat and damper controls. If you're considering that upgrade, HVAC zoning is worth understanding before you commit to a single thermostat location.
Split-level homes are the hardest case. Levels that are only a few steps apart often share one HVAC zone, but they can have meaningfully different temperatures. The practical compromise is to place the thermostat on the level where you spend the most time, then use a remote sensor on the other level to average the readings.
| Home Layout | Recommended Placement | Notes |
|---|---|---|
| Single-story | Central interior wall, main living area | Straightforward; avoid perimeter walls |
| Open-plan | Central zone with good air circulation | Avoid corners and walls near large windows |
| Two-story (single zone) | First-floor main living area | Heat rises; second-floor reads warmer |
| Two-story (zoned) | One thermostat per zone | Each floor controlled independently |
| Split-level | Most-occupied level, central wall | Add remote sensor on secondary level |
Pro Tip: Aesthetics often push thermostats into hallways or tucked corners. If the "pretty" spot is also a poor-airflow spot, a remote sensor paired with a smart thermostat is a cleaner fix than forcing a bad placement.
How to test whether your thermostat is reading accurately
If your home never feels quite right even when the thermostat is set correctly, the placement may be the problem. Here's how to check.
- Get a reliable digital thermometer. An inexpensive indoor thermometer from a hardware store works fine. Avoid using a phone app, which reads the phone's internal sensor, not room air.
- Place it next to the thermostat. Set it at the same height, within a foot of the thermostat housing, without touching the wall.
- Wait 15–30 minutes. Let both devices stabilize. Don't open doors, run appliances, or let sunlight shift during the test window.
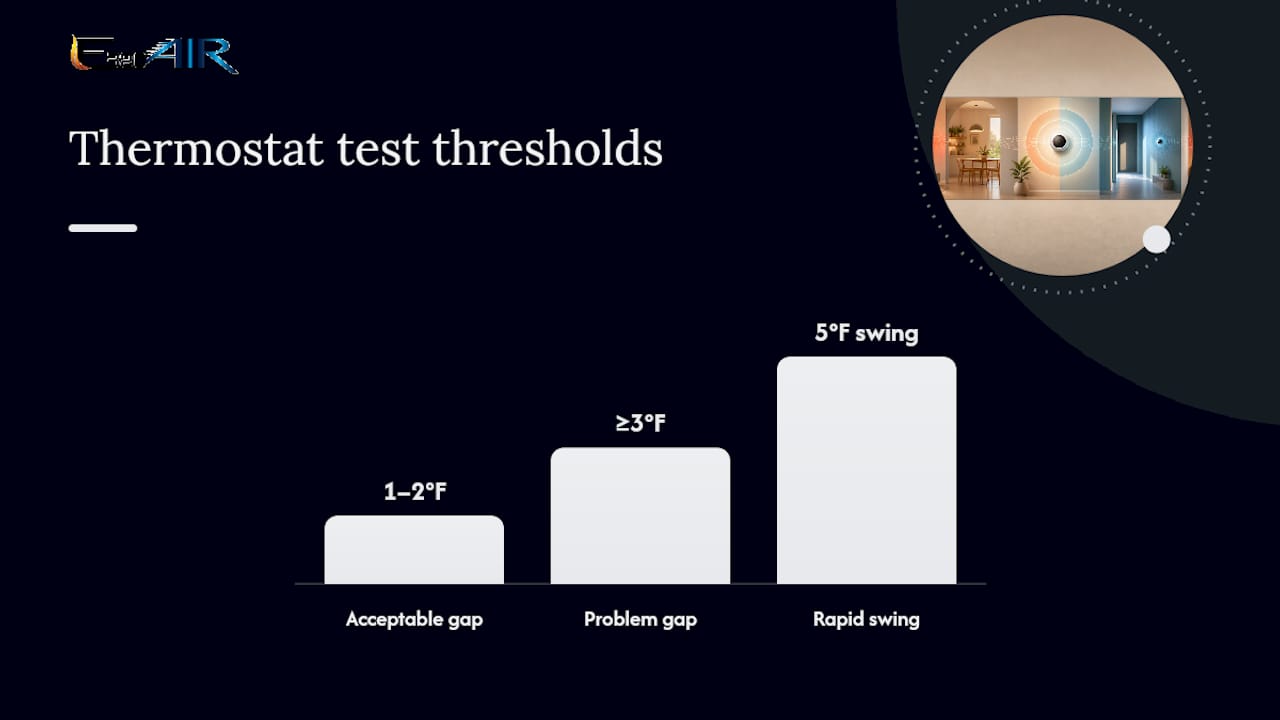
- Compare the readings. A difference of 1–2°F is normal and generally acceptable. A gap of 3°F or more points to a placement or calibration issue. Rapidly changing readings (the thermometer swings 5°F in 10 minutes) suggest a nearby heat source or draft is influencing the sensor. This DIY calibration method is the standard homeowner check for diagnosing placement problems.
- Repeat at different times of day. Run the test in the morning, midday (when sun angles shift), and evening (when cooking and TV use peak). A thermostat that reads accurately at 8 AM but drifts at noon is almost certainly getting afternoon sun.
- Check during an HVAC cycle. If the reading spikes or drops sharply the moment the system kicks on, the thermostat is too close to a vent.
A consistent large gap that doesn't change with time of day usually points to a calibration issue rather than placement. A gap that varies by time of day or activity is a placement problem.
Smart thermostats and remote sensors change the placement equation
Smart thermostats don't eliminate placement rules, but they do offer practical workarounds when the ideal spot isn't available.
- Remote sensors let you average multiple rooms. Devices like Ecobee's SmartSensors or similar third-party sensors report temperature from other rooms, and the thermostat averages those readings. This is useful when the base unit is in a compromise location or when one room consistently runs hot or cold.
- Room-priority modes let you tell the system which room matters most at a given time. If the bedroom sensor is active at night, the system conditions to that room's temperature rather than the hallway where the base unit sits.
- Wi-Fi signal matters. Keep the thermostat within reliable range of your router. Metal enclosures, thick masonry walls, and dense electronics clusters can degrade the connection. A weak signal causes delayed responses and missed schedules.
- Sensor averaging vs. dedicated zone thermostats. Remote sensors work well for minor hot/cold spots in a single-zone system. If entire floors or wings of your home need independent control, a full zoned HVAC setup with dedicated thermostats is the more effective solution.
Pro Tip: Before relocating a hard-wired thermostat, check whether a remote sensor solves the problem first. It's faster, cheaper, and reversible. Learn more about smart thermostat features that support sensor averaging before you commit to a move.
When thermostat relocation requires a professional
Moving a battery-powered wireless thermostat is usually a straightforward homeowner task. Moving a hard-wired thermostat is a different job.
- Check whether you have a C-wire. Smart thermostats need a continuous power supply, which requires a common wire. Older systems often lack one. Running a new C-wire through finished walls is not a beginner task. Upgrading thermostat wiring safely covers what's involved, but many homeowners find it easier to have a technician handle it.
- Assess your wiring age and type. Low-voltage thermostat wiring in older homes can be brittle, improperly labeled, or routed in ways that make relocation complicated. An HVAC technician can trace and extend wiring without damaging it.
- Consider zoning at the same time. If you're already opening walls to relocate a thermostat, it's worth asking whether a zoned system makes sense. Adding zone dampers and a second thermostat during the same service call costs less than two separate visits.
- Ask your technician these questions before the job:
- Does my current wiring support the thermostat I want to install?
- Will the new location require a permit? (Some jurisdictions require permits for low-voltage wiring work.)
- Are there any gas-fired equipment safety checks needed if the thermostat controls a furnace?
- What's included in the relocation scope, and what's billed separately?
Pro Tip: Working near electrical wiring and gas-fired equipment carries real risk. If you're not confident identifying wire types or working in a panel, stop and call a licensed HVAC technician. A botched relocation can void equipment warranties and create safety hazards.
Energy on thermostat settings and installation measures underscores that correct placement and sealing are practical, low-cost ways to reduce HVAC energy use. Getting the location right the first time is worth the cost of a professional visit.
The trade-off most homeowners don't think about
Most placement guides stop at "interior wall, 5 feet, central room" and leave it there. That's correct, but it misses the real tension in most homes: the best thermostat location for accuracy is rarely the most convenient spot for daily use, and it's almost never the most aesthetically pleasing one.
Wiring runs, existing wall penetrations, and furniture layouts push thermostats into hallways, near entryways, or onto walls that happen to face west. Renters often can't move a thermostat at all. These are real constraints, and pretending they don't exist doesn't help anyone.
The practical answer isn't to force an ideal placement at any cost. It's to understand why the rules exist, so you can make the best available trade-off. A thermostat in a slightly imperfect spot with a remote sensor averaging a second room will outperform a thermostat in the "correct" spot that happens to catch afternoon sun through a nearby window. Accuracy is the goal; the placement rules are just the most reliable path to it.
If your current location is genuinely problematic (you're seeing 4–5°F swings, your bills are higher than expected, or the system short-cycles), that's when relocation pays for itself. Otherwise, a sensor fix and a quick calibration check are often enough.
E320air handles thermostat relocation and wiring the right way
When the ideal spot requires new wiring, a C-wire run, or a full zoning upgrade, that's where E320air's installation team steps in. E320air handles thermostat relocation, C-wire installation, smart thermostat setup, and zoning upgrades for homeowners across the Inland Empire, with transparent pricing and no guesswork about what the job actually involves.

A typical service call covers a site assessment, wiring check, relocation or new installation, and a post-install accuracy test so you leave knowing the system is reading correctly. Whether you need a simple move or a full zoned system with multiple thermostats, E320air's technicians carry the equipment and the experience to do it safely. Request a quote or schedule service at E320air to get a clear scope and price before any work begins.
Sources
- Energy