TL;DR:
- Thermostat calibration aligns the temperature reading with the actual room temperature to improve efficiency. Proper tools and stable conditions are essential for accurate calibration and preventing system malfunctions. If calibration repeatedly fails or the unit is over ten years old, replacing with a smart thermostat offers better accuracy and energy savings.
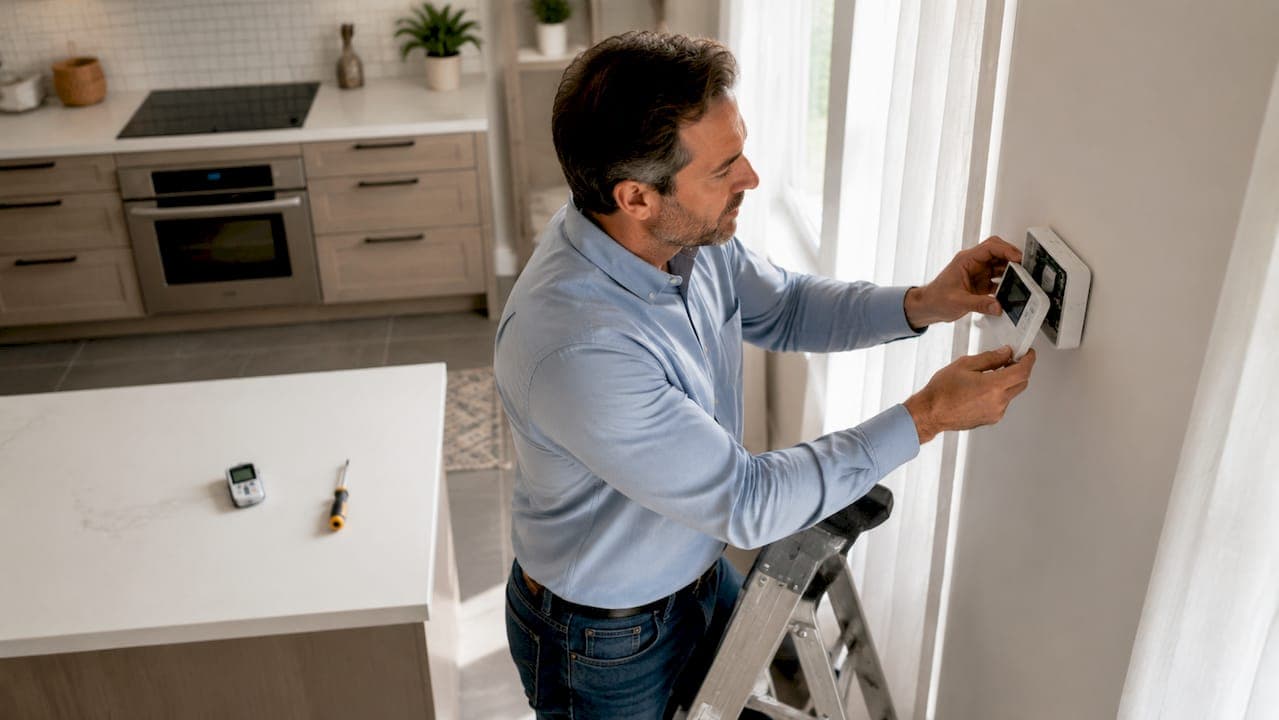
Thermostat calibration is the process of adjusting your thermostat's temperature reading to match the actual room temperature. A thermostat that reads even two or three degrees off can cause your HVAC system to run longer than needed, driving up your energy bill without improving comfort. Knowing how to calibrate HVAC thermostats yourself saves money and keeps your home at the temperature you actually set. This guide covers every step, from gathering tools to testing wiring with a multimeter, so you can handle the job confidently without calling a technician.
What tools and preparations do you need before calibrating?
The right tools make the difference between a calibration that holds and one that drifts back within a week. Gather these before you touch the thermostat:
- Digital thermometer: A standalone digital thermometer gives you an independent temperature reading to compare against the thermostat display. Avoid using a phone app since phone sensors are not calibrated for room air.
- Multimeter: A multimeter lets you check voltage at terminals and rule out electrical problems before you blame the sensor.
- Screwdrivers: Most thermostat covers use a Phillips head screw, but some older models use a flathead. Bring both.
- Fresh batteries: If your thermostat runs on batteries, install new ones before calibrating. Battery replacement often resolves erratic readings on its own.
- Flashlight or headlamp: The calibration screw on older analog thermostats is small and easy to miss in dim light.
Safety comes first. Turn off power to the HVAC system at the breaker before removing the thermostat cover. This protects both you and the control board from accidental shorts.
Pro Tip: Place your digital thermometer at the same height as the thermostat and at least 12 inches away from the wall. Air near the wall is slightly warmer or cooler than the center of the room, which skews your baseline reading.
Room temperature must be stable before you start. Wait 15–30 minutes for readings to settle after the system has been off. Calibrating against a temperature that is still rising or falling gives you a false target.
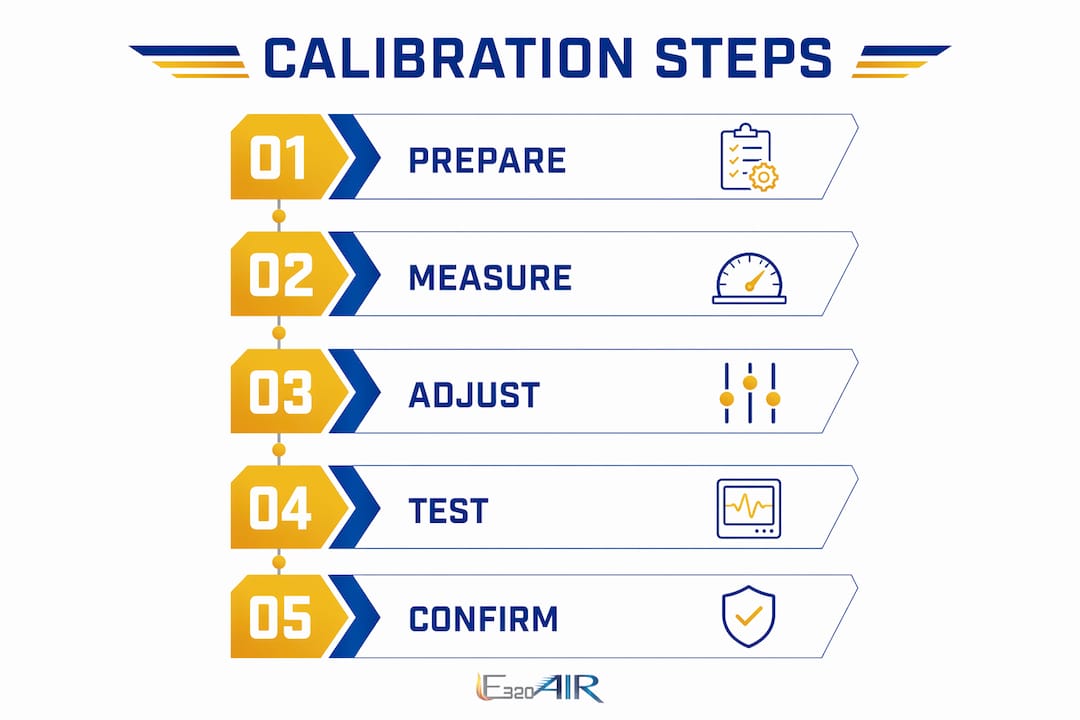
How to calibrate an HVAC thermostat step by step
Follow these steps in order. Skipping steps, especially the stabilization wait, is the most common reason a calibration does not hold.
- Turn off HVAC power at the breaker. Do not just set the thermostat to "off." Cut power at the panel so no voltage runs through the control wiring while you work.
- Remove the thermostat cover. Most snap off with gentle pressure. Screw-mounted covers need a Phillips head. Set the cover aside without forcing it.
- Inspect wiring before touching anything else. Look for loose connections or corrosion at the terminals. A loose wire causes temperature swings that no amount of calibration will fix.
- Place your digital thermometer near the thermostat. Let it sit for 15 minutes. Write down the reading.
- Compare the thermometer reading to the thermostat display. A difference of more than one degree means calibration is needed.
- Locate the calibration screw. On analog thermostats, this is a small screw near the bimetallic coil or sensing element. Your thermostat manual will show the exact location. On digital models, look for a temperature offset setting in the menu, often labeled "offset" or "calibration."
- Adjust gradually. Turn the calibration screw in small increments, roughly a quarter turn at a time. Clockwise typically raises the reading; counterclockwise lowers it. Check your manual to confirm the direction for your model.
- Restore power and let the system run. Wait at least 15 minutes for the room temperature to stabilize again.
- Recheck both readings. If the thermostat display now matches the digital thermometer within one degree, calibration is complete.
Pro Tip: If your thermostat has no physical calibration screw and no offset menu, the sensor may be sealed. In that case, replacement is more practical than attempting to open the unit.
Calibration adjustment reference
| Thermostat type | Calibration method | Adjustment location |
|---|---|---|
| Analog bimetallic | Turn calibration screw | Near sensing coil inside cover |
| Digital non-programmable | Temperature offset in menu | Settings or setup menu |
| Programmable | Temperature offset in menu | Advanced settings menu |
| Smart thermostat (Nest, Ecobee) | App-based offset setting | App settings or device menu |
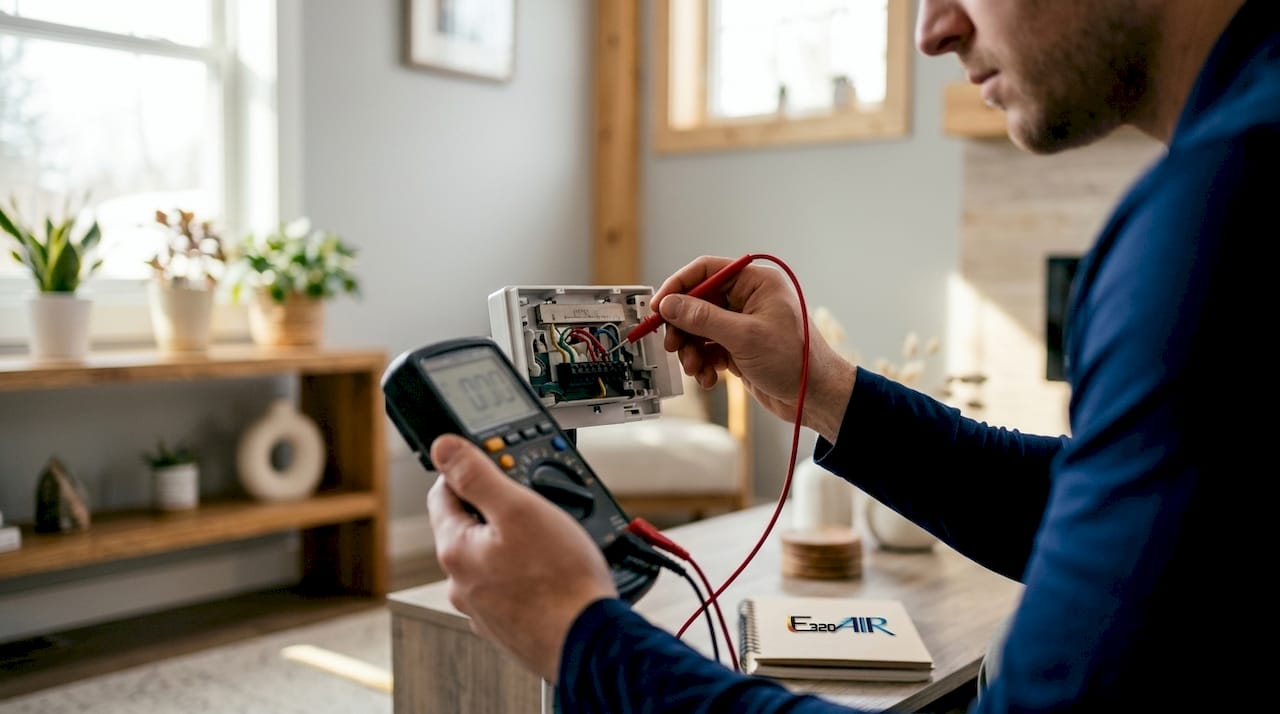
How to test thermostat accuracy and wiring
Many calibration problems are not calibration problems at all. Faulty wiring or a weak transformer causes the same symptoms as a drifted sensor. Testing voltage first saves you from adjusting a perfectly good sensor.
Set your multimeter to AC voltage. Touch the probes to the R terminal (power) and the C terminal (common). A healthy system reads between 24V and 28V AC. If the reading drops below 22V, the transformer or wiring is the problem, not the thermostat sensor. Chasing calibration on a low-voltage system wastes time.
Signs that point to wiring problems rather than calibration drift:
- The HVAC system short-cycles, turning on and off every few minutes
- The thermostat display goes blank or flickers
- The system runs continuously regardless of the set temperature
- You see visible corrosion or burn marks at the terminal block
To test whether the HVAC equipment itself responds correctly, you can bypass the thermostat terminals with a short wire. Twist the R wire and the Y wire together to call for cooling, or R and W for heating. If the equipment starts, the thermostat is the issue. If nothing happens, the problem is downstream in the system.
Wiring fault vs. calibration drift: quick comparison
| Symptom | Likely cause | First action |
|---|---|---|
| Thermostat reads 3°F+ off but system runs normally | Sensor calibration drift | Adjust calibration screw or offset |
| System short-cycles or won't start | Wiring fault or low voltage | Test voltage with multimeter |
| Display blank or flickering | Dead batteries or wiring fault | Replace batteries, then check voltage |
| System runs but never reaches set temp | Calibration drift or poor placement | Calibrate and check thermostat location |
When voltage and wiring check out but the thermostat still misreads temperature, the sensor itself has failed. At that point, no-heat diagnostics can help you confirm whether the issue is the thermostat or the equipment before you buy a replacement.
Common mistakes that ruin a good calibration
Avoiding these errors keeps your calibration accurate for months, not days.
- Calibrating in direct sunlight. A thermostat hit by afternoon sun reads several degrees warmer than the actual room air. Sunlight and drafts are the top causes of false thermostat readings and wasted energy.
- Rushing the stabilization wait. Adjusting the calibration while the room temperature is still changing guarantees an inaccurate result. Always wait the full 15–30 minutes.
- Ignoring thermostat placement. A thermostat mounted near a kitchen, laundry room, or exterior door reads conditions that do not represent the rest of the house. Calibration cannot fix a bad location.
- Skipping battery replacement. Low batteries cause digital thermostats to display incorrect temperatures. Replace batteries before calibrating, not after.
- Making large adjustments at once. One full turn of the calibration screw can shift the reading by several degrees. Small quarter-turn increments give you control.
Pro Tip: Schedule a calibration check every fall before heating season and every spring before cooling season. Twice-yearly checks catch drift early and keep your energy bills predictable.
The HVAC filter replacement guide from E320air pairs well with a calibration check. A clogged filter forces the system to run longer, which can make a slightly miscalibrated thermostat feel much worse than it actually is.
When should you recalibrate vs. replace your thermostat?
Recalibration works when the sensor is intact and the reading is off by a few degrees. Replacement makes more sense when calibration fails to hold, the display malfunctions, or the unit is more than 10 years old.
Upgrading to a programmable or smart thermostat offers controls that go well beyond manual calibration. Smart thermostats like Nest and Ecobee use multiple sensors and learning algorithms to maintain temperature more accurately than any analog unit can. The upfront cost is typically recovered through lower energy bills within one to two heating and cooling seasons.
Environmental factors also shorten thermostat life. High humidity, dust buildup inside the cover, and voltage fluctuations all degrade sensors faster than normal. If you live in a region with wide seasonal temperature swings, inspect the thermostat interior annually for dust or corrosion. A quick cleaning with compressed air extends the unit's useful life considerably.
When calibration attempts repeatedly fail or the HVAC system behaves erratically even after wiring checks, the problem may be in the equipment itself rather than the thermostat. Consulting an HVAC professional at that point saves time and prevents misdiagnosis. The HVAC replacement stages guide from E320air outlines how to evaluate whether the full system needs attention.
Key Takeaways
Accurate thermostat calibration requires stable room conditions, a digital thermometer, and a multimeter to rule out wiring faults before adjusting the sensor.
| Point | Details |
|---|---|
| Stabilize before calibrating | Wait 15–30 minutes after shutting off the system before taking any temperature readings. |
| Test voltage first | Use a multimeter to confirm 24V AC at R and C terminals before adjusting the calibration screw. |
| Adjust in small steps | Turn the calibration screw a quarter turn at a time to avoid overshooting the target reading. |
| Fix placement before calibrating | A thermostat near sunlight, drafts, or heat sources will drift again regardless of calibration. |
| Replace when calibration fails | If the thermostat cannot hold calibration, upgrade to a programmable or smart model. |
What I've learned after years of thermostat calls
The most common misconception I see is that homeowners assume a thermostat reading off by two degrees is a sensor problem. Nine times out of ten, it is a wiring issue or a low transformer voltage. I have walked into homes where someone had already replaced a perfectly good thermostat because they skipped the multimeter test. That is a $150 mistake that takes five minutes to avoid.
The second thing I notice is that people calibrate without checking placement first. You can nail the calibration perfectly, and if the thermostat sits above a lamp or near a drafty window, it will drift again within a week. Fix the location, then calibrate.
Annual calibration checks genuinely show up on energy bills. A thermostat reading two degrees high in cooling mode runs the air conditioner far longer than necessary. Over a full summer, that adds up. I tell every homeowner I work with to treat thermostat calibration the same way they treat filter changes: put it on the calendar twice a year and do not skip it.
If you get through the steps in this guide and the system still behaves oddly, do not keep adjusting. That is the point where a professional diagnosis saves you from chasing a problem in the wrong direction.
— Edward
E320air can handle what DIY cannot
Thermostat calibration covers a lot of ground on its own. When the wiring, voltage, or equipment adds complexity beyond a simple adjustment, E320air's technicians handle the full diagnostic and repair process.
E320air provides HVAC installation and repair for residential and commercial properties, including thermostat calibration, wiring repairs, and full system replacements. If your calibration check reveals a deeper problem, the E320air problem-solving gallery shows real examples of HVAC issues diagnosed and resolved by the team. Visit E320air to schedule a service call or get a quote on a thermostat upgrade.
FAQ
What is thermostat calibration?
Thermostat calibration is the process of adjusting the thermostat's temperature reading to match the actual room temperature. It typically involves turning a calibration screw or setting a digital offset in the thermostat menu.
How do I test thermostat accuracy at home?
Place a standalone digital thermometer next to the thermostat and compare readings after 15–30 minutes. A difference of more than one degree means the thermostat needs calibration.
How do I test thermostat wiring with a multimeter?
Set the multimeter to AC voltage and touch the probes to the R and C terminals. A healthy reading is 24V–28V AC. Readings below 22V point to a transformer or wiring fault, not a sensor problem.
How often should I calibrate my HVAC thermostat?
Calibrate twice a year, once before heating season and once before cooling season. Annual checks catch drift early and help keep energy costs consistent.
When should I replace instead of recalibrate?
Replace the thermostat when calibration fails to hold, the display malfunctions, or the unit is more than 10 years old. Upgrading to a smart thermostat like Nest or Ecobee also delivers better long-term accuracy than repeated manual adjustments.