TL;DR:
- Regularly replacing HVAC filters improves indoor air quality and maintains system efficiency, especially during wildfire season in California. Proper filter sizing, correct installation with airflow arrows facing the blower, and monthly inspections prevent bypass leaks and strain on equipment. Using higher MERV ratings during smoke events and stocking filters in advance help homeowners protect their homes and breathe cleaner air.
HVAC filter replacement is the process of swapping your home's air filter on a regular schedule to maintain clean airflow, protect your equipment, and keep indoor air quality at a healthy level. For California homeowners, this task carries extra weight. Wildfire smoke, high pollen counts, and dry conditions all shorten filter life faster than the national average. A clogged or incorrectly installed filter forces your system to work harder, raises your energy bill, and pushes contaminants back into your living space. The good news is that proper filter sizing and fit are the two biggest drivers of HVAC efficiency, and both are fully within your control.
What you need before starting your HVAC filter replacement
Before you pull out the old filter, gather the right materials. Showing up unprepared is the number one reason homeowners end up with the wrong filter or a poor installation.
Tools you will need
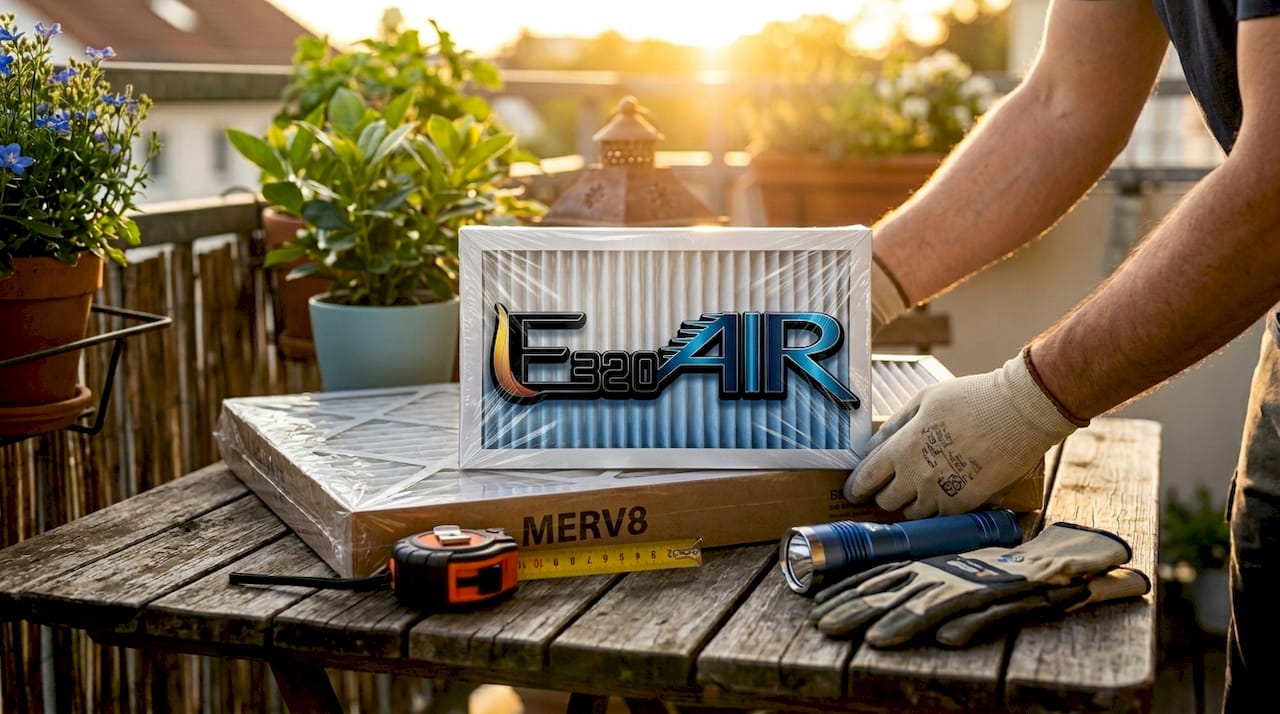
You do not need specialized equipment. Three items cover almost every residential job:
- Flashlight to inspect the filter slot and check for dust buildup or gaps around the frame
- Measuring tape to confirm filter dimensions if the size is not printed on the old filter's frame
- Microfiber cloth to wipe down the filter housing before inserting the new filter
Filter types explained
Choosing the right filter type matters as much as changing it on time. The four main options for California homes are:
- Pleated filters (polyester or cotton paper): the most popular choice, balancing airflow restriction with solid particle capture
- Fiberglass filters: cheap and low-restriction, but they capture only large particles and offer minimal protection against smoke or allergens
- HEPA filters: extremely high efficiency, but most residential HVAC systems cannot handle the airflow restriction they create without a system modification
- Washable/reusable filters: lower long-term cost, but require thorough drying before reinstallation to prevent mold growth
Understanding MERV ratings
MERV (Minimum Efficiency Reporting Value) is the standard scale for filter performance, running from 1 to 20. For most California homes, a MERV 8 to MERV 11 pleated filter hits the right balance between air quality and airflow. During wildfire season, the U.S. EPA recommends upgrading to MERV 13 or higher to capture fine smoke particles. Higher MERV filters load up faster, so plan to check them more often during smoke events.
| Filter Type | MERV Range | Best For |
|---|---|---|
| Fiberglass | 1–4 | Basic dust, large debris |
| Pleated (standard) | 8–11 | Everyday use, allergens |
| Pleated (high-efficiency) | 13–16 | Wildfire smoke, allergy households |
| HEPA | 17–20 | Medical-grade; requires system modification |
Pro Tip: Actual filter dimensions are typically a quarter to a half inch smaller than the nominal size printed on the frame. This clearance lets the filter slide in, but if the gap is excessive, unfiltered air will bypass the media entirely. Always measure your slot before buying.
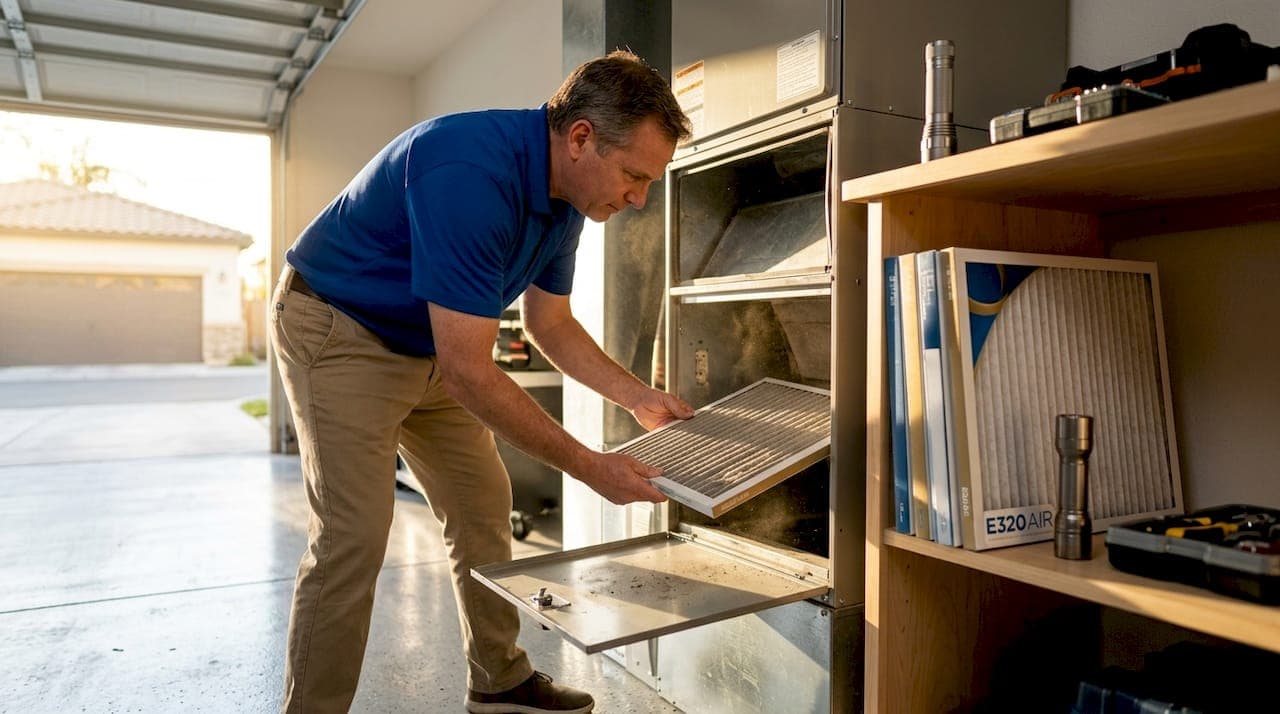
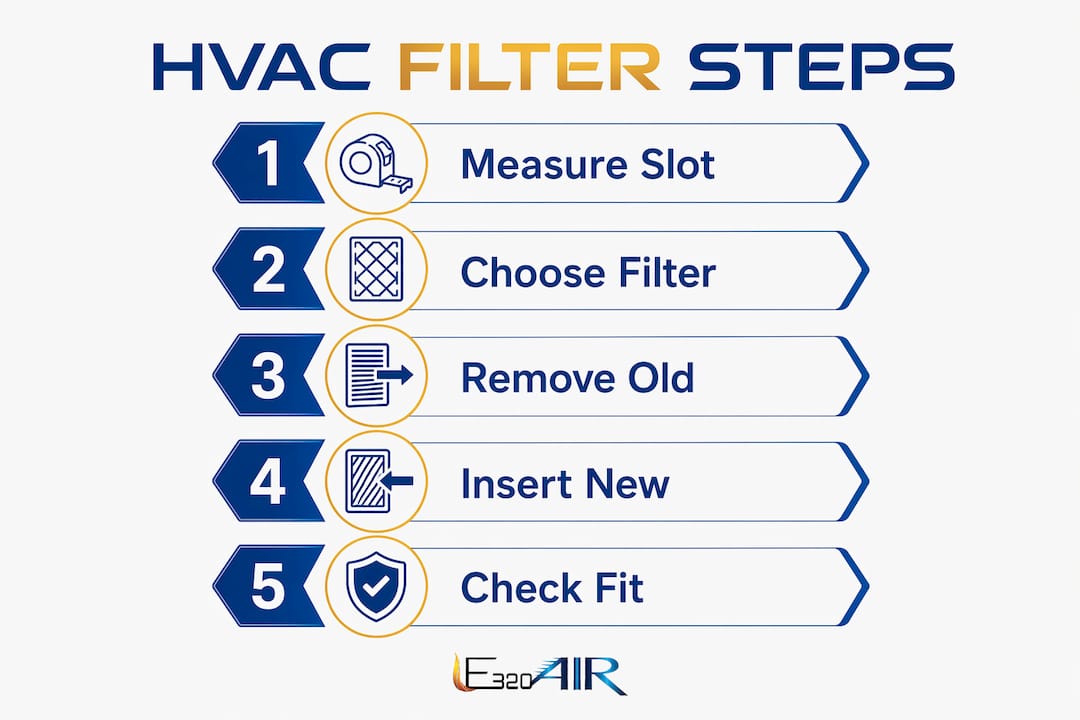
How to replace your HVAC filter step by step
The full replacement process takes most homeowners under ten minutes. Follow these steps in order to avoid the most common installation errors.
-
Turn off your HVAC system. Switch the thermostat to "off" before opening any panels. This stops airflow so loose debris does not get pulled into the system while you work.
-
Locate the filter slot. Most residential systems have the filter at the return air vent (a large grille on a wall or ceiling) or at the air handler cabinet in a closet, attic, or garage.
-
Open the access panel or grille. Most return grilles unclip or unscrew. Air handler cabinets usually have a simple latch or sliding door.
-
Remove the old filter. Slide it out carefully to avoid shaking loose dust back into the room. Note the size printed on the frame and the direction of the airflow arrow before you set it down.
-
Inspect the filter slot. Use your flashlight to check for dust buildup, debris, or any warping of the frame that could cause gaps. Wipe the housing with your microfiber cloth.
-
Insert the new filter with the arrow pointing toward the air handler. The airflow arrow must face the blower or air handler, not toward the return duct. Installing it backward reduces filtration efficiency and puts strain on the motor.
-
Check the fit. Press gently on all four edges. The filter should sit snug with no visible gaps. Filters that shift or show light around the edges allow unfiltered air to bypass the media, which defeats the purpose of the replacement.
-
Close the panel and turn the system back on. Listen for any rattling or unusual sounds during the first minute of operation. A properly seated filter runs quietly.
Pro Tip: Draw a permanent arrow on the inside of your air handler cabinet pointing toward the blower. American Standard recommends this trick as a simple way to prevent the most common installation mistake, especially if multiple people in your household handle maintenance.
What correct airflow direction actually does
The filter media is designed to capture particles as air moves through it in one specific direction. When the arrow points the wrong way, air flows through the less efficient side of the media first. The result is reduced particle capture, faster pressure buildup, and a motor that works harder to pull air through. None of that is visible from the outside, which is why wrong-direction installations often go undetected for months.
How often should you replace your HVAC filter?
Most homes need a new filter every 60 to 90 days, with a quick visual check each month. That interval assumes a typical household without pets, smokers, or nearby construction. Your actual timeline depends on several factors that are especially relevant in California.
Replace every 30 days if your home has:
- One or more pets that shed
- A household member with asthma, allergies, or a respiratory condition
- Active wildfire smoke in your area
- A wood-burning fireplace used regularly
Signs your filter needs replacing before the scheduled date:
- Visible gray or brown dust coating the filter surface
- Reduced airflow from vents
- Allergy symptoms that have gotten worse indoors
- A noticeable increase in your monthly energy bill
During wildfire smoke events, the U.S. EPA also recommends running your HVAC fan continuously to maximize filtration. This accelerates filter loading significantly. Check your filter every two weeks during active smoke periods and upgrade to MERV 13 if you have not already done so.
Some HVAC technicians use pressure differential gauges to measure the actual dust load on a filter rather than relying on a fixed calendar schedule. Pressure drop rises as filters collect dust, and a gauge reading gives you a precise signal to change rather than a guess. This approach prevents both premature changes (wasted money) and extended use (damaged airflow). For most homeowners, a monthly visual check achieves a similar result without the equipment.
Common mistakes and how to fix them
Filter bypass leaks are the primary failure mode in DIY filter replacements. The filter itself is rarely the problem. The installation is. Here are the mistakes E320air sees most often, along with how to correct them.
Wrong filter size. Buying a filter that is too small leaves a gap around the edges. Buying one that is too large means it will not seat properly. Always read the size from the old filter's frame or measure the slot directly. Remember that nominal size (what is printed on the box) and actual size differ by a fraction of an inch.
Arrow pointing the wrong direction. This is the single most common error. If you are unsure which way air flows in your system, hold a tissue near the return vent with the system running. The tissue will pull toward the vent, showing you the direction air travels into the system. The arrow on your new filter should point the same direction.
Gaps around the filter edges. After inserting the filter, shine your flashlight around all four sides. Any visible light or space means unfiltered air is getting through. Sealing the filter properly matters more than any other step in the process. If the filter shifts when you close the panel, the slot may be slightly oversized for that filter brand. Try a different brand with slightly larger actual dimensions, or use foam weatherstrip tape around the frame to close the gap.
Rattling or vibrating after installation. This usually means the filter is not fully seated. Turn the system off, reopen the panel, and press the filter firmly into place on all sides before closing again.
Pro Tip: Stock two or three replacement filters at home so you are never tempted to delay a change because you do not have one on hand. Keeping filters in a dry closet shelf costs almost nothing and removes the biggest barrier to staying on schedule.
Key takeaways
Replacing your HVAC filter correctly, with the right MERV rating, proper orientation, and a snug fit, is the single highest-impact maintenance task a California homeowner can perform.
| Point | Details |
|---|---|
| Replace every 30 to 90 days | Adjust frequency based on pets, allergies, or wildfire smoke conditions. |
| Arrow faces the air handler | Backward installation reduces filtration and strains the blower motor. |
| No gaps around the edges | Light leaks around the filter frame mean unfiltered air is bypassing the media. |
| Use MERV 13 during wildfire season | The U.S. EPA recommends higher-rated filters when outdoor smoke is present. |
| Inspect monthly, not just at replacement | Visual checks catch early loading and help you replace before airflow drops. |
What I have learned from years of California HVAC calls
I have been inside hundreds of California homes for HVAC service calls, and a surprising number of them trace back to one thing: a filter that was either overdue, installed backward, or sitting loose in its slot. Homeowners often assume the system will tell them when something is wrong. It usually does not. By the time you notice reduced airflow or a spike in your energy bill, the filter has been restricting the system for weeks.
The wildfire season issue is one I feel strongly about. A MERV 8 filter that works fine in February can be completely saturated within two weeks during a bad smoke event in August or September. I have seen systems in the Inland Empire and the San Bernardino foothills where filters turned black in under a month. If you live anywhere near fire-prone areas, keeping a MERV 13 filter in the house before fire season starts is not optional. It is the difference between breathing clean air and recirculating smoke particles through your home.
The other habit I push hard is stocking filters in advance. Every homeowner I know who stays on schedule does one thing: they buy a three-pack and keep it in the garage. The people who fall behind are the ones who have to make a special trip to the hardware store. Remove that friction and the habit takes care of itself. Set a calendar reminder on your phone for the first of every other month. That is all it takes.
— Edward
Keep your HVAC system running right with E320air
Knowing the steps is one thing. Having the right filters on hand and a trusted technician when something goes wrong is another. E320air serves California homeowners with professional HVAC installation and maintenance services designed for the specific demands of our local climate. Whether you need a system tune-up before wildfire season, help selecting the right filter for your equipment, or a full system replacement, the E320air team is ready to help. Visit E320air to explore filter options, schedule a maintenance visit, or get a quote on a new system tailored to your home.
FAQ
How often should I replace my HVAC filter in California?
Most California homes need a filter change every 60 to 90 days, but households with pets, allergy sufferers, or exposure to wildfire smoke should replace filters every 30 days. Check the filter visually each month and replace it early if it looks gray or brown.
Which direction does the arrow on an HVAC filter face?
The arrow on your HVAC filter must point toward the air handler or blower, not toward the return duct. Installing the filter backward reduces filtration efficiency and increases strain on the motor.
What MERV rating is best for California homes?
A MERV 8 to MERV 11 pleated filter works well for everyday conditions. During wildfire smoke events, the U.S. EPA recommends upgrading to MERV 13 or higher to capture fine smoke particles effectively.
Why is my HVAC filter leaving gaps around the edges?
Gaps usually mean the filter is the wrong size or is not fully seated in the slot. Measure your filter slot directly and compare it to the actual dimensions on the filter box. If the slot is slightly oversized, foam weatherstrip tape around the filter frame can close the gap.
Can I use a HEPA filter in my home HVAC system?
Most residential HVAC systems cannot handle the airflow restriction of a true HEPA filter without a modification to the system. A high-efficiency pleated filter rated MERV 13 to MERV 16 delivers strong filtration without the risk of damaging your equipment.