
If your AC is running but not cooling, the culprit is almost always one of five things: a dirty air filter, wrong thermostat settings, a frozen evaporator coil, a dirty or blocked outdoor condenser, or an electrical fault at the outdoor unit. Filter problems alone account for roughly 42% of cooling complaints, which is why it's the first thing to check.
Stop the system immediately and shut it off at the thermostat if you notice ice on the indoor coil or lines, a burning smell, or sparking near the outdoor disconnect. Those are not DIY situations.
Before touching anything else, run through these three checks. They take less than 10 minutes combined:
- Thermostat mode and setpoint. Confirm it's set to "Cool," not "Fan" or "Heat," and the target temperature is at least 3 to 5 degrees below the current room temperature.
- Air filter. Pull it out and hold it up to a light. If you can't see light through it, replace it now.
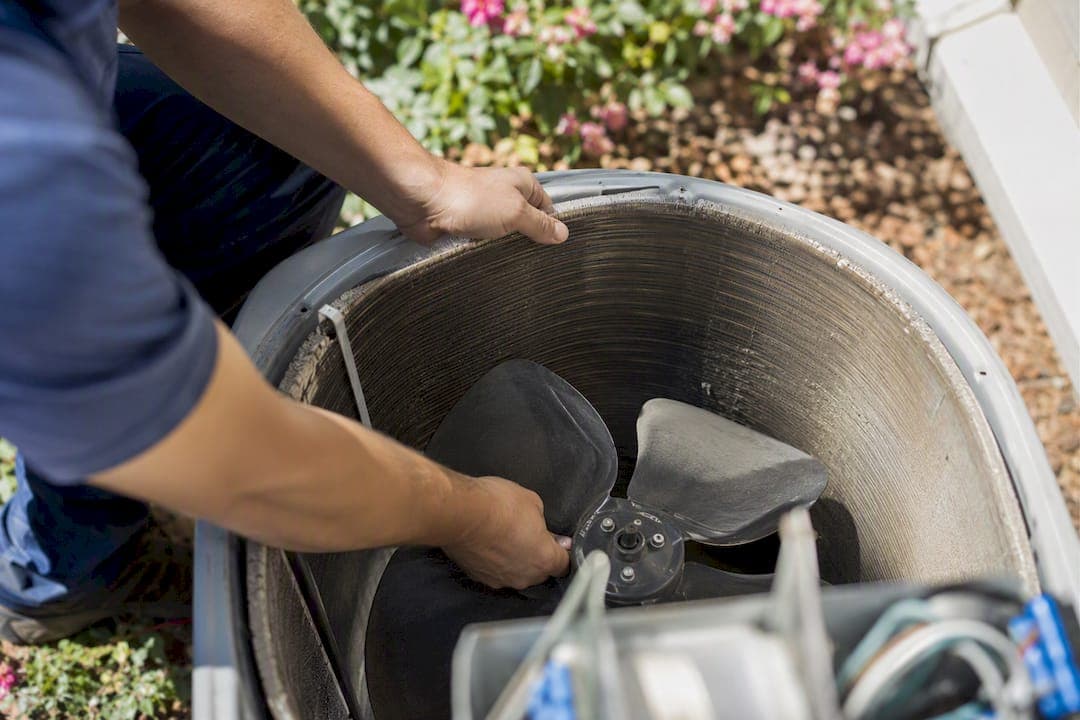
- Outdoor unit. Walk outside. Is the fan spinning? Do you hear the compressor humming? If it's dead silent while your indoor blower runs fine, you're likely looking at an electrical issue, not a refrigerant one.
Key Takeaways
A dirty filter or a wrong thermostat setting causes most AC cooling failures, and working through checks in order of likelihood, from thermostat to filter to outdoor unit to refrigerant, saves both time and money.
| Point | Details |
|---|---|
| Start with the filter | A dirty filter causes roughly 42% of cooling complaints and takes 10 minutes to check and replace. |
| Check the outdoor unit first | If the fan and compressor aren't running while the indoor blower works, suspect an electrical fault, not refrigerant. |
| Never run a frozen coil | Turn off cooling, set the fan to "On," and let the coil thaw for several hours before restarting the system. |
| Repeated freezing means a technician | Ice returning within days of a thaw signals a refrigerant leak or weak blower, not a filter problem. |
| Call E320air for electrical or refrigerant issues | E320air diagnoses capacitors, contactors, and refrigerant charge using the same temperature-split and pressure checks outlined in this guide. |
Table of Contents
- Why Is My AC Not Cooling? A Prioritized Fix-It Checklist
- Thermostat and Control Checks
- Airflow Problems: Filters, Returns, and the Blower
- Outdoor Condenser Unit and Coil Care
- Frozen Evaporator Coil: How to Thaw It Safely
- Refrigerant Leaks: Why This Almost Always Needs a Technician
- Electrical Causes: Breakers, Capacitors, and Contactors
- Ductwork and Vents: Is It the AC or the Distribution?
- When to Call a Licensed HVAC Technician
- What Actually Matters When Your AC Won't Cool
- Get It Fixed Right the First Time With E320air
- Sources
Why Is My AC Not Cooling? A Prioritized Fix-It Checklist
Work through these in order. Each one is ranked by how often it actually solves the problem, so you're not wasting time on unlikely fixes while the easy answer sits ignored.
-
Confirm thermostat and fan settings. Time: 5 minutes. Difficulty: easy. Set mode to "Cool" and fan to "Auto," not "On." Leaving the fan on "On" blows air across the coil constantly, even between cooling cycles, which pushes warm, humid air through your vents and makes a working system feel broken. Safety note: none, this is a simple settings check.
-
Inspect and replace the air filter. Time: 10 minutes. Difficulty: easy. This single step resolves close to 42% of "AC not cooling" calls that service techs get. A clogged filter starves the system of airflow, which drops your indoor temperature split and can eventually freeze the coil. Safety note: turn off the system before removing the filter door if it's near any wiring.
-
Open registers and check returns. Time: 5 minutes. Difficulty: easy. Furniture, rugs, and closed vents choke airflow room by room. Walk your house and make sure nothing is blocking supply or return grilles. Safety note: none.
-
Clear debris from the outdoor unit. Time: 15 to 30 minutes. Difficulty: medium. Leaves, grass clippings, and overgrown shrubs around the condenser block airflow across the coil, which cuts cooling capacity. Safety note: cut power at the disconnect before reaching into the cabinet.
-
Reset the breaker and outdoor disconnect. Time: 5 minutes. Difficulty: easy. A tripped breaker or a disconnect knocked loose (common after storms or lawn work) will leave the outdoor unit dead while the indoor blower keeps running. Safety note: if the breaker trips again immediately after resetting, stop and call a technician. That's a sign of a short, not a fluke.
Working through this list in order mirrors how HVAC technicians actually diagnose the problem: thermostat first, then airflow, then the coil, then the outdoor components, and only then refrigerant or compressor issues. It's the cheapest fixes first, expensive ones last.
Pro Tip: If you find ice on the indoor coil during any of these checks, don't just switch back to "Cool." Turn the system off, set the fan to "On" so it circulates room-temperature air across the coil, and give it several hours to thaw completely before running the compressor again.
Thermostat and Control Checks
A surprising number of "broken AC" calls turn out to be a thermostat set wrong, not a mechanical failure. Before you assume the worst, verify these:
- Mode is set to Cool, not Auto, Heat, or Off.
- Fan is set to Auto, not "On." As noted above, "On" circulates air even when the compressor isn't actively cooling.
- Setpoint is at least 3 to 5 degrees below the current room temperature. If the room reads 78°F and the thermostat is set to 78°F, nothing is wrong, it's just not calling for cooling.
- Batteries aren't dead in a battery-powered thermostat. A dim or blank display is your first clue.
A simple restart often clears up minor glitches: cut power at the breaker for 30 seconds, then restore it. If a smart thermostat shows a Wi-Fi or sensor error, or the screen is unresponsive after a battery swap, that points to wiring or a failed sensor, not something you should chase further yourself. That's a call for a technician.
Airflow Problems: Filters, Returns, and the Blower
Weak or warm airflow almost always traces back to something blocking air movement before it ever reaches your living space. Since a dirty filter causes about 42% of these complaints, start there before assuming anything mechanical has failed.
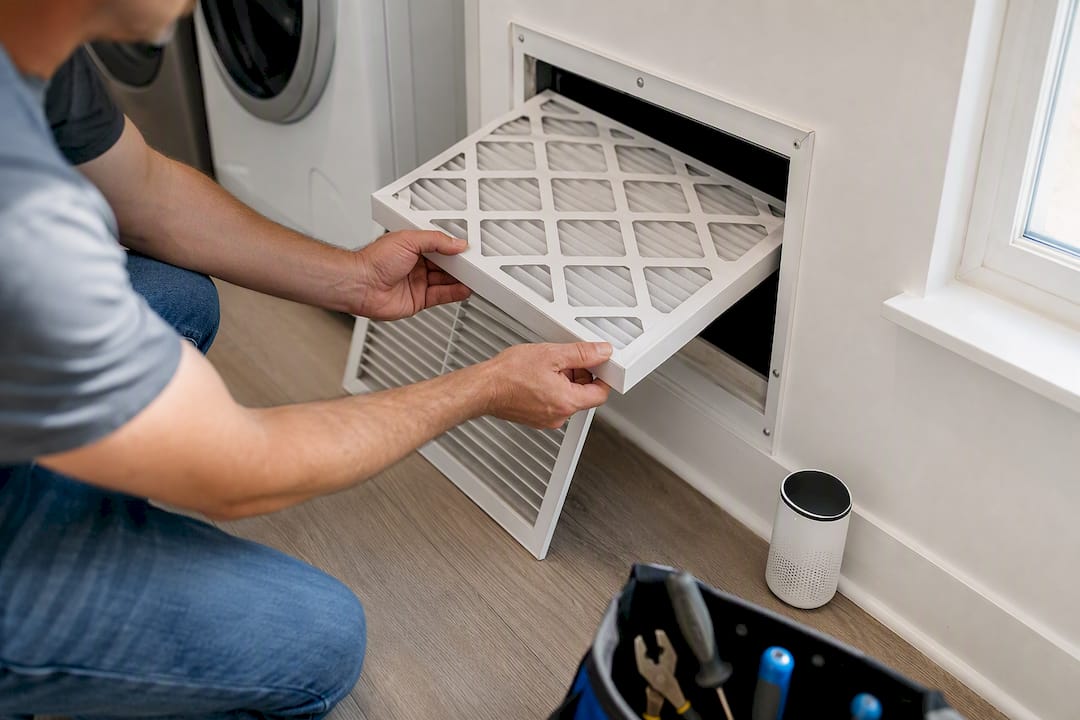
Filter replacement isn't complicated, but timing matters. A standard 1-inch fiberglass filter needs changing every 30 days. A pleated MERV 8 to MERV 11 filter, common in most residential systems, can usually go 60 to 90 days. If you have pets or live somewhere dusty, cut those intervals roughly in half.
Once the filter's confirmed clean, check registers room by room:
- Feel airflow at each supply vent. A weak vent in one room but strong airflow elsewhere usually means a closed damper or a crushed duct run, not a system-wide issue.
- Weak airflow at every vent points to something upstream: the filter, a failing blower motor, or a return that's blocked by furniture or a closed door.
- Listen at the return grille. Whistling or a hissing sound usually means the return is too restricted for the system's airflow demand.
A quick way to judge overall performance: place a thermometer at a supply register and another at the return grille. A properly running system should show a 16 to 22°F difference between the two. Anything under about 14°F suggests the system is struggling, whether from airflow restriction or something further along the diagnostic chain.
If airflow feels weak at every vent even with a fresh filter and open registers, you're likely dealing with a blower motor issue, which is a job for a technician, not a filter swap. Our air conditioner troubleshooting guide walks through additional signs room by room if you want to dig deeper before making that call.
Outdoor Condenser Unit and Coil Care
Your outdoor unit does the actual work of dumping heat outside, and it can't do that job buried under leaves or clogged with dust. Stand next to it and check three things: is the fan spinning freely, is the compressor humming (a low, steady buzz, not a struggling rattle), and is there at least two feet of clearance around the cabinet for airflow.
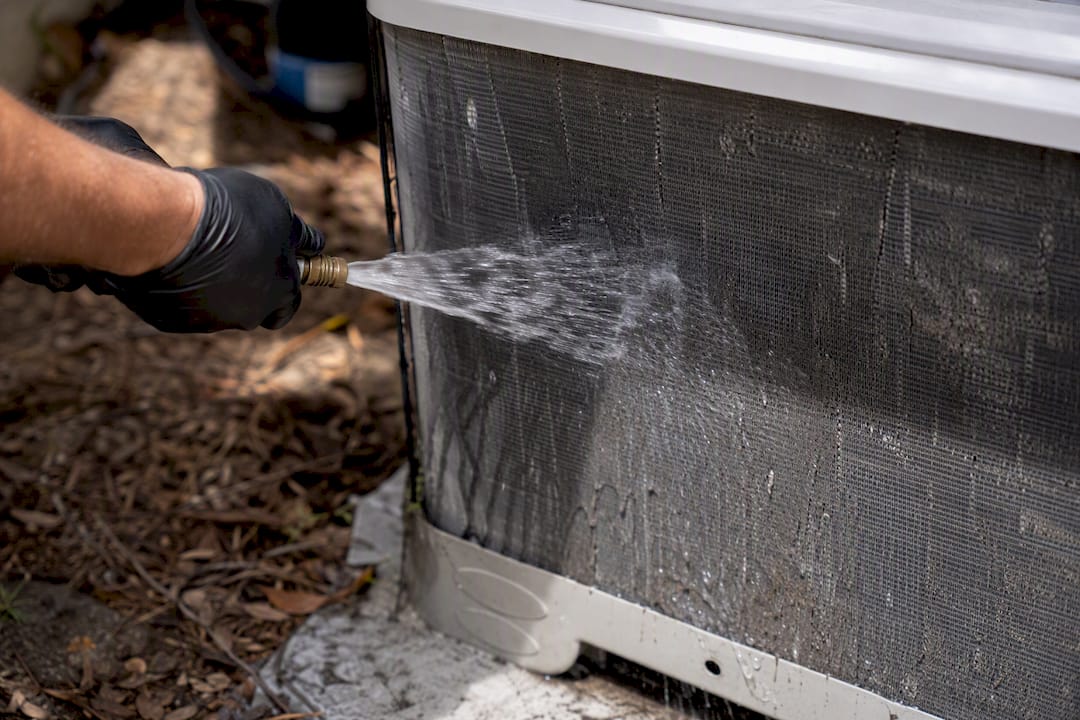
Dirty condenser coils aren't a cosmetic issue. Buildup on the coil fins can cut cooling capacity by roughly 30% and drive energy use up 20 to 30%, which explains why a unit that "runs fine" can still leave your house warm and your utility bill high.
If the unit looks dirty:
- Cut power at the outdoor disconnect before touching anything.
- Clear leaves, grass, and debris away from the base and sides by hand.
- Gently hose the fins from the inside out with a regular garden hose, never a pressure washer, which can bend the delicate aluminum fins and make things worse.
- Trim back plants and shrubs so the unit has open air on all sides.
Pro Tip: Bent fins look alarming but rarely cause real problems on their own. A fin comb (a cheap tool available at most hardware stores) can straighten minor damage without a service call. Deep, widespread bending, though, restricts airflow enough to matter and is worth mentioning to a technician at your next visit.
If the fan runs but the compressor doesn't hum at all, or the whole unit is silent while your indoor blower works fine, stop here. That's an electrical issue, covered below, not something more hosing will fix.
Frozen Evaporator Coil: How to Thaw It Safely
Ice on the indoor coil is your system telling you something upstream is wrong. It's almost always restricted airflow, low refrigerant, or both working together, and thawing the ice without fixing the underlying cause just buys you a few days before it freezes again.
Here's the safe sequence if you find a frozen coil:
- Turn off cooling at the thermostat immediately. Running a frozen coil risks damaging the compressor.
- Set the fan to "On." This circulates room air across the coil to melt the ice without forcing the compressor to work.
- Wait it out. Full thawing can take several hours to overnight depending on how much ice built up. Don't rush it by scraping or chipping at the coil.
- Check the filter and registers once thawed. If everything looks clear and you restart the system only to see ice return within a day or two, that's a strong signal of a refrigerant leak or a weak blower motor, not a filter problem.
Repeated freezing after you've already replaced the filter and confirmed good airflow is a red flag. Don't keep cycling the system hoping it resolves itself. That pattern typically means refrigerant or blower work that requires a technician's tools to diagnose properly.
Refrigerant Leaks: Why This Almost Always Needs a Technician
Refrigerant doesn't get "used up" the way gas in a car does. A sealed system that's low on refrigerant has a leak somewhere, and recharging it without finding and repairing that leak just means you're back to square one in a few months.
Watch for these signs pointing toward a refrigerant issue rather than an airflow problem:
- A hissing or bubbling sound near the indoor or outdoor unit.
- Oily residue around refrigerant line connections. Refrigerant oil leaves a visible film.
- Ice forming on the copper refrigerant lines themselves, not just the coil.
- Cooling that gets gradually worse over weeks rather than failing all at once.
Federal environmental regulations restrict who can legally purchase and handle refrigerant, and locating a leak requires specialized tools, electronic leak detectors, UV dye, or a full pressure test, that go well beyond a homeowner toolkit. A technician will typically connect gauges to check system pressures and measure subcooling and superheat values to pinpoint exactly what's wrong before recommending a repair. Refrigerant-related repairs run a wide range depending on the leak's location and severity, and a proper diagnosis is what determines whether you're looking at a simple fix or a bigger job.
Electrical Causes: Breakers, Capacitors, and Contactors
When the outdoor unit sits completely silent while your indoor blower runs normally, the problem is almost always electrical, not refrigerant, and not airflow.
Start with what's safe to check yourself:
- Breaker panel. Look for a tripped breaker feeding the outdoor unit and reset it once. If it trips again right away, stop and call for service.
- Outdoor disconnect box. This gray box mounted near the condenser sometimes gets bumped loose. Confirm the pull-out fuse or switch is fully seated.
Beyond that, you're into technician territory. A humming outdoor unit where the fan won't spin, or a compressor that hums then shuts off, often points to a failed run capacitor or a stuck contactor, two of the most common and least expensive outdoor-unit failures in the industry. A visibly swollen or bulging capacitor top is a reliable visual sign of failure, but confirming its actual capacitance requires a multimeter and training most homeowners don't have. Capacitor and contactor replacements are generally on the lower end of HVAC repair costs precisely because the parts themselves are cheap, but the diagnosis and safe replacement, working inside an energized cabinet, belongs to a licensed technician.
Ductwork and Vents: Is It the AC or the Distribution?
Sometimes the AC itself is working fine and the problem is getting that cool air where it needs to go. A quick room-by-room check tells you which situation you're in.
Use a simple thermometer at each supply register and compare readings across rooms. If one or two rooms run noticeably warmer than the rest of the house while the vents themselves have good airflow, you're likely looking at a duct problem, not an equipment problem.
- Uneven cooling room to room usually means duct leaks, disconnected sections, or poor insulation in an attic or crawlspace run.
- A whistling or rattling sound near ductwork often signals a loose connection or a gap where conditioned air is escaping before it reaches the vent.
- A simple homeowner fix is foam tape or mastic sealant on accessible, visible duct joints, but this is a stopgap, not a permanent repair.
If multiple rooms run warm despite good airflow at the register and a healthy outdoor unit, it's time to schedule a professional duct assessment rather than keep patching individual joints.
When to Call a Licensed HVAC Technician
E320air's technicians follow the same diagnostic order outlined throughout this guide: check supply and return temperatures first, then test the capacitor and contactor, then move to refrigerant pressures only if the electrical and airflow checks come back clean. That order matters because it catches the cheap fixes before anyone starts talking about expensive ones.
Most service calls turn up something on the inexpensive end: a failed capacitor, a stuck contactor, a filthy filter, or a condenser that needs a real cleaning. The costly repairs, compressor replacement or full coil replacement, are far less common and usually only come up after a system has been ignored for years or run repeatedly while frozen.
- Never open the outdoor unit's electrical cabinet or attempt to test a capacitor yourself.
- Never attempt to add refrigerant to a system on your own; it's both a legal and safety issue.
- If you've worked through the checklist above and the system still isn't cooling, that's your signal to stop DIY and book a diagnostic visit.
You can browse real repair examples in E320air's problem-solving gallery or read more in the homeowner's guide to HVAC repair services for what to expect from a service call.
Pro Tip: Ask any technician to show you the supply/return temperature split and the capacitor reading before they recommend a repair. A reputable tech won't mind, and it gives you a clear, objective reason for whatever fix they're proposing.
What Actually Matters When Your AC Won't Cool
Most guides treat every possible cause as equally likely, which leaves homeowners checking refrigerant lines before they've even looked at the filter. That's backwards. The data is clear that filter and thermostat issues dominate real-world service calls, and those are exactly the fixes anyone can handle in minutes without a wrench or a gauge set.
The conventional advice also underweights the outdoor unit walk-around. Standing outside for thirty seconds to see whether the fan spins and the compressor hums tells you more than almost any other single check, because it immediately splits the problem into "electrical" versus "everything else." Skip that step and you'll waste time guessing.
Where I'd push back hardest on typical troubleshooting lists is the frozen coil advice. Thawing it is step one, not the whole fix. If ice comes back within a couple of days, the freeze was a symptom, not the disease, and running the system through repeated freeze cycles is how a simple airflow problem turns into a compressor replacement. Prioritize the cheap checks first, but respect the red flags when they show up twice.
— Edward
Get It Fixed Right the First Time With E320air
If you've worked through the checklist above and your AC is still blowing warm air, it's time for a technician, not another YouTube video. E320air handles residential and commercial repairs, routine maintenance, and full system installations across the categories covered in this guide: refrigerant diagnostics, capacitor and contactor replacement, coil cleaning, and duct assessments, without the guesswork of trying to price a repair over the phone.

What sets a service call apart is the diagnostic order technicians follow: temperature split, electrical components, then refrigerant pressures, the same sequence outlined in this article, so you're not paying for a compressor diagnosis when the real issue is a $20 filter or a swollen capacitor. If your system needs more than a repair, whether it's aging equipment or a unit that's been limping along for years, E320air's HVAC installation services cover full replacements too.
Ready to get a technician out to look at your system? Visit E320air to schedule a diagnostic visit and get a straight answer on what's actually wrong.
Sources
This guide draws on troubleshooting frameworks from ServiceMag, HVACBase, InspectApedia, and Trane. For repair help, visit E320air's services page or explore the Claremont repair guide for local examples.
- AC Not Cooling: Troubleshooting Central Air From the Thermostat to the Compressor | ServiceMag
- AC not cooling — HVACBase
- Air Conditioner Blows Warm Air - InspectApedia
- AC Not Blowing Cold Air - Trane