
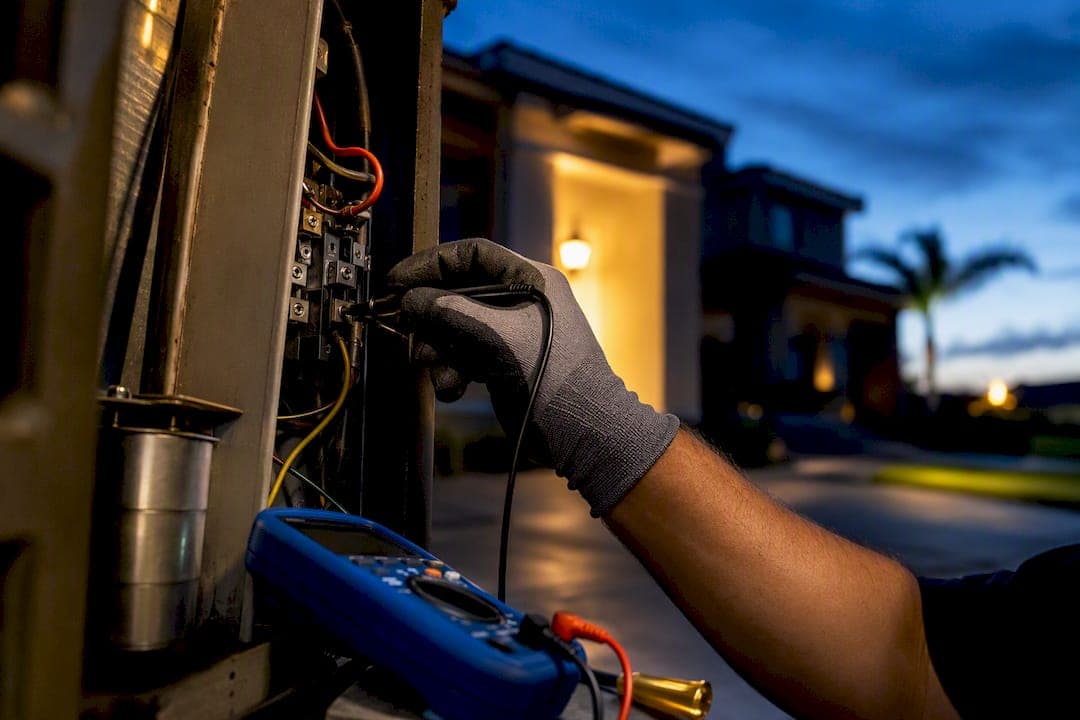
If your AC hums but the outdoor unit won't run, the vents blow warm, or the breaker keeps tripping while you hear knocking from the condenser, the compressor is the likely suspect. Power the system down and call a licensed technician before running it again. If the signs are milder, such as slightly weaker airflow or a small bump in your energy bill, work through the homeowner checks below before assuming the worst.
TL;DR:
- Most compressor failures are caused by electrical issues such as faulty capacitors or contactors, which are easier and cheaper to fix than replacing the compressor.
- Repeated breaker trips, loud knocking, or burning odors require immediate professional attention, as they indicate severe mechanical or electrical damage.
- Routine maintenance like changing filters, cleaning coils, and checking airflow can prevent most causes of compressor overheating and prolong system lifespan.
- Diagnosing compressor trouble involves checking simpler symptoms first, such as airflow and refrigerant leaks, before performing detailed electrical and pressure tests.
- A compressor's expected lifespan ranges from 10 to 15 years, and early signs of failure often stem from preventable issues like poor airflow or refrigerant problems.
Table of Contents
- Compressor Failure Symptoms: The 15-Point Homeowner Checklist
- How to Diagnose Compressor Failure: A Prioritized Checklist
- Mapping Compressor Symptoms to Root Causes
- When to Call a Professional (and What It Will Cost)
- Preventing Compressor Failure: Maintenance That Actually Works
- What Technicians Actually See in the Field
- Repair or Replace? A Field-Tested Framework
- How E320air Handles Compressor Diagnostics and Repairs
- Sources
- FAQ
Compressor Failure Symptoms: The 15-Point Homeowner Checklist
A compressor rarely fails without warning. It usually telegraphs trouble through one or more of the signs below, and most homeowners can spot several of them without opening a single panel. This checklist mirrors the diagnostic sequence technicians actually use: confirm the symptom, check operating conditions, then narrow down electrical versus mechanical versus refrigerant causes before touching a wrench, a sequence detailed in MXCompressor's failure diagnosis guide.
Work through these in order. Each one lists what you can check yourself and how urgent it is.
- System won't start at all. Flip the thermostat to cooling and lower the set point five degrees. If nothing happens outside or inside, check the breaker panel and the outdoor disconnect switch first. Urgency: professional, same day.
- Outdoor unit hums but never runs. A stuck rotor or a failed start capacitor both produce this sound. Listen for a single buzz that cuts off after a few seconds rather than a running motor. Urgency: professional, same day. This is one of the most common bad AC compressor symptoms that turns out to be a $30 part, not a $2,000 compressor.
- Breaker trips repeatedly. Note whether it trips immediately on startup or after running for a few minutes. Immediate trips usually point to a short or locked rotor; delayed trips suggest overheating. Urgency: immediate, stop use.
- Warm air from the vents. Check your air filter first. A filthy filter can mimic compressor failure by starving the coil of airflow. Urgency: professional if the filter is clean.
- Weak airflow at the registers. Feel for airflow at multiple vents, not just one. Weak airflow everywhere points to the blower or ducts; weak cooling with normal airflow points to the compressor or refrigerant charge. Urgency: routine to professional.
- Short cycling. Time how long the system runs before shutting off. Anything under five minutes per cycle strains the compressor and often signals a refrigerant or electrical fault. Urgency: professional.
- Loud knocking or grinding. This is a mechanical red flag: worn bearings, a broken connecting rod, or debris inside the compressor shell. Urgency: immediate, stop use.
- Screeching or squealing. Usually a belt or fan motor issue on older equipment, but on some systems it signals a compressor bearing losing lubrication. Urgency: professional.
- Hissing near the refrigerant lines. A hissing sound often means a refrigerant leak under pressure. Look at the copper lines running to the outdoor unit for frost, oily residue, or visible damage. Urgency: professional.
- Oil stains on or near the unit. Refrigerant carries compressor oil, so a leak often leaves an oily film on the ground, on line connections, or on the compressor shell itself, a sign confirmed by HVAC School's residential diagnostic checklist. Urgency: professional.
- Ice on the refrigerant lines. Frost or ice on the larger suction line usually means low refrigerant charge or restricted airflow across the indoor coil. Urgency: professional, do not run the system further.
- Unusually high energy bills. Compare your last two bills against similar outdoor temperatures. A struggling compressor draws more current to do less cooling. Urgency: routine, schedule diagnostics soon.
- Vibration you can feel or see. Place your hand on the outdoor cabinet while it runs. Excess vibration often means loose mounting, a failing internal component, or an unbalanced fan. Urgency: professional.
- Overheating outdoor unit. Touch the cabinet cautiously; if it's hot to the touch and the unit keeps shutting off on overload, airflow or refrigerant problems are likely overworking the compressor. Urgency: professional.
- Unusual odors near the vents or outdoor unit. A burning smell suggests an electrical fault; a sharp chemical smell can indicate an internal compressor burnout contaminating the refrigerant. Urgency: immediate, stop use.
Pro Tip: Write down exactly what you observed, including sounds, timing, and any smells, before the technician arrives. A precise description ("hums for three seconds, then clicks off") narrows the diagnosis faster than a vague "it's not cooling right," and it can shave real time off a service call.
How to Diagnose Compressor Failure: A Prioritized Checklist
Diagnosing compressor malfunction signs correctly means ruling out cheaper, more common problems before condemning the compressor itself. A surprising number of "dead compressor" calls turn out to be a bad capacitor or a tripped safety switch. The sequence below moves from what you can check in five minutes to what requires a technician's gauges and meters.
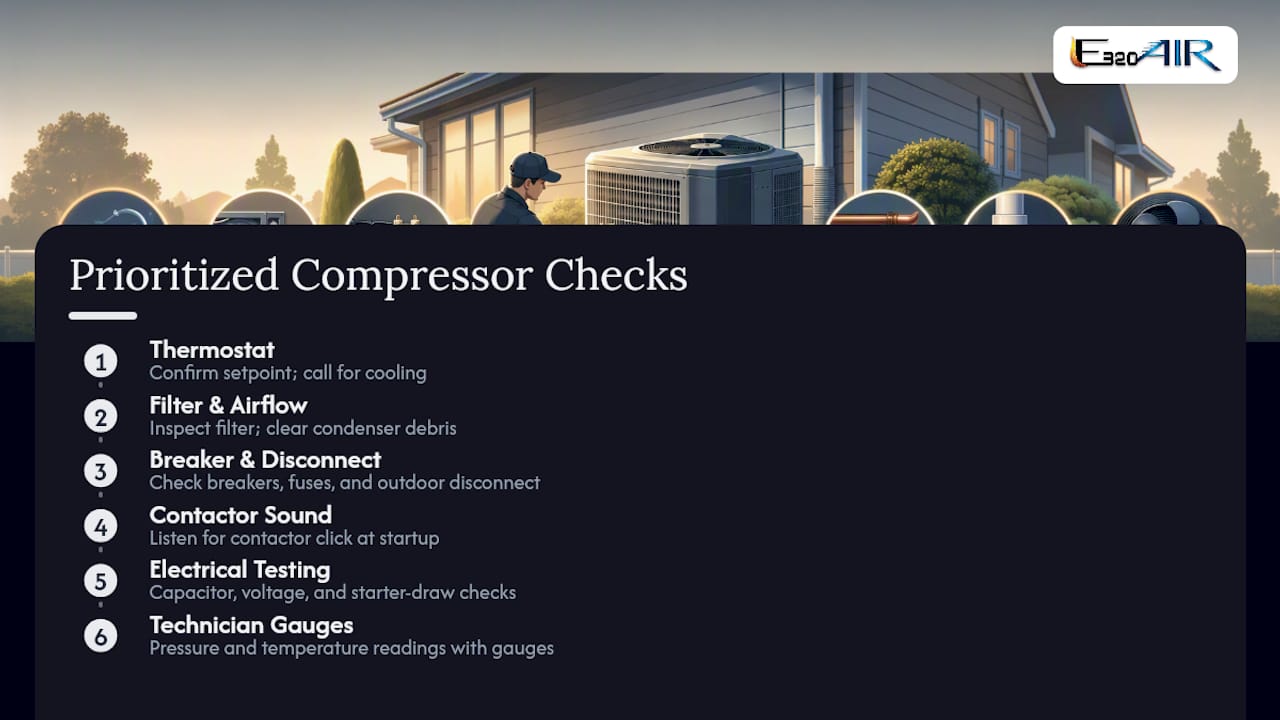
Step 1: Confirm the symptom under normal conditions
Before anything else, verify the problem isn't something simple. Check that the thermostat is set to cooling, the batteries aren't dead, and the setpoint is actually below room temperature. Replace the air filter if it's been more than 60 to 90 days. Walk outside and clear leaves, grass clippings, or mulch away from the condenser, since airflow blockage causes a huge share of what looks like compressor overheating symptoms.
Step 2: Check the breaker and disconnect
Reset the breaker once. If it trips again immediately, stop, that's a short circuit or a locked compressor, and repeated resets can damage wiring or the compressor windings further. Pull the outdoor disconnect (the small box near the unit) and inspect it for scorch marks or a burnt smell, both signs of a failing contactor.
Step 3: Listen for clutch and contactor engagement
Stand near the outdoor unit when the thermostat calls for cooling. You should hear a distinct click as the contactor closes, followed by the fan and compressor starting almost together. If you hear the click but only the fan spins, the compressor itself, its capacitor, or its internal overload is the next suspect.
Step 4: Technician electrical tests
This is where the diagnosis moves from homeowner checks to instrument-based testing, and it's the stage that separates a real compressor failure from a $40 part replacement.
- Voltage at startup. Technicians measure line voltage at the contactor terminals during the start attempt. Voltage that sags more than 10% under load suggests a wiring or utility supply issue rather than the compressor.
- Amp draw versus nameplate rating. A clamp meter reading compared against the compressor's nameplate amperage is one of the fastest ways to catch a struggling motor. Locked rotor amperage that's reached but the compressor won't turn over usually means a mechanical seizure, not an electrical fault.
- Capacitor MFD tolerance test. Run and start capacitors degrade with heat cycles. Manufacturers typically allow a tolerance band around the rated microfarad (MFD) value; a capacitor reading outside that band gets replaced immediately, since it's the single most common cause mistaken for compressor malfunction signs.
- Contactor and relay inspection. Pitted or burnt contactor points cause intermittent starts and can look exactly like a failing compressor from the homeowner's side.
- Winding resistance and megohm (megger) test. This measures resistance between the compressor's electrical windings and its steel shell. A properly insulated compressor should show very high resistance to ground. A low reading indicates a short to ground, a decisive and largely unambiguous sign that the compressor itself has failed internally, a test HVAC School treats as one of the most reliable go/no-go checks in the entire diagnostic sequence.
Step 5: Pressure and temperature readings
With gauges attached to the service ports, a technician reads suction and discharge pressures and compares them against the manufacturer's target range for the refrigerant type and outdoor temperature. Manufacturer documents such as Copeland's technical publications list the exact operating envelopes for specific compressor models, since generic "normal" pressure ranges can be misleading across different refrigerants and equipment ages.
Discharge temperature and superheat readings add another layer: unusually high discharge temperature combined with low superheat can point to oil loss inside the crankcase, a subtler problem that pressure readings alone won't reveal.
Step 6: Oil sampling when the compressor comes out
If a compressor is pulled for replacement, a smart technician pulls an oil sample and checks it for acid content. Even a small amount of inorganic acid in the oil, often left behind by an earlier burnout, can rapidly destroy a brand-new replacement compressor if the refrigerant lines and coil aren't properly flushed first.
Repair versus replacement: the decision line
| Favors repair | Favors replacement |
|---|---|
| Bad capacitor, contactor, or relay | Grounded or open windings |
| Correctable low voltage or wiring fault | Severe internal mechanical damage (seized rotor, broken rods) |
| Dirty coil or blocked airflow causing overload trips | Acid or heavy contamination found in oil sample |
| Minor refrigerant leak, sealable and rechargeable | Liquid refrigerant slugging (floodback) history |
| Hard-start kit resolves high locked rotor amps | Compressor shell shows burnt or melted internals |
Roughly a third of "compressor failure" service calls trace back to a failed capacitor or contactor rather than the compressor itself, according to MXCompressor's diagnostic breakdown, which is exactly why the electrical tests in Step 4 come before anyone recommends pulling the compressor.
Mapping Compressor Symptoms to Root Causes
Every symptom on the checklist above traces back to one of four failure categories: electrical, mechanical, refrigerant/system, or airflow. Knowing which bucket your symptom falls into tells you roughly what a repair will involve, and roughly what it will cost, before a technician ever arrives.
Electrical causes show up as:
- No-start with no hum at all (open circuit, dead contactor, blown fuse)
- Hum without rotation (failed start capacitor, weak run capacitor, locked rotor)
- Repeated breaker trips (short circuit, grounded winding, overloaded circuit)
- Abnormally high current draw at startup (failing start components, tight or seized bearings forcing the motor to work harder)
Mechanical causes show up as:
- Knocking or grinding noises (worn bearings, broken internal parts, loose mounting hardware)
- Vibration felt through the cabinet (unbalanced components, loose bolts, a failing mount)
- A seized compressor that draws high amps but never turns (mechanical lockup, often after years of wear or a prior overheating event)
- Poor pumping capacity despite the compressor clearly running (worn valves or scroll components losing compression efficiency internally)
Refrigerant and system causes show up as:
- Warm air from the vents despite the system running (low charge, major leak, or a failed metering device)
- Ice forming on the suction line (low charge or restricted airflow starving the evaporator coil)
- Low suction pressure on a gauge set (undercharge, restriction in the line set, or a failing metering device)
- Compressor overheating during normal-length cycles (refrigerant flooding back as a liquid, known as floodback, which washes oil out of the compressor and destroys internal lubrication)
Airflow and heat exchange causes show up as:
- High discharge pressure on a gauge set (dirty condenser coil, blocked airflow, or a failing condenser fan motor)
- Overheating that worsens as outdoor temperature climbs (the condenser can't reject heat fast enough, so the compressor works harder and runs hotter)
- Repeated trips on the internal overload protector (the compressor's built-in safety shutting it down before it damages itself, almost always tied to insufficient airflow across the coil)
A dirty condenser coil is quietly one of the most preventable contributors to this entire chain. Poor airflow raises head pressure, which raises discharge temperature, which shortens the compressor's working life even if it never trips a single breaker in the process, a link supported by Cedars HVAC's failure-signs guide. If you've replaced a compressor once and it's already showing the same symptoms again, airflow across the coil is the first place to look before assuming bad luck.
When to Call a Professional (and What It Will Cost)
Some compressor malfunction signs are safe to observe for a day or two while you schedule service. Others mean shutting the system off immediately and calling a technician the same day.
Call immediately if you notice:
- Loud knocking, grinding, or metal-on-metal sounds from the outdoor unit
- A burning smell from the vents or the outdoor cabinet
- A breaker that trips more than once when reset
- Visible oil pooling near the unit or on refrigerant lines
- A compressor that hums continuously but never starts running (possible seizure)
When a technician arrives, expect a structured process rather than a guess. They'll measure amp draw against the nameplate rating, attach gauges to check suction and discharge pressure, run a winding resistance test, and, if the compressor is coming out, pull an oil sample. Refrigerant work itself is federally regulated. Technicians who recover, handle, or recharge refrigerant must hold an EPA Section 608 certification, which is exactly why DIY refrigerant recharging isn't just risky, it's not legal for anyone without that credential to perform.
Cost context. Compressor replacement costs vary widely depending on system tonnage, refrigerant type, whether the equipment is still under warranty, and how much contamination cleanup the refrigerant lines need after a burnout. A capacitor or contactor repair typically runs far less than a full compressor swap, which is one more reason the electrical tests in the diagnostic sequence matter so much. Get a written estimate that separates diagnostic fees from repair costs before authorizing major work.
Lifespan context. A well-maintained residential compressor typically lasts somewhere in the 10 to 15 year range. Factors that shorten that window include chronic airflow restriction, repeated short cycling, refrigerant floodback events, electrical brownouts or voltage sags, and skipped annual maintenance. A compressor that fails at year six almost always has an identifiable cause behind it, not just bad luck.
Preventing Compressor Failure: Maintenance That Actually Works
Most of the causes behind compressor overheating symptoms and electrical failures are preventable with a handful of routine tasks, split between what you do and what a technician should check once a year.
What you can do:
- Change or clean your air filter every 60 to 90 days, more often with pets or in dusty environments.
- Keep at least two feet of clearance around the outdoor condenser unit, clear of shrubs, mulch, and debris.
- Rinse the condenser coil gently with a garden hose a few times per season if it looks visibly dusty.
- Schedule a professional tune-up once a year, ideally in spring before peak cooling season starts.
- Watch for and report early symptoms of compressor problems, like a new noise or a bump in your energy bill, rather than waiting for a full breakdown.
What a technician should check annually:
- Deep coil cleaning beyond what a garden hose can reach
- Airflow verification in cubic feet per minute (CFM) across the evaporator and condenser
- Torque checks on electrical connections, since loose connections generate heat and resistance over time
- Capacitor MFD and contactor condition testing
- Refrigerant leak detection and charge verification
- Oil analysis on older or high-hour commercial equipment where relevant
Pro Tip: Set a recurring reminder for spring maintenance rather than waiting for the first hot week to call. Technicians book up fast once temperatures spike, and a compressor that's already stressed by dirty coils tends to fail during the exact week everyone else is calling for the same problem.
What Technicians Actually See in the Field
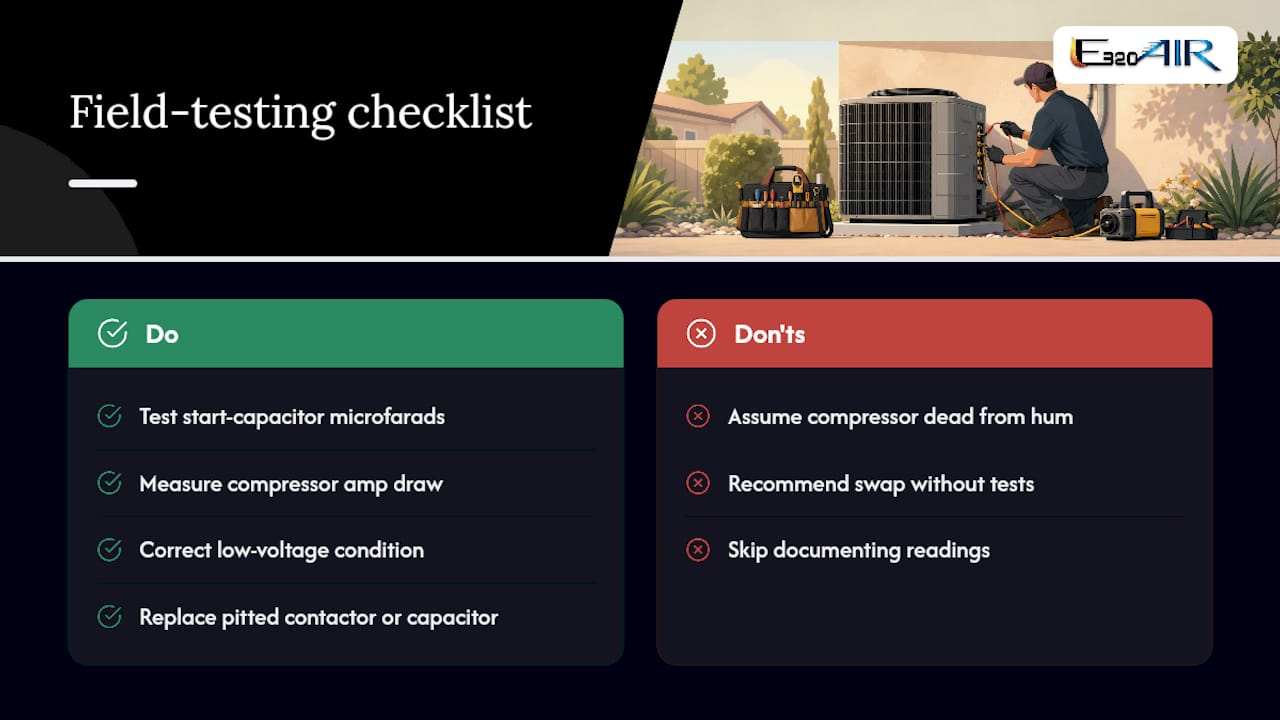
The single most common misdiagnosis Edward and the E320air team run into is a homeowner convinced their compressor is dead when the real problem is a $30 to $60 capacitor. A failing start capacitor produces the exact same symptom, a hum with no rotation, as a genuinely seized compressor. The only way to tell them apart is testing the capacitor's microfarad rating and checking amp draw, not guessing from the sound alone.
Correcting a low-voltage condition, replacing a pitted contactor, or swapping a weak capacitor can restore a system that looked terminal. Replacement becomes necessary only when winding resistance tests confirm a short to ground, when oil sampling turns up acid contamination, or when a compressor has physically seized from mechanical wear. Field experience backs up a simple rule: test before you condemn, and document every reading before recommending the more expensive fix.
Repair or Replace? A Field-Tested Framework
Choosing between repair and replacement comes down to two numbers: how much life is realistically left in the rest of the system, and how contaminated the refrigerant circuit already is. A five-year-old compressor with a bad capacitor is an easy repair call. A fifteen-year-old unit with acid in the oil sample usually isn't worth saving, even if the compressor itself could theoretically be revived.
Fix the root cause, not just the symptom. I've seen homeowners replace a compressor twice because nobody addressed the blocked condenser airflow cooking it in the first place. Before approving major work, get diagnostics in writing, including the actual readings, not just a verdict, and get a written estimate so you're comparing an informed decision, not a guess.
— Edward
How E320air Handles Compressor Diagnostics and Repairs
E320air runs diagnostic visits the same way this checklist is built: confirm the symptom, test the electrical components first, then move to pressure and mechanical checks before recommending anything as drastic as compressor replacement. That order matters, because it's the difference between a $60 capacitor swap and an unnecessary multi-thousand-dollar recommendation.

A typical diagnostic visit includes amp draw and voltage measurements, capacitor and contactor testing, pressure readings, and, if replacement genuinely is the answer, a clear written report showing exactly what failed and why. If your system needs new equipment rather than a repair, E320air also handles full system replacement and installation, so you're not left juggling separate diagnostic and installation contractors. Commercial property owners dealing with rooftop units or multi-zone systems can review E320air's commercial HVAC services for larger-scale diagnostics and repair work.
Curious what real diagnostic and repair outcomes look like before you schedule anything? The problem-solving gallery walks through actual field cases. When you're ready, visit E320air's main page to schedule a diagnostic visit and get a written repair or replacement recommendation instead of a guess.
Sources
- Compressor Failure Diagnosis: 15 Symptoms, Causes, and Testing Guide
- Compressor Failure: Diagnosis and Replacement Checklist for Residential and Light Commercial Equipment
- Copeland technical publication (AE4-1294_R1)
FAQ
How much does it cost to fix a bad AC compressor?
Cost varies by system size, refrigerant type, and whether contamination cleanup is needed, so get a written estimate that separates the diagnostic fee from the actual repair cost before approving work.
What is the average lifespan of an AC compressor?
Most well-maintained residential compressors last around 10 to 15 years; airflow restriction, short cycling, and skipped maintenance are the biggest factors that cut that lifespan short.
What is the most common cause of compressor failure?
Electrical component failure, specifically a bad capacitor or contactor, is mistaken for compressor failure so often that testing those parts first is standard practice before anyone condemns the compressor itself.
Will my AC still work if the compressor is bad?
No. The compressor is the piece that actually moves refrigerant through the system, so a failed compressor means the system may run but won't produce cold air, and continuing to run it risks further damage.
How can I tell if it's the compressor or just the capacitor?
A hum with no rotation can mean either one; a technician has to measure the capacitor's microfarad rating and the compressor's amp draw to tell them apart, since both produce the identical sound.