
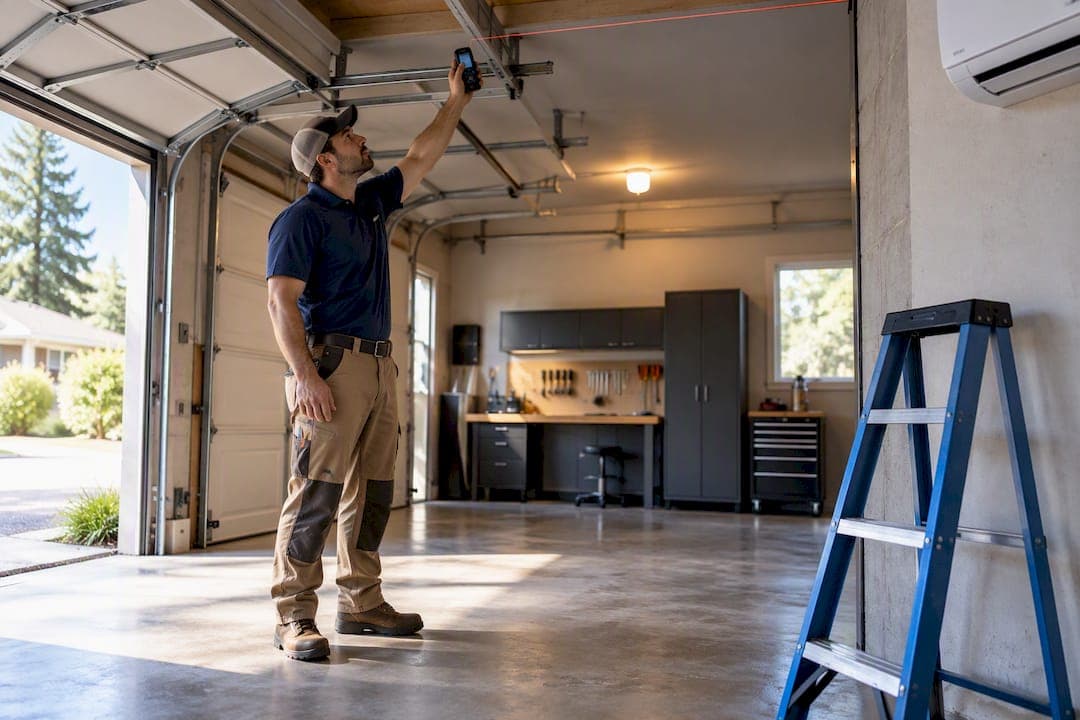
A ductless heat-pump mini split is usually the best way to heat and cool a garage, but only if you prepare the space first. Insulate the garage door and ceiling before anything else, upsize capacity above what a standard room calculator suggests, and hire a licensed installer to run a proper load calculation and check your electrical panel. Skip any of those three, and even the best equipment will underperform.
TL;DR:
- Proper insulation of garage doors and ceilings can often allow for a smaller mini split unit, saving on equipment costs and energy use.
- Adjusted BTU calculations for garage conditions typically exceed standard room estimates by 30% to 50%, with larger units needed for high ceilings and sun-exposed doors.
- Site evaluation and a manual load calculation are essential, as they account for actual insulation, leaks, and climate factors, superseding simple square-footage rules.
- Electrical and envelope upgrades, such as dedicated circuits and insulation, are critical prep steps that can significantly impact system performance and cost.
- Units with low-ambient heating capabilities and proper zoning features are most suitable for garage use, especially in cold climates or spaces with distinct zones.
Table of Contents
- How Do You Size a Mini Split for a Garage?
- What Insulation Work Should You Do Before Installing a Mini Split?
- What Does a Professional Mini Split Installation Include?
- Which Mini Split Features Matter Most for a Garage?
- Common Mistakes and a Simple Maintenance Routine
- Seasonal Energy Efficiency in Garages
- Which Mini Split Brands Suit Garage Use Best?
- Can a Mini Split Control Garage Humidity?
- Zoning and Thermostat Options for Garage Systems
- How Garage Layout and Use Affect Mini Split Performance
- E320air's Perspective: What Installers See On Site
- Get a Garage Mini Split Installed Right, the First Time
- Sources
- FAQ
How Do You Size a Mini Split for a Garage?
Standard sizing charts fail garages almost every time. The old 20 BTU per square foot rule was built for insulated interior rooms with drywall, batt insulation, and no eight-foot steel door leaking air on one whole wall. A garage doesn't behave like that. Concrete slabs pull heat out of the room in winter, uninsulated doors act like a hole in the wall, and the sheer volume of a two-story ceiling or an attached workshop throws off any flat square-footage math.
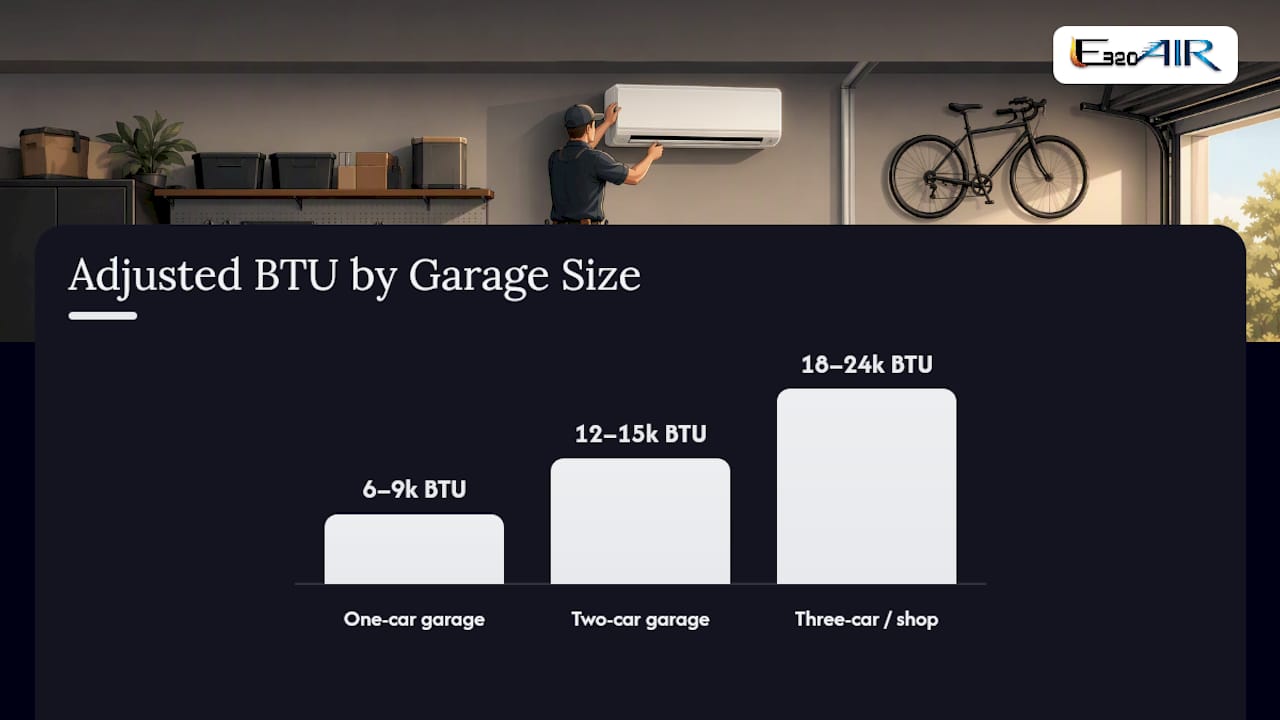
That's why specialist sizing guides recommend adding 30% to 50% more capacity than a standard room of the same square footage would need. A 400-square-foot garage that would call for 8,000 BTU as a bedroom often needs 11,000 to 12,000 BTU once you account for the door, the slab, and typical air leakage.
Here's how that plays out across common garage sizes:
- One-car garage (roughly 200 to 250 square feet): Base calculation lands around 4,000 to 5,000 BTU. Adjusted for garage conditions, plan on 6,000 to 9,000 BTU.
- Two-car garage (roughly 400 to 500 square feet): Base calculation runs 8,000 to 10,000 BTU. Adjusted, that becomes 12,000 to 15,000 BTU, which is why 12k units are the most commonly installed size for this footprint.
- Three-car garage or garage with a shop area (600 to 800 square feet): Base math suggests 12,000 to 16,000 BTU. After adjustment, most homes need 18,000 to 24,000 BTU, especially if the space includes a workbench, welding equipment, or a lift.
Ceiling height and sun exposure shift those numbers further. A garage with a 10 or 12-foot ceiling has more air volume to condition than a standard 8-foot space, and a garage-specific sizing guide suggests adding another 10% to 15% for anything above standard height. South and west-facing garage doors that catch direct afternoon sun in summer push cooling load up too, particularly in hot, dry climates.
Once you've landed on an adjusted BTU figure, round up to the nearest commonly stocked size, usually 12k, 18k, or 24k BTU, rather than trying to special-order something in between. That rounding decision, along with anything unusual about your garage's shape or use, is exactly what a Manual J load calculation settles. Manufacturers and contractors alike treat that calculation as the final word over any square-foot rule, and for good reason. It accounts for your actual insulation levels, window and door area, climate zone, and occupancy pattern in a way no chart can. If your math and the Manual J disagree, trust the calculation.
What Insulation Work Should You Do Before Installing a Mini Split?
Insulating the garage door and ceiling first almost always beats buying a bigger unit. A mini split can only work as well as the envelope around it lets it, and in most garages the door is the single biggest source of heat loss and gain.
Garage conversion guides recommend tackling upgrades in this order:
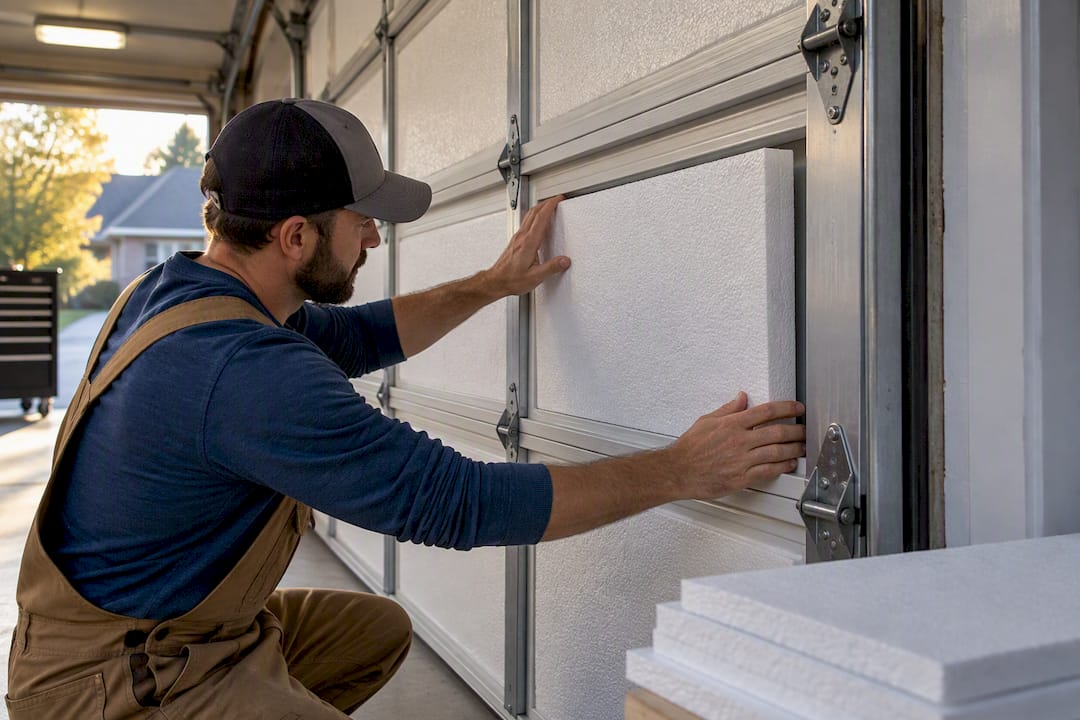
- Insulate the garage door first. Foam board kits designed for sectional doors run $50 to $150 in materials and bring an uninsulated steel door from roughly R-2 up to R-8 or higher. This is the highest-return fix in the entire project.
- Address the ceiling next. If there's living space or an attic above, blown-in or batt insulation to R-38 or better keeps conditioned air from escaping upward, which matters even more in a garage with a high ceiling.
- Seal walls and penetrations. Weatherstrip the door frame, caulk around plumbing and electrical penetrations, and add batt insulation to stud walls if they're currently bare, targeting R-13 to R-21 depending on your climate zone.
- Check the man door and windows. A cheap exterior door swap or new weatherstripping around windows closes gaps that undercut everything else you've done.
Most of this is DIY-friendly for a weekend, with door insulation kits and weatherstripping being the easiest wins. Ceiling and wall insulation get more involved once you're dealing with attic access or electrical wiring behind the walls, and that's where hiring a contractor starts to make sense.
Pro Tip: Spending $300 on door and ceiling insulation before you buy equipment can sometimes let you install a 12k unit instead of an 18k unit, saving more on equipment cost than the insulation itself cost. Insulate first, size second.
If you're planning to use the garage as a home gym, office, or year-round workshop rather than occasional storage, it may be worth treating this as a full conversion to conditioned space rather than a partial upgrade. At that point, wall and ceiling assemblies, vapor barriers, and even flooring come into play, and that's a bigger scope than most weekend projects. It's still worth handling insulation before finalizing your unit size either way.
What Does a Professional Mini Split Installation Include?
A proper garage installation follows a specific sequence, and skipping steps is where most problems start. Here's what a qualified installer actually does, in order:
- Site evaluation and load calculation. This confirms your BTU target and identifies any envelope issues worth fixing before equipment goes in.
- Indoor unit placement. Wall-mounted units go high on an exterior-facing wall away from direct sun and workbenches; ceiling cassettes suit garages with lower wall clearance or overhead storage.
- Outdoor unit siting. The condenser needs clearance from the wall, protection from falling debris, and a stable, level pad, typically placed on the side or rear of the structure.
- Line set and condensate drain routing. Refrigerant lines and drain lines run through a small wall penetration, insulated and sealed against the elements.
- Electrical circuit installation. Most 12k and 18k units run on a dedicated 115V or 230V circuit; 24k and larger systems almost always need a dedicated 230V line.
- Commissioning and testing. The installer evacuates the line set, charges the system, and verifies airflow and temperature differential before calling the job done.
Permits and electrical work are where DIY installs run into trouble. Most jurisdictions require an electrical permit for a new dedicated circuit, and if your garage's existing panel is already near capacity, you may need a subpanel or service upgrade before installation can proceed. An electrician is mandatory anytime you're adding a 230V circuit or your panel doesn't have open slots.
On cost, expect a wide range depending on unit size and how much electrical and insulation work is involved. Total installed cost for a garage mini split typically runs $2,000 to $7,000, with that range reflecting real variation rather than a single fixed number:
- Equipment: $600 to $2,500, depending on capacity and brand.
- Installation labor: $500 to $1,500 for a straightforward single-zone setup.
- Electrical work: $300 to $1,500 if a new dedicated circuit or panel work is needed.
- Insulation and envelope prep: $100 to $1,000, depending on whether you're doing a door kit or full ceiling insulation.
A 12k BTU single-zone system with minimal electrical work often lands near the bottom of that range. An 18k or 24k system requiring a new 230V circuit and door insulation pushes toward the top.
Which Mini Split Features Matter Most for a Garage?
Not every feature that matters in a bedroom matters the same way in a garage, and some matter more.
Efficiency ratings are worth checking, but SEER2 and HSPF2 numbers only tell part of the story for garage use. HSPF2 measures heating efficiency and matters more than usual if your garage sits somewhere with real winters, since a unit with weak low-ambient performance will struggle once outdoor temperatures drop below freezing. Look specifically for a "low-ambient" or "hyper-heat" rated system if you're heating a garage in a cold climate. These units maintain output down to negative temperatures, where standard heat pumps taper off hard.
Inverter-driven compressors are close to standard on modern mini splits now, and they matter for garages specifically because they modulate output instead of cycling on and off. A garage door opening and closing throughout the day creates load swings that an inverter system handles far more smoothly than an older single-speed unit.
A few practical features worth prioritizing:
- Noise rating, especially if the garage sits under or near a bedroom; look for indoor units rated below 40 decibels on low speed.
- Indoor unit style: wall-mounted units suit most garages, cassette units work well when wall space is tight or ceiling storage is a priority, and floor-mounted units make sense in workshops where wall-mounted equipment risks impact damage.
- Filtration: dusty workshop garages benefit from washable mesh filters rated for higher particulate loads, since standard filters clog fast in a space with sawdust or metal grinding.
- Electrical compatibility: smaller 12k units often run on a standard 115V circuit, while larger 18k and 24k systems typically require a dedicated 230V circuit, which affects both installation complexity and cost.
If your garage doubles as a workshop with metalworking or heavy sanding, durability and filtration deserve as much weight as raw capacity.
Common Mistakes and a Simple Maintenance Routine
The mistakes that shorten a mini split's life or ruin its performance are almost always avoidable:
- Undersizing the unit. A system sized for interior-room math instead of adjusted garage load will run constantly and never quite reach setpoint, which strains the compressor and wastes energy.
- Skipping door insulation. Installing a properly sized unit against an uninsulated door means fighting a losing battle every time someone opens it.
- Poor indoor unit placement. Mounting the head directly above a workbench or in a corner with no airflow path leaves parts of the garage never getting conditioned air.
- Ignoring outdoor unit clearance. Boxing in the condenser or letting debris pile against it restricts airflow and can trip the system into a fault state.
Maintenance is simple but easy to neglect. Clean or rinse the indoor filter every one to two months in a dusty garage, more often than the every-three-month schedule typical for a bedroom unit. Keep at least two feet of clearance around the outdoor unit and hose off accumulated dust or leaves a few times a year. Schedule a professional service visit annually to check refrigerant charge and electrical connections.
Watch for warning signs: ice forming on the outdoor unit outside of a normal defrost cycle, the indoor unit running constantly without reaching setpoint, or unusual clicking or grinding noises. Any of those points to a technician visit rather than a wait-and-see approach.
Pro Tip: Inverter-driven mini splits handle slight oversizing well because they modulate down at partial load. Installers often round up to the next standard size rather than down, since an undersized unit that runs nonstop wears out faster than one that's occasionally oversized for the space.
Seasonal Energy Efficiency in Garages
Garage energy use swings harder between seasons than a typical room in the house, mostly because of that door. In summer, a west-facing garage door absorbing direct sun for hours can push indoor temperatures well above outdoor ambient, forcing the mini split's cooling side to work overtime during peak afternoon hours. In winter, the same door radiates heat straight back outside overnight, meaning the heating side often runs hardest in the early morning rather than evenly throughout the day.
This is where insulation quality changes your actual operating costs more than any efficiency spec on the unit itself. A well-sealed garage with door insulation and a properly adjusted BTU size will cycle efficiently in both directions. An uninsulated one forces the compressor to run at higher output for longer stretches regardless of how good the SEER2 rating looks on paper.
Usage pattern matters too. A garage used daily as a gym or office benefits from keeping the mini split on a moderate setback rather than fully off between uses, since ductless systems recover temperature faster from a small gap than a large one. A garage used only occasionally on weekends can run a deeper setback without much efficiency penalty, since there's no comfort expectation between visits.
Which Mini Split Brands Suit Garage Use Best?
Garage-specific requirements narrow the field more than most buyers expect. You're generally looking for a manufacturer with strong low-ambient heating performance, a reputation for compressor durability under load swings, and readily available parts and service in your area, since a garage unit often runs harder than a comparable bedroom system.
Major manufacturers across the ductless category, including brands like Bryant, offer garage-specific mini split lines built around exactly this use case: independent, ductless comfort control for spaces that don't connect easily to central ductwork. Rather than chasing a single "best" model number, focus on matching the capacity ladder discussed earlier (12k, 18k, 24k BTU) to a manufacturer that backs its equipment with a solid warranty and has technicians in your area who can service it. Availability of parts and qualified service technicians matters more over a 10 to 15-year equipment lifespan than a half-point difference in efficiency rating between two comparable models.
Can a Mini Split Control Garage Humidity?
Most mini splits handle dehumidification as a side effect of cooling rather than a dedicated function, and that distinction matters in a garage more than in a house. When the compressor runs in cooling mode, it pulls moisture out of the air as a natural part of the refrigeration cycle. Garages tend to run damper than living spaces, especially ones with concrete slabs, parked wet vehicles, or minimal ventilation, so that side effect carries real weight.
Some mid-range and higher-end mini splits include a standalone "dry" or dehumidify mode that runs the compressor at lower speed specifically to strip moisture without dropping the temperature much. That mode is worth having if your garage sees seasonal humidity swings, stores tools or equipment prone to rust, or connects to a laundry area. For garages with persistent moisture problems from grade issues or poor drainage, a mini split helps but won't solve a structural water problem. That's a job for grading and drainage work before equipment even enters the picture.
Zoning and Thermostat Options for Garage Systems
Most garage installations run as a single zone, one indoor unit tied to one outdoor condenser, controlled by a wall-mounted or handheld remote. That's sufficient for the vast majority of one and two-car garages, where the whole space heats and cools as one area anyway.
Larger garages, or ones split into distinct zones like a workshop on one side and a gym or office on the other, can benefit from a multi-zone system running two indoor heads off a single outdoor unit. This lets you condition only the zone in use rather than the whole footprint, which saves real energy in garages that see uneven use throughout the day.
Smart thermostat integration is increasingly common on mid-range and higher-end units, letting you schedule setbacks around when the garage typically sees activity, or adjust remotely before you head out to the workshop. If your garage sits on a different usage schedule than the rest of the house, a separate schedule for that zone alone tends to save more than trying to sync it with your main HVAC system's programming.
How Garage Layout and Use Affect Mini Split Performance
Two garages with identical square footage can need very different equipment depending on how they're actually used. A garage that's mostly closed storage with the door opened twice a day holds conditioned air well and performs close to the sizing math predicts. A garage functioning as an active workshop with the door open for hours at a stretch loses conditioned air constantly, and no amount of extra capacity fully compensates for that.
Ceiling height and layout complexity matter beyond raw volume. An open garage with a simple rectangular footprint conditions evenly from a single wall-mounted unit. An L-shaped garage, or one with a loft or storage mezzanine, creates dead zones where airflow struggles to reach, which is where a ceiling cassette or a second indoor head earns its cost.
Heat-generating equipment inside the garage changes the math too. A garage with a running refrigerator, power tools, or a home gym setup with people exercising adds real heat load that a straight square-footage calculation never accounts for. If your garage functions as more than storage, mention that specifically when a contractor runs your load calculation.
E320air's Perspective: What Installers See On Site
Most garage calls start with a homeowner who sized their own unit off a chart and wonders why it's not keeping up. In the field, the door and the panel are usually the real story. If your service panel is already full or your garage door has no insulation, budget for that work upfront rather than as a surprise mid-project. Real installs, not chart math, are what actually tell you what a garage needs.
— Edward
Get a Garage Mini Split Installed Right, the First Time
Experienced technicians perform load calculations before quoting a number, work across major brands, and offer flexible payment options including financing so a $2,000 to $7,000 project doesn't have to hit all at once.

A garage installation done right covers site evaluation, electrical assessment, permitting where required, and commissioning, not just mounting a unit on the wall and hoping the math holds up. Residential HVAC installation can be handled from the first site visit through final testing, with technicians available around the clock, including weekends and holidays, if something needs attention after the fact. If your garage already has a system that's underperforming, heater repair service can diagnose whether the problem is the equipment or the envelope around it. Curious what past garage and workshop installs actually looked like on-site? The Problem Solving Gallery shows real project examples. Ready to get a number instead of a guess? Request a site visit through E320air's homepage and get a load calculation scheduled before you buy anything.
Sources
For readers who want to verify the sizing and cost figures in this guide, a few sources are worth bookmarking. Bryant's garage mini split page covers manufacturer-level guidance on ductless benefits and typical installed cost ranges. The garage conversion guide from Houseyog walks through insulation priority and R-value targets in more depth. For sizing specifically, Filterbuy's garage mini split guide and the Mini Split Sizer garage sizing guide both offer adjustment tables that go well beyond the basic square-footage rule.
- Ductless Mini Split For Garage | Garage AC | Bryant
- Garage Conversion with Mini Split: Cost, Sizing & Installation Guide (2026)
- Best Mini Split for a Garage (2026): Top Picks for Dusty Spaces
- Garage Mini Split Sizing Guide: Why Standard Charts Fail (2026)
FAQ
Is a Mini Split a Good Idea for a Garage?
Yes, for most garages used as a workshop, gym, or hobby space, a ductless mini split is a strong choice because it heats and cools independently without extending your home's ductwork. It works best when paired with door and ceiling insulation and sized using the 30% to 50% upsize adjustment garages typically need over standard room calculations.
How Much Does It Cost to Put a Mini Split in a Garage?
Total installed cost typically runs $2,000 to $7,000, covering equipment, labor, electrical work, and any insulation upgrades. Where you land in that range depends mainly on unit size and whether your garage needs a new dedicated electrical circuit. E320air provides project-specific estimates after a site visit rather than a flat number, since panel condition and envelope prep vary so much from garage to garage.
What Are the Disadvantages of a Mini Split?
The main drawbacks are upfront equipment and installation cost compared to a simple window unit, the need for a dedicated electrical circuit on larger systems, and reduced performance in an uninsulated space regardless of unit size. Outdoor units also require periodic clearing of debris and occasional professional service to stay efficient.
What Is the Best Mini Split System for a Garage?
There's no single best model, but the right system pairs adjusted BTU capacity (commonly 12k, 18k, or 24k for typical garage sizes) with strong low-ambient heating performance if you're in a cold climate. Manufacturers with garage-specific ductless lines, solid warranties, and accessible local service tend to hold up best over a system's 10 to 15-year lifespan.
How Do I Know What Size Mini Split My Garage Needs?
Start with a base BTU estimate for your square footage, then add 30% to 50% for typical garage conditions like an uninsulated door and concrete slab, an adjustment multiple specialist guides recommend over standard room charts. A professional Manual J load calculation is the deciding authority, since it accounts for your specific insulation, ceiling height, and sun exposure.