
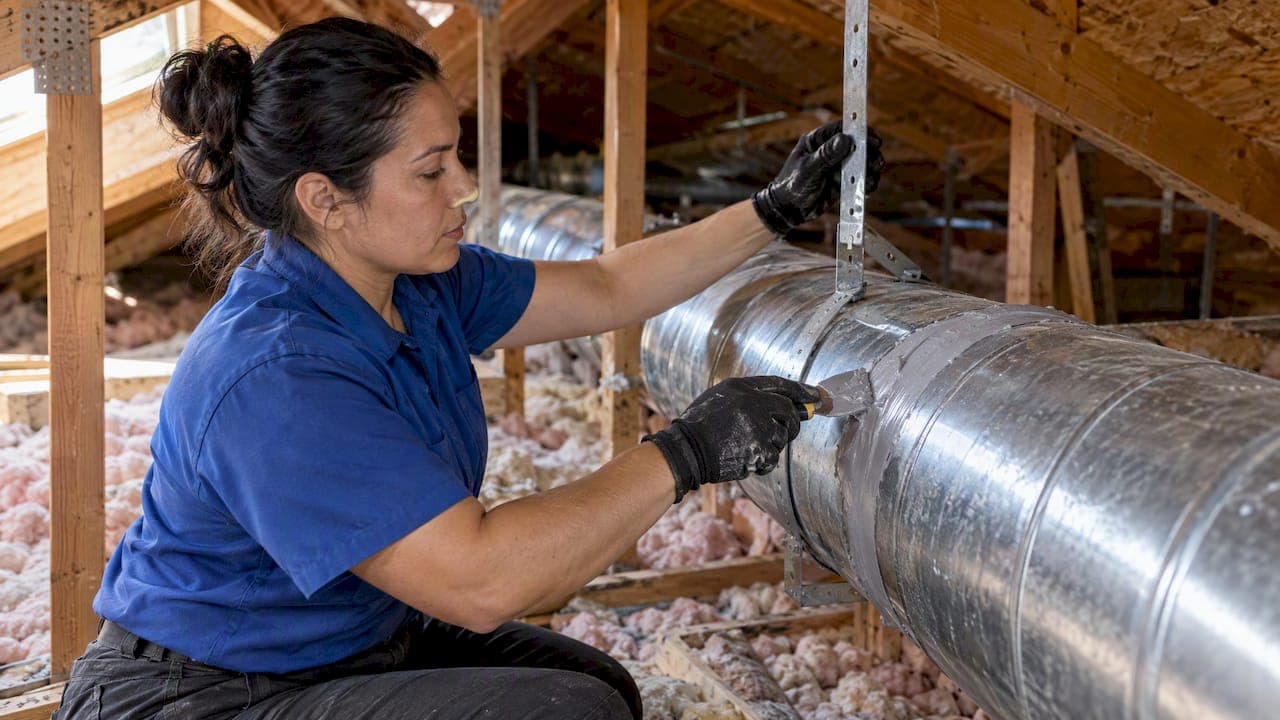
A rattling duct is most often caused by loose metal connections, an unsecured register or damper, or vibration traveling from the blower through the duct walls. Start by listening to where the sound is loudest, placing a hand on the duct near that spot while the system runs, and tightening any visible register screws. That simple test usually tells you whether you have a quick fix or a bigger problem.
TL;DR:
- Rattling from ducts often results from loose screws, unstable registers, or vibration transmission, which can typically be addressed with simple tightening and sealing methods.
- Sound type and timing, such as ticking after shutdown or continuous rattling, provide clues to whether the issue comes from thermal contraction, loose parts, or airflow restrictions.
- Proper diagnosis involves confirming the exact noise source, inspecting duct connections, and verifying hangers and supports meet standard spacing, rather than just tightening visible screws.
- Seal all seams and gaps with mesh and mastic following DOE standards, support ducts at recommended intervals, and use vibration dampers to prevent recurring noise.
- Persistent rattles that remain after securing accessible hardware often indicate airflow or sizing issues, requiring professional static-pressure and blower testing to diagnose and resolve effectively.
Table of Contents
- What causes different types of duct rattle
- How to find exactly where the noise is coming from
- DIY fixes that actually last, and where to draw the line
- Red flags that mean it's time to call a professional
- What field experience teaches about lasting duct repairs
- Can persistent duct noise affect your comfort or health?
- How seasonal temperature swings trigger duct noise
- What unresolved duct rattle costs your system over time
- Simple maintenance habits that keep ducts quiet
- Tools that make diagnosis and repair easier
- Why most duct noise advice skips the part that matters
- Getting a professional diagnosis for ductwork that won't quiet down
- FAQ
- Sources
What causes different types of duct rattle
The sound itself is a clue. A sharp pinging or ticking that happens only when the furnace shuts off usually comes from sheet metal contracting as it cools. A continuous rattle while the blower runs often points to a loose screw, a vibrating panel, or a register that isn't seated properly in its boot. An intermittent banging, sometimes called "oil canning," happens when thin sheet metal flexes in and out under pressure changes, especially in larger duct sections with flat, unsupported panels.
Airflow itself can generate noise even when every connection is tight. According to the ASHRAE Handbook chapter on noise and vibration control, the sound amplitude of aerodynamically generated noise in ducts rises with the 5th to 7th power of local airflow velocity, which means even a modest increase in duct speed can produce a noticeable jump in noise. High velocity tends to show up as a whooshing or whistling sound rather than a rattle, but it can also set thin duct walls vibrating hard enough to clatter against nearby framing.
Sound also travels. A rattle you hear in a bedroom might actually originate in a duct run two rooms away, carried along the metal and radiated out through a thinner section or a loose joint. That's why matching the sound type to a likely cause is only the first step. Confirming the actual location takes a short diagnostic routine, which we cover next.
- Pinging or ticking after shutdown: usually thermal contraction in sheet metal duct runs.
- Continuous rattle during operation: often a loose screw, panel, or poorly seated register.
- Intermittent banging or oil canning: flat sheet metal flexing under pressure swings.
- Whistling or whooshing paired with vibration: high airflow velocity or a restricted duct section.
- Rattle far from the apparent source: sound transmitted along connected duct runs.
How to find exactly where the noise is coming from
Before tightening anything, confirm where the rattle actually starts. A structured check takes less time than guessing and prevents you from "fixing" a duct section that was never the problem.
- Run the system through a full cycle and note when the noise happens: at startup, during steady operation, or right after shutdown. Each timing points to a different cause.
- With the system running, place your hand flat against accessible duct sections, plenums, and boots near registers. A buzzing or shaking feel under your palm confirms active vibration at that spot.
- Isolate individual registers by partially closing all but one and listening for a change. If the rattle fades or shifts, the open register's branch is likely involved.
- Have someone stand at the suspected duct section while you adjust airflow or tap gently nearby, so you can confirm the source without walking back and forth.
- Visually inspect accessible duct runs for loose screws, gaps at take-offs, boots pulling away from the duct wall, sagging sections, and hangers that have slipped or rusted through.
A flashlight, a basic screwdriver set, and a stepladder cover most of this inspection. Attics and crawl spaces hide a lot of the duct run, so check what you can reach safely and note anything that needs a closer look.
Pro Tip: Tape a strip of paper or a tissue near a suspected gap. If it flutters while the system runs, you've found an airflow leak worth sealing.
DIY fixes that actually last, and where to draw the line
Loose screws and shifted registers are the easiest wins. Replace stripped sheet metal screws with new self-tapping screws sized for the duct gauge, and make sure register covers sit flush in their boots rather than resting at an angle. A boot that has pulled away from the duct wall can often be reattached with new screws and a bead of mastic around the seam.
Sealing gaps correctly matters more than most homeowners expect. The U.S. Department of Energy's guidance on sealing ducts with mastic recommends fiberglass mesh tape embedded in mastic for seams and small gaps, with mechanical fasteners holding sections together before sealing. Ordinary fabric or rubber duct tape is not a durable fix. It dries out, loses adhesion, and often peels within a year or two, letting the gap reopen and the rattle return.
One widely cited figure worth remembering: the same DOE guidance specifies that flex duct should be supported at least every 4 feet, while rigid metal duct needs support no more than every 10 feet. Gaps beyond those intervals let duct sections sag and sway, which is a common hidden cause of recurring rattles after a "fix" that only addressed the loudest spot.
For vibration transmitted from the blower or furnace, rubber isolation pads under the unit and a flexible fabric connector between the blower housing and the metal duct can stop the shaking from traveling down the line. If a duct run touches a stud, joist, or another duct, a scrap of foam or rubber insulation at the contact point stops the two surfaces from clapping together.
- Tighten or replace loose screws at registers, boots, and duct seams with properly sized fasteners.
- Reseal gaps with fiberglass mesh and mastic rather than tape, matching the DOE-recommended method.
- Add or replace sagging hangers to meet standard spacing for flex and metal duct.
- Install rubber isolation pads or a flexible connector where the blower meets rigid duct.
- Avoid closing multiple registers to "quiet" airflow. Restricting too many outlets raises velocity elsewhere and can make noise worse.
Dampers are a mixed case. If a damper blade rattles because its set screw has backed out, tightening it is a reasonable DIY task. If the damper is motorized or tied into a zoning system and isn't responding correctly, that's electrical and control work better left to a technician.
Red flags that mean it's time to call a professional
Some rattles resolve with a tightened screw or a bead of mastic. Others are symptoms of a system that is working harder than it should, and tightening hardware won't fix that.
- The noise persists after you've checked and secured every accessible screw, register, and hanger.
- You notice physical damage: crushed sections, torn seams, or ducts separated at a joint you can't reach safely.
- The blower itself makes grinding, humming, or clicking sounds that suggest a motor or electrical issue rather than duct vibration.
- Registers whistle loudly or airflow feels unusually weak at multiple outlets, which can indicate high static pressure from undersized or overly restrictive ductwork.
A technician diagnosing persistent noise will typically measure static pressure across the system, inspect the blower assembly, check airflow in cubic feet per minute against the system's rated capacity, and review whether duct sizing matches the equipment. Depending on what that turns up, the fix might involve replacing or upsizing a duct section, adding a flexible transition at the blower, or professionally resealing and rebalancing the whole run. Straightforward sealing jobs can often be done in a single visit, while duct resizing or replacement takes longer and may require opening up ceilings or walls.
What field experience teaches about lasting duct repairs
Most recurring rattle calls share a pattern: someone already tried a visible fix, usually tape over a gap or a single tightened screw, and the noise came back within a season. The cases that stay quiet are the ones where every seam along a run gets mesh and mastic, not just the loudest spot, and where hangers get checked for proper spacing rather than just visual sag.
The standards behind this aren't improvised. The DOE's mastic sealing method, ASHRAE's noise and velocity guidance, and AMCA's work on air system noise all point the same direction: duct noise is a system issue tied to airflow, fastening, and support, not a cosmetic annoyance to mask. Our own notes on why ductwork matters for HVAC efficiency and comfort and on what homeowners gain from proper duct sealing go deeper into how sealing and support choices affect comfort beyond just noise.
Can persistent duct noise affect your comfort or health?
A rattle itself isn't a health hazard, but living with one for months tends to wear on people in ways that are easy to dismiss. Sleep gets interrupted by ticking or banging that starts and stops with the thermostat cycle. Concentration suffers in a home office near a noisy supply run. Stress builds from a sound you can't predict or control, especially when it happens at night.
There's a secondary concern worth naming: a rattling or whistling duct is often a sign of airflow problems, and airflow problems can affect indoor air quality. A duct leaking air at a loose seam pulls unconditioned, sometimes dusty air from attics or crawl spaces into the supply stream, which can aggravate allergies or respiratory sensitivity for some residents. Sealing that same gap to quiet the rattle often improves air quality as a side effect.
None of this requires a diagnosis to act on. If a noise is disrupting sleep or focus in a particular room, that's reason enough to run through the diagnostic steps above and address it, independent of any other symptom.
How seasonal temperature swings trigger duct noise
Sheet metal duct expands when air moves through it hot and contracts as it cools, and that shift in dimension is a common source of the clicking or popping many homeowners notice right after the heat shuts off. This Old House notes that this thermal expansion and contraction is one of the most common explanations for post-cycle clicks, particularly in long, straight metal runs.
Winter heating season tends to produce more of these ticking sounds because the temperature swing between a cold duct and hot supply air is larger than it is in cooling mode. Summer cooling can bring its own noise pattern, often tied to airflow rather than temperature, especially if the system runs longer cycles in peak heat and pushes more air through the same ductwork.
Ducts in unconditioned spaces, attics, garages, or crawl spaces, see the widest temperature extremes and are the most likely spots for seasonal rattle to show up or worsen. Insulating these runs reduces the temperature differential the metal experiences each cycle, which can lessen the expansion and contraction that drives the clicking. If a rattle seems to appear only in winter or only in peak summer, that seasonal pattern itself is a useful diagnostic clue pointing toward thermal movement rather than a loose screw.
What unresolved duct rattle costs your system over time
A rattle that gets ignored rarely stays a cosmetic issue. The same loose connection or gap causing the noise is usually also leaking conditioned air, and that leak forces the system to run longer to reach the same temperature. Over time, that extra runtime adds wear to the blower motor and other components that weren't designed to work overtime for air that's escaping into a wall cavity or attic.
Vibration left unaddressed tends to loosen nearby connections too. A single rattling joint can work screws looser at adjoining sections over months of operation, turning one small fix into a more involved repair if it sits unresolved through a full heating or cooling season.
There's also a comfort cost that compounds the efficiency one. Leaking or poorly sealed ducts often mean uneven temperatures between rooms, since the air meant for a far bedroom is escaping before it arrives. Homeowners sometimes respond by closing registers in rooms that feel too warm or too cool, which raises velocity elsewhere in the system and can introduce the kind of aerodynamic noise described earlier, compounding the original problem instead of solving it.
Addressing a rattle early, with proper mastic sealing and secure hangers, keeps these knock-on effects from accumulating and protects the efficiency gains a well-sealed duct system is supposed to deliver.

Simple maintenance habits that keep ducts quiet
A few routine checks catch loose hardware and sagging supports before they turn into a rattle you can hear from another room.
- Inspect accessible duct connections, registers, and boots once per season for loose screws or gaps.
- Replace furnace filters on schedule. A clogged filter restricts airflow, raises pressure in the system, and can both stress ducts and make them noisier.
- Check hanger spacing and condition in attics or crawl spaces where ducts are exposed, looking for rust, sag, or slipped straps.
- Reseal any duct tape repairs you find from a previous owner or earlier fix, replacing them with mesh and mastic.
- Keep an eye on registers after any home renovation, since nearby construction vibration can loosen screws over time.
Pairing this with a professional duct inspection every few years, especially before a major heating or cooling season, catches sagging sections and loosening seams that aren't visible from inside the living space.
Tools that make diagnosis and repair easier
A basic kit covers most of what a homeowner needs to run the diagnostic steps and attempt the repairs described above. A flashlight and a stepladder get you into attics and above drop ceilings where duct runs are visible. A screwdriver set with both Phillips and flathead bits, plus a supply of properly sized self-tapping sheet metal screws, handles loose connections.
For sealing, fiberglass mesh tape and mastic (sold together or separately at HVAC supply stores) replace the ordinary duct tape most people reach for first. A basic caulking gun applies mastic cleanly along seams. Rubber isolation pads, sold for HVAC equipment, help with blower vibration, and a roll of UL-listed foil tape is the right choice for any spot where mastic isn't practical, since it's rated for lasting duct use unlike standard cloth tape.
A simple thermometer or a tissue strip can help confirm airflow at a suspected leak, as mentioned earlier in the diagnostic routine. Measuring actual static pressure requires a manometer and some training to interpret correctly, which is where professional equipment and experience take over from homeowner tools.
Why most duct noise advice skips the part that matters
Most guides treat duct rattle as a tightening problem: find the loose screw, snug it down, move on. That advice isn't wrong, but it treats the symptom as the whole story. The screws usually loosen for a reason, often vibration from an oversized blower pushing air through undersized ductwork, or thermal cycling that nothing short of insulation will calm down. Tightening without addressing that root cause buys a quiet month, maybe a season, before the rattle returns somewhere else on the same run.
The homeowners who get lasting results are the ones willing to seal properly the first time, with mesh and mastic instead of tape, and to check hanger spacing instead of just the loudest joint. That takes more effort upfront than a quick fix, but it's the difference between solving the problem and deferring it. If you've gone through the full diagnostic routine and secured every accessible connection and the noise persists, that's a reliable signal the issue lives in airflow or equipment sizing, not hardware, and no amount of additional tightening will fix it.
— Edward
Getting a professional diagnosis for ductwork that won't quiet down
When a rattle survives tightened screws, resealed gaps, and new hangers, the next step is a proper static-pressure and blower inspection rather than another round of guesswork. We offer diagnostic visits checking airflow, blower condition, and duct sizing to find what a visual inspection can't catch.

A typical service visit for persistent duct noise includes:
- A static-pressure test across the system to check for airflow restrictions.
- A blower inspection for wear, imbalance, or mounting issues that transmit vibration into the ductwork.
- A review of duct sizing and take-off connections against the system's rated airflow.
- Sealing and support repairs using mastic and properly spaced hangers where gaps or sag are found.
If the diagnosis points to a duct section that needs replacing or resizing, our HVAC installation service covers that scope of work, and persistent noise tied to the furnace or blower itself falls under heater repair. For an initial visit or a broader look at residential HVAC service and system upgrades, that's the place to start. You can also browse our problem-solving gallery for examples of completed repair work before booking a visit.
FAQ
Is it normal for ductwork to make noise?
Some sound is normal, especially soft ticking or popping right after the furnace shuts off, which usually comes from sheet metal cooling and contracting. Continuous rattling, banging, or whistling during operation is not typical and points to a loose connection, airflow problem, or vibration issue worth investigating.
How can you tell if your ductwork has a problem?
Persistent or worsening noise, uneven temperatures between rooms, and visible gaps or sagging sections during a visual inspection are the clearest signs. Weak airflow at registers alongside noise often indicates a leak or restriction somewhere in the duct run.
What is the 2-foot rule for ductwork?
Duct design guidance addresses fitting placement and transitions near equipment, but the DOE's published duct sealing guidance speaks specifically to support spacing rather than a universal "2-foot rule," specifying flex duct support at least every 4 feet and rigid metal duct every 10 feet. If you've heard a different spacing rule cited locally, check it against your specific duct material and a licensed installer's guidance.
How can I fix noisy ductwork myself?
Start by tightening loose screws at registers and boots, then seal any gaps using fiberglass mesh and mastic rather than ordinary duct tape, following the DOE's recommended method. Add or replace sagging hangers and isolate the blower with rubber pads if vibration seems to originate there.
Can room-level changes reduce how much duct noise I hear?
Sealing and securing the duct itself fixes the source, but interior changes can reduce how much noise reaches living spaces, including noise-reducing door options for rooms near noisy duct runs. These treat the symptom rather than the cause, so they work best alongside, not instead of, proper duct repair.
Sources
- CHAPTER 49. NOISE AND VIBRATION CONTROL — ASHRAE Handbook
- Seal ducts with mastic — U.S. Department of Energy guidance
- Understanding & reducing air system noise — AMCA presentation
- How to quiet noisy ducts — This Old House