TL;DR:
- Preventing HVAC leaks involves regular inspection and maintenance of ductwork, refrigerant lines, and condensate systems to avoid higher energy costs and costly repairs. Early detection through visual cues and proper tools can prevent small issues from escalating, while using approved sealing materials and professional service ensures long-lasting repairs. Consistent homeowner vigilance and professional checkups are key to maintaining an efficient, leak-free HVAC system.
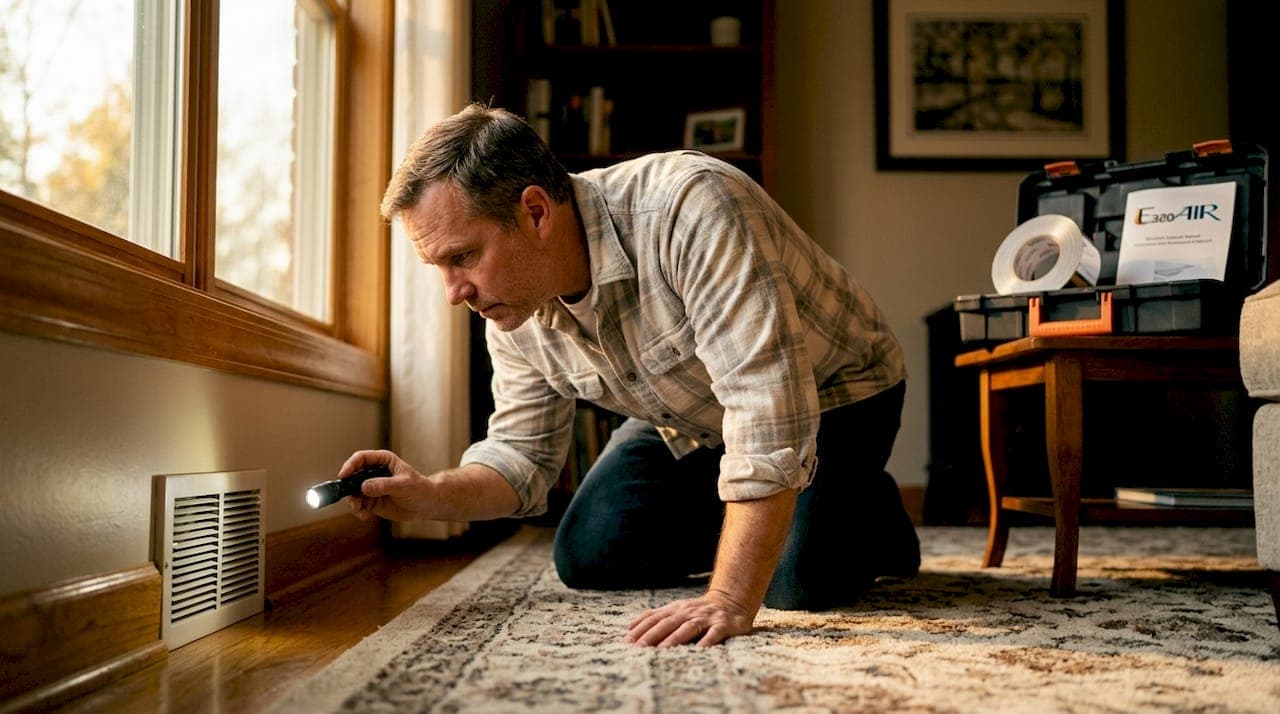
Preventing HVAC leaks is defined as the practice of stopping conditioned air, refrigerant, or water from escaping your system before those losses drive up your energy bills and repair costs. A typical home loses 20–30% of conditioned air through duct leaks alone. That figure means your system works harder, your bills climb higher, and your equipment wears out faster. The good news is that most leaks are preventable with the right tools, materials, and maintenance habits. This guide covers how to prevent HVAC leaks across ductwork, refrigerant lines, and condensate systems, with specific steps for homeowners and property managers.
How to prevent HVAC leaks: spot the warning signs first
Catching a leak early costs far less than repairing the damage it causes. Knowing what to look for is the first step in any solid leak prevention plan.
Visual and sensory clues to watch for:
- Dust rings or streaks around supply registers and return grilles
- Hissing or whistling sounds near the air handler or along duct runs
- Water pooling around the indoor unit or in the utility closet
- Rooms that never reach the set temperature despite normal thermostat settings
- Ice forming on the refrigerant lines or evaporator coil
Return duct leaks pull unconditioned air directly into the system, which degrades indoor air quality and forces the equipment to compensate. Dust accumulation around return grilles is one of the clearest visual signals that a return duct is pulling air from an unintended space.
Recommended detection tools
| Tool | Best Use | Notes |
|---|---|---|
| Electronic refrigerant detector | Locating refrigerant leaks at joints and valves | Move probe at 25–50 mm/s for accuracy |
| UV dye kit | Confirming refrigerant leak location | Requires UV light and safety glasses |
| Soap bubble solution | Quick check on accessible fittings | Low cost, works on pressurized lines |
| Calibrated torque wrench | Verifying flare nut tightness | Prevents over-torquing during inspection |
| UL 181 foil tape | Sealing accessible duct leaks | Do not use standard silver duct tape |

Pro Tip: When using an electronic detector, move the probe slowly at 25–50 mm/s near joints without touching the surface. Rushing past a joint is the most common reason technicians miss trace leaks.
What maintenance practices prevent refrigerant leaks?
Refrigerant leaks are the most expensive type of HVAC leak to repair, and most of them start at the installation stage or develop slowly from vibration and corrosion.
Cross-threading and over-torquing are the leading causes of refrigerant leaks within the first year of operation. That means a single installation shortcut can produce a leak before your first full cooling season ends. A calibrated torque wrench is not optional equipment. It is the difference between a tight, leak-free flare connection and a slow drip that costs hundreds of dollars to diagnose and repair.
Vibration is the second major culprit. Copper refrigerant lines that contact cabinet walls, other pipes, or structural members will eventually rub through. Isolating those contact points with foam insulation or rubber grommets stops the wear before it starts.
Key installation and inspection steps to follow:
- Clean all flare surfaces with isopropyl alcohol before assembly to remove oils and debris.
- Blow out new line sets with dry nitrogen to clear any moisture or particulate.
- Start every flare nut by hand to confirm threads are aligned before applying torque.
- Use a calibrated torque wrench set to manufacturer specifications, not feel.
- Inspect all copper lines for contact points with cabinets or other surfaces and add isolation where needed.
- Check service valve caps and O-rings at every inspection visit.
Professional maintenance twice a year, in spring and fall, gives a trained technician the chance to catch refrigerant loss, corrosion at fittings, and coil degradation before any of those issues become full repairs. Scheduling those visits around seasonal changeovers also means your system is checked right before it faces its heaviest workload.
Pro Tip: Service valve caps with worn or missing rubber O-rings are the top source of small, persistent refrigerant leaks. Check and replace O-rings every year. A tight cap with a fresh O-ring often resolves a nuisance leak without any further work.
Under EPA Section 608, simply topping off a leaking system is illegal. Any system losing more than 35% of its refrigerant charge annually must be repaired. That regulation exists for good reason. Refrigerants are potent greenhouse gases, and a slow leak is both an environmental problem and a sign that your system is running on a compromised charge. You can learn more about how refrigerants behave in residential systems in this overview of refrigerants in HVAC for Southern California homeowners.
How do you seal HVAC ductwork leaks effectively?
Duct sealing is one of the highest-return maintenance tasks a homeowner or property manager can perform. The materials you choose determine whether the repair lasts one season or one decade.

Silver duct tape fails quickly because its adhesive degrades under heat cycling. UL 181-rated foil tape and mastic sealants are the code-compliant alternatives that hold up long-term. Mastic is a paste-like compound that you brush onto joints and seams. It stays flexible as ducts expand and contract, which is exactly what silver tape cannot do.
Duct sealing options compared
| Method | Best For | Durability | DIY Friendly |
|---|---|---|---|
| UL 181 foil tape | Accessible straight seams | 10+ years | Yes |
| Mastic sealant | Joints, elbows, and connections | 15+ years | Yes, with brush |
| Aeroseal technology | Hidden or in-wall ductwork | 10+ years | No, professional only |
| Standard silver tape | Nothing (avoid entirely) | 1–3 years | N/A |
Aeroseal is an aerosol-based duct sealing technology where pressurized sealant particles are injected into the duct system and bond to leak edges from the inside. It is the only practical solution for ducts buried in walls, ceilings, or crawlspaces where physical access is impossible.
Common duct leak locations to check yourself:
- Connections where ducts meet supply registers and return grilles
- Joints at the air handler plenum (the large box directly attached to the unit)
- Elbows and transitions in accessible attic or basement runs
- Any section of duct that was recently disturbed by construction or pest activity
Understanding why ductwork matters for overall system efficiency helps put these repairs in context. A sealed duct system delivers conditioned air where it belongs instead of losing it to unconditioned spaces like attics or crawlspaces.
What stops AC water leaks and clogged drain lines?
Water leaks from an AC system almost always trace back to one of two causes: a clogged condensate drain line or a frozen evaporator coil. Both are preventable with routine homeowner attention.
Regular air filter replacement prevents the airflow restriction that causes evaporator coils to freeze. A frozen coil melts when the system cycles off, producing more water than the drain pan can handle. Replacing your filter every 30–90 days depending on household conditions is the single easiest step you can take to prevent AC water leaks.
Routine tasks that keep condensate systems clear:
- Inspect the condensate drain pan monthly during cooling season for standing water or algae growth.
- Flush the drain line with a diluted bleach solution (one part bleach to 16 parts water) every three months to prevent algae buildup.
- Keep the area around the indoor unit clear of stored items that could block airflow or trap moisture.
- Check that the drain line exits properly and is not kinked, crushed, or blocked at the outdoor termination point.
- Listen for gurgling sounds near the air handler, which often indicate a partial drain line blockage before overflow occurs.
Property managers overseeing multiple units should add drain line checks to their seasonal maintenance checklist. A single overflow event can cause ceiling or drywall damage that costs far more to repair than a routine flush. For a broader look at HVAC mold risk in managed properties, the connection between moisture control and air quality is worth understanding before a problem develops.
Pro Tip: If your AC unit has a secondary drain pan, check it every time you change the filter. Water in the secondary pan means the primary drain is already blocked. That is your signal to flush the line before overflow damage occurs.
Key takeaways
Preventing HVAC leaks requires consistent maintenance across three systems: ductwork, refrigerant lines, and condensate drainage.
| Point | Details |
|---|---|
| Seal ducts with rated materials | Use UL 181 foil tape or mastic sealant, never standard silver tape, for lasting repairs. |
| Use calibrated torque wrenches | Proper torque on flare fittings prevents the cross-threading that causes first-year refrigerant leaks. |
| Schedule twice-yearly inspections | Spring and fall professional tune-ups catch refrigerant loss and corrosion before they become major repairs. |
| Replace filters regularly | Clean filters prevent coil freezing, which is the leading cause of AC water leaks. |
| Isolate vibrating copper lines | Foam or rubber isolation at contact points stops rub-through leaks before they develop. |
What i've learned after years of HVAC leak calls
Most homeowners call us after a leak has already caused damage. That pattern is frustrating because the majority of those calls were preventable. The leaks I see most often fall into two categories: installation shortcuts and deferred maintenance. Both are avoidable.
The one habit that separates low-repair-cost homeowners from high-repair-cost ones is a twice-yearly walkthrough of their system. Not a full inspection, just a visual check. Look at the drain pan. Feel the refrigerant lines for frost. Check the duct connections you can see. That 10-minute habit catches problems when they are still cheap to fix.
I also want to push back on the idea that DIY duct tape repairs are "good enough for now." They are not. Standard silver tape fails within a season or two, and by the time you notice the problem again, you have been losing conditioned air the entire time. The seasonal maintenance benefits of getting this right the first time are real and measurable on your utility bill.
Refrigerant line protection is the area where I see the most avoidable damage. Lines that run along exterior walls or through tight spaces get bumped, kinked, and abraded over years. A few dollars of foam insulation and a couple of rubber grommets at contact points will outlast any repair bill by a wide margin. Protect the lines when the system is installed and you will rarely think about them again.
— Edward
Let E320air handle the hard part
Leak prevention is straightforward when you know what to look for. When the problem is already inside a wall, buried in a crawlspace, or showing up as an unexplained spike in your energy bill, you need a professional with the right equipment.

E320air provides full leak detection, duct sealing, refrigerant line inspection, and HVAC installation services for homeowners and property managers across the area. Our technicians use calibrated electronic detectors, Aeroseal technology for hidden duct systems, and manufacturer-specified torque procedures on every refrigerant connection. If you want a system that runs efficiently and stays leak-free, schedule a service visit with E320air and get ahead of the problem before it becomes an expensive repair.
FAQ
How often should i inspect my HVAC system for leaks?
A visual inspection every season is a good baseline for homeowners. Professional inspections twice a year, in spring and fall, are the standard recommendation for catching refrigerant loss and duct degradation early.
What is the best tape for sealing HVAC duct leaks?
UL 181-rated foil tape is the correct choice for accessible duct seams. Standard silver duct tape degrades quickly under heat cycling and is not a reliable long-term fix.
Can i detect a refrigerant leak myself?
You can use a soap bubble solution on accessible fittings or purchase an electronic refrigerant detector for a more thorough check. For a confirmed diagnosis and legal repair, a licensed HVAC technician is required.
Why does my AC unit leak water?
AC water leaks are most commonly caused by a clogged condensate drain line or a frozen evaporator coil. Replacing your air filter regularly is the most direct way to prevent coil freezing and the water overflow that follows.
Is it legal to just add refrigerant to a leaking system?
No. Under EPA Section 608, topping off a leaking system without repairing the leak is illegal. The leak must be located and repaired before the system is recharged.