

Insulation and air sealing change how much heating and cooling capacity your home actually needs, often by a full ton or more on a typical system. The correct way to find that number is a Manual J load calculation, not a square-foot rule of thumb. Start by gathering your home's insulation levels, window details, and air-leakage information, then either run that data through a vetted calculator or hire a contractor to produce a full Manual J report before anyone quotes equipment.
TL;DR:
- Proper load calculation using Manual J considers room-by-room data and actual insulation, significantly reducing the risk of oversizing by 50 to 100 percent.
- Upgrading insulation and sealing envelopes can lower cooling loads by up to a ton or more, potentially saving thousands on system size and cost.
- Accurate results depend on detailed inputs, including climate zone, window properties, duct location, and infiltration rates, preferably verified by a blower-door test.
- Rule-of-thumb sizing based solely on square footage often leads to oversized systems, causing short cycling, humidity issues, and higher energy bills.
- Professional assessment ensures correct equipment matching with Manual S and the right duct sealing, avoiding common pitfalls that compromise comfort and efficiency.
Table of Contents
- Insulation and HVAC Sizing Tools: What Homeowners Should Gather First
- How Insulation and Air Sealing Change Heating and Cooling Loads
- What Manual J Actually Calculates, and What a Report Should Include
- Why Rule-of-Thumb Sizing Backfires
- Ducts, Airflow, and Why "Delivered" Capacity Isn't Nameplate Capacity
- Matching Equipment to the Load: Manual S and Comfort Trade-offs
- What E320air Sees in the Field
- Why Envelope Work Belongs Before the Equipment Decision
- Book a Manual J Assessment With E320air
- Sources
- FAQ
Insulation and HVAC Sizing Tools: What Homeowners Should Gather First
Before you touch a calculator or call a contractor, collect the raw numbers. Load calculations are only as good as the inputs behind them, and most homeowners can gather these in under an hour with a tape measure, a flashlight, and last year's utility bill.
Here's what you need:
- Conditioned square footage by room, not just total house size
- Ceiling height in each area (vaulted ceilings change volume significantly)
- Climate zone and local design temperatures (your county's IECC zone works as a starting point)
- Wall and ceiling R-values, pulled from insulation labels, a home energy audit, or an attic inspection
- Window area and SHGC (solar heat gain coefficient), found on the National Fenestration Rating Council label
- Air leakage, ideally from a blower-door test, or a conservative estimate if one hasn't been done
- Duct location and insulation (attic, crawlspace, or fully inside conditioned space)
- Occupancy and internal gains, meaning how many people live there and how much heat-generating equipment runs daily
A free online calculator is fine for a rough gut check or for comparing quotes from different contractors. It's not appropriate as the sole basis for buying equipment, especially on a home with unusual geometry, mixed insulation levels, or known duct problems. When you get a number back, sanity check it: cooling loads on a reasonably insulated home usually fall between 20 and 30 BTU per square foot, and if a report shows all sensible load with no latent split in a humid climate, something's missing.
How Insulation and Air Sealing Change Heating and Cooling Loads
Every wall, window, and ceiling loses or gains heat at a rate tied to its R-value and the temperature difference across it. Engineers express this as U times A times delta T. Higher R-value means lower U-factor, which means less heat moves through that surface for every degree of difference between inside and outside. You don't need the formula memorized. You need to understand that insulation is the single biggest lever you control before equipment gets sized.
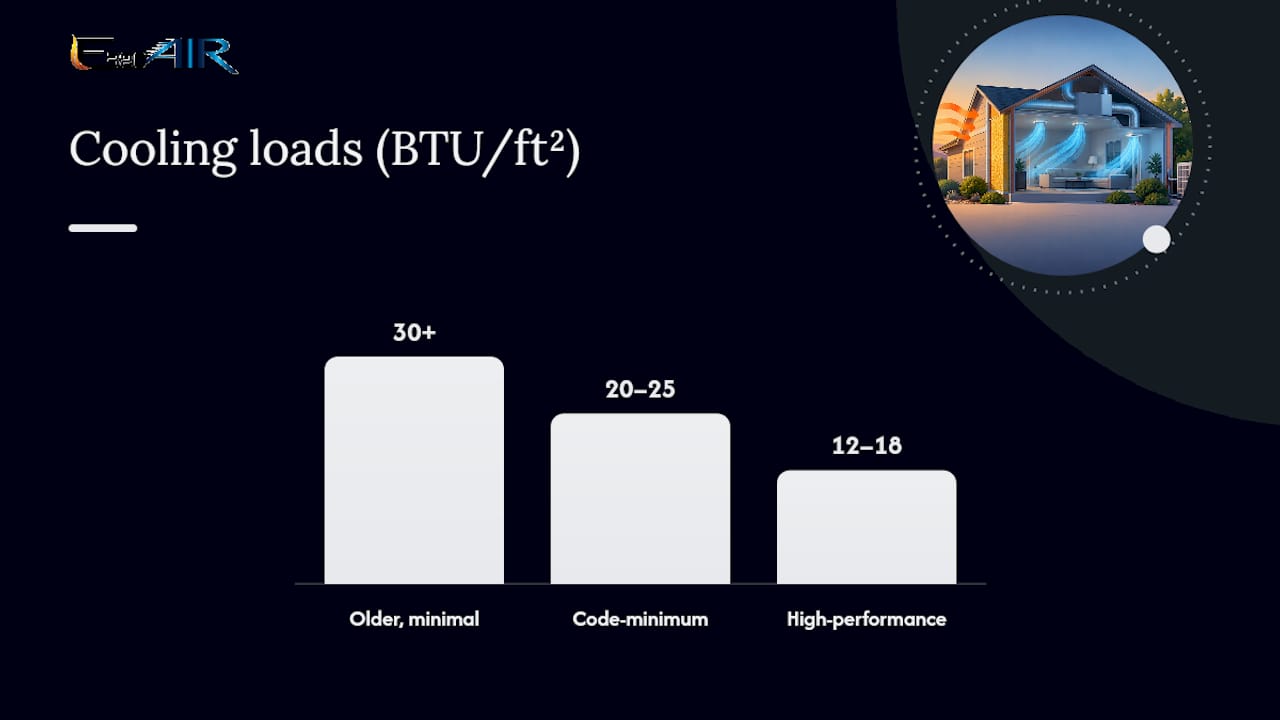
Typical cooling load ranges by construction type:
| Home type | Approximate load |
|---|---|
| Older, minimally insulated | 30+ BTU/ft² |
| Current code-minimum construction | 20–25 BTU/ft² |
| High-performance envelope | 12–18 BTU/ft² |
Moving from R-13 walls to R-20 with continuous insulation, and topping the attic up to R-49, can drop the calculated load enough to shave a half-ton to a full ton off the required equipment size in many climates. That's not a marginal change. It's often the difference between a 3-ton and a 2-ton system.
Air leakage matters just as much as the insulation itself. A leaky envelope pulls in humid or extreme-temperature air continuously, and accurate infiltration rates directly affect Manual J outputs. Homes without a blower-door test get assigned a conservative, higher air-change rate by default, which inflates the calculated load. Getting that test done, or at minimum knowing your home was built to a specific ACH50 target, can meaningfully tighten the numbers.
What Manual J Actually Calculates, and What a Report Should Include
Manual J is the ACCA-developed method for calculating residential heating and cooling loads room by room, rather than guessing off a flat per-square-foot number. It accounts for every surface separately, plus internal heat sources and outdoor air requirements, and produces a load figure specific to your house on the specific day design conditions occur.
A legitimate Manual J report should include these elements:
- Room-by-room square footage and orientation, since a west-facing bedroom gains heat differently than a north-facing one
- Envelope properties for every wall, ceiling, floor, and slab, pulled from actual insulation R-values rather than assumed defaults
- Window area, orientation, and SHGC for each opening, not a single blanket window estimate for the house
- Infiltration rate, from a blower-door test or a documented conservative assumption
- Internal gains from occupants, lighting, and major appliances
- Duct losses, especially for ducts running through unconditioned attics or crawlspaces
- Design temperatures pulled from your specific climate zone, using the 97.5% heating and 2.5% cooling percentiles rather than the record hottest or coldest day on file
That last point trips up a lot of DIY attempts. Skewing design temperatures toward extremes, rather than using the standard percentile-based values, is one of the most common ways a load calculation ends up wrong, even when every other input is correct. Ask your contractor to show you the design temperatures they used and where they came from.
Once the load number exists, Manual S takes over for equipment matching. A complete rundown of how the two manuals work together is worth reading if you want to understand why a contractor asks for both before recommending a specific unit.
Why Rule-of-Thumb Sizing Backfires
The old contractor shortcut, "one ton per 500 or 600 square feet," ignores insulation entirely, along with window area, orientation, and duct condition. Two houses with identical square footage can have genuinely different loads if one has R-49 attic insulation and the other has R-19. Rule-of-thumb sizing treats them as the same job.
The data on how often this goes wrong is not subtle. Rules of thumb routinely produce systems that are 50 to 100 percent oversized compared to what Manual J calculates for the same home, and field audits of newly installed systems commonly find oversizing in the 35 to 50 percent range even now.
An oversized system doesn't just cost more upfront. It causes:
- Short-cycling, where the unit satisfies the thermostat before it finishes a full dehumidification cycle
- Poor humidity control, leaving the house feeling clammy even at the right temperature
- Higher energy bills from repeated startup surges instead of steady, efficient runtime
- Premature compressor wear from constant on/off cycling
In humid climates, pairing that right-sized load with variable-speed or multi-stage equipment gives you far better latent (moisture) control than a bigger single-stage unit ever will.
Ducts, Airflow, and Why "Delivered" Capacity Isn't Nameplate Capacity
A furnace or air handler rated for 3 tons doesn't actually deliver 3 tons of conditioned air to your rooms if the ductwork is leaking or poorly insulated. Ducts running through an unconditioned attic or crawlspace pick up or lose heat before that air ever reaches a supply register, and uninsulated or under-insulated ducts outside the conditioned envelope are one of the most common hidden causes of a system that seems undersized even though it was calculated correctly.
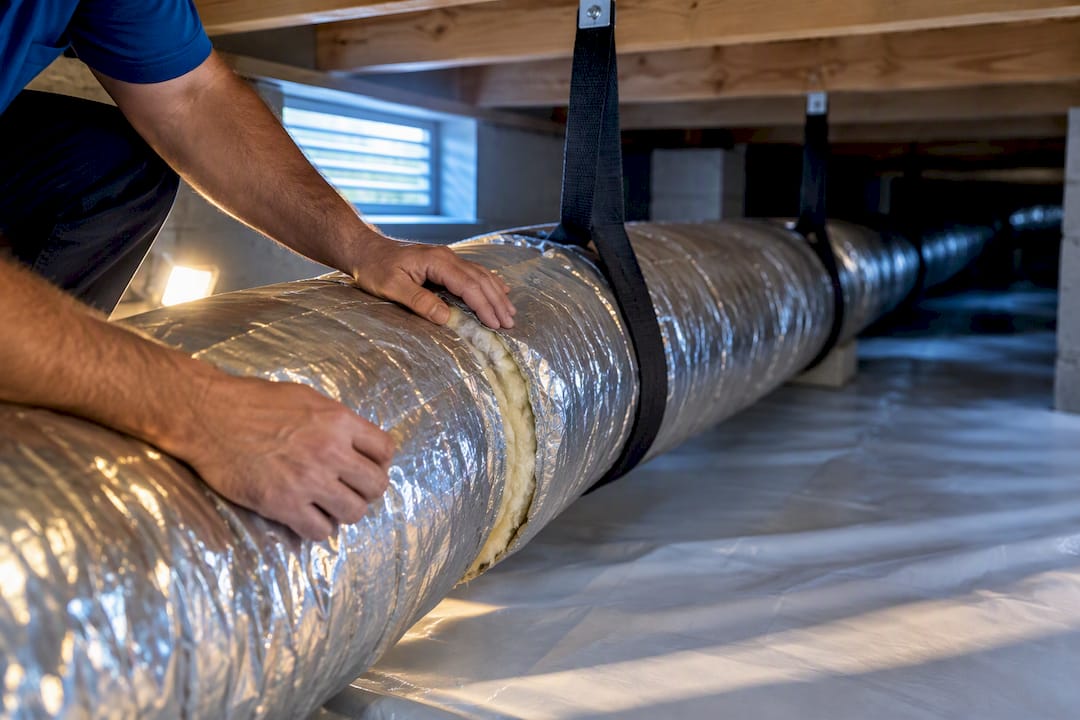
Duct leakage compounds the problem. Field data on oversized systems paired with leaky attic ductwork shows the combination can push annual cooling electricity use up noticeably compared to a right-sized, well-sealed setup, and duct heat gain alone can eat into peak sensible capacity by a meaningful margin before the air ever reaches a room.
A basic inspection checklist:
- Confirm duct insulation is intact and rated appropriately for ducts outside conditioned space (commonly R-8 to R-12 depending on climate zone)
- Look for visible leakage at joints, boots, and plenum connections
- Check that return air pathways aren't blocked or undersized
- Have registers balanced so no single room is starved of airflow
Pro Tip: Ask your contractor for a static pressure reading during any service call. High static pressure usually means the blower is fighting restricted airflow somewhere in the duct system, and that fight quietly reduces the coil's ability to dehumidify, no matter how correctly the equipment was sized.
Matching Equipment to the Load: Manual S and Comfort Trade-offs
Manual S exists to answer one question once Manual J gives you a number: which specific piece of equipment actually matches that load, that duct system, and that airflow requirement? Manual S guidance covers both sensible and latent capacity, not just a single BTU figure, because a unit that handles temperature fine but ignores humidity will leave a home feeling uncomfortable even at the "right" thermostat setting.
A few practical takeaways for equipment selection:
- Single-stage equipment is the cheapest option but offers the least humidity control, especially if it's oversized even slightly
- Two-stage and variable-speed equipment run longer at lower output, which improves both comfort and moisture removal
- Zoning or a dedicated dehumidifier can solve a comfort problem in one part of the house without upsizing the whole system
- Envelope upgrades, like the interior door and air-sealing improvements covered in this piece on energy efficiency in older homes, sometimes solve a load problem more permanently than swapping equipment ever could
Occasionally a well-insulated, tightly sealed modern home calculates to a load smaller than any manufacturer's smallest nominal unit. That's a real scenario, not a calculation error, and it usually means looking at variable-speed equipment or a different system configuration built for low-load homes rather than accepting an oversized standard unit because it's the smallest one on the truck.
What E320air Sees in the Field
Homes we inspect across the Inland Empire often carry equipment sized for the house's original 1980s or 1990s insulation, even after owners added attic insulation or replaced windows. One recent assessment found a proposed 4-ton replacement dropping to 3 tons once we accounted for attic upgrades the homeowner had made two years earlier, nobody had recalculated the load in between.
Before hiring anyone, a homeowner can reasonably do the basic checks themselves: measuring square footage, checking attic insulation depth, and photographing window labels. What requires a professional is the blower-door test, the room-by-room Manual J math, and the duct pressure testing. If your contractor skips straight to a quote without asking about any of that, ask why.
Why Envelope Work Belongs Before the Equipment Decision
Most homeowners think about HVAC sizing backward: pick the unit first, live with the comfort problems later. The math says insulation and air sealing should come first, because every dollar spent tightening the envelope lowers the load equipment has to meet, sometimes permanently. A properly sized system paired with a decent envelope beats an oversized system fighting a leaky one every time, on comfort and on the utility bill. Get a real assessment before you buy anything.
— Edward
Book a Manual J Assessment With E320air
A quality HVAC contractor replaces guesswork with a documented process: a room-by-room Manual J load calculation, a duct leakage and insulation assessment, and an equipment recommendation that follows Manual S rather than a sales quota. That's a meaningfully different starting point than a same-day flat quote based on square footage alone, and it's the difference between a system sized for your actual house and one sized for a generic average.

What you get from a paid assessment: a written load calculation showing room-by-room numbers, a recommended nominal equipment size with the reasoning behind it, and a specific duct repair list if leakage or insulation gaps are dragging down delivered capacity. Experienced technicians are licensed and insured, cover all major equipment brands, and offer flexible payment options including financing, with service available around the clock, including weekends and holidays. If you're weighing a replacement or a new installation, start with E320air's HVAC installation page to schedule a Manual J assessment before any equipment decision gets made. You can also browse real diagnostic examples in the problem-solving gallery to see how sizing issues show up in actual homes.
Sources
- HVAC proper sizing of HVAC systems | Building Science Education
- Understanding insulation systems and commercial HVAC duct systems
- Right-Size Heating and Cooling Equipment — Strategy Guide (Burdick et al.)
- ASHRAE Handbook—Ch. on Cooling and Heating load calculation
FAQ
What Is the $5,000 Rule for HVAC Systems?
The repair cost times the system's age guideline is a rough consumer shortcut, not a sizing method, and does not determine what tonnage or capacity a replacement should be. That decision still requires a proper Manual J calculation based on your home's insulation and envelope details.
What Is the Rule of Thumb for Sizing AC Units?
The common rule of thumb is one ton of cooling per 500 to 600 square feet, but this ignores insulation, windows, and duct condition entirely and routinely oversizes systems by 50 to 100 percent. A Manual J load calculation replaces this guess with room-by-room numbers based on your home's actual construction.
What Is the 20 Degree Rule in HVAC?
The 20 degree rule refers to a rough benchmark for the temperature drop across an air conditioner's evaporator coil, typically expected to fall between 15 and 20 degrees Fahrenheit. It's a field diagnostic check for whether a system is running correctly, not a sizing or load calculation method, and a properly sized system paired with correct airflow is what makes that temperature split achievable in the first place.
Is It Better to Oversize or Undersize an AC Unit?
Neither extreme is good, but oversizing is the more common and more damaging mistake. An oversized unit short-cycles, struggles with humidity control, and increases energy use, while a modestly undersized unit mainly runs longer during extreme weather.
Does Adding Insulation Actually Change What Size AC I Need?
Yes. Improving attic and wall insulation lowers the calculated cooling and heating load, which can shift a home from needing a 3-ton system down to a 2.5 or even 2-ton system depending on the upgrade's scope. Any load calculation done before an insulation upgrade should be redone afterward rather than assumed unchanged.