
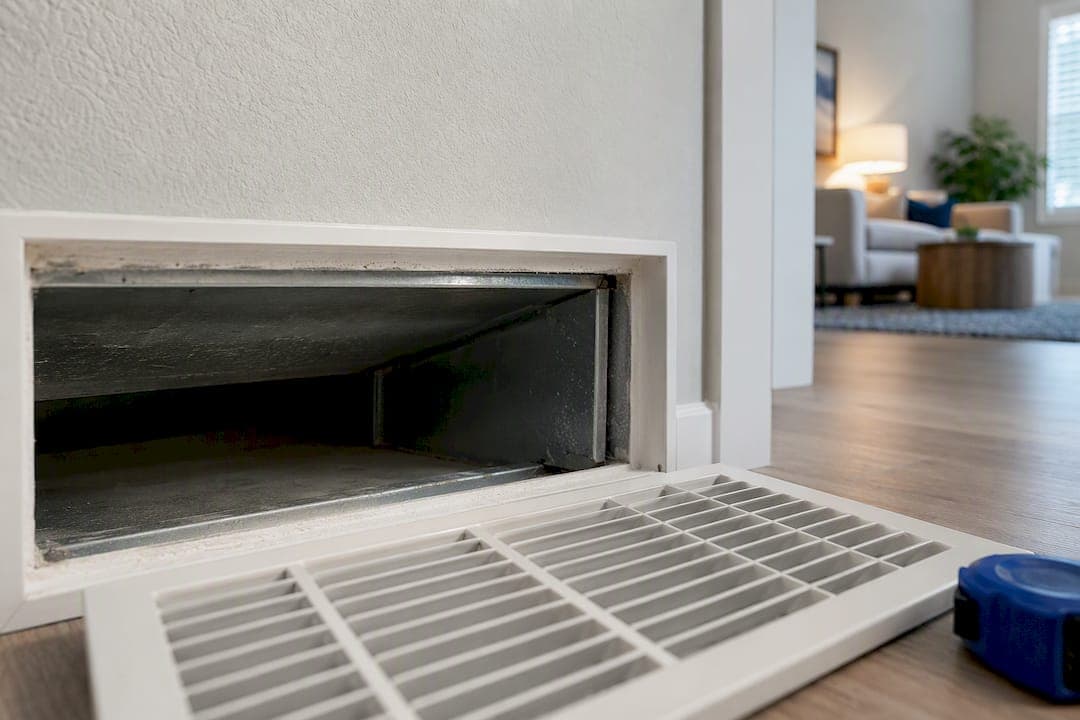
If your rooms feel stuffy, your vents blow weakly, and your energy bills keep climbing, insufficient return airflow is the likely cause, not a failing air conditioner. It raises static pressure inside the duct system and starves the blower of the air it needs to move. Start by checking your filter and return grilles for blockage, then open interior doors to see if airflow improves. If the problem persists, arrange a professional static pressure and airflow test.
TL;DR:
- Insufficient return airflow can cause the blower to struggle, leading to frozen coils, poor airflow across vents, and increased energy bills, especially when symptoms like weak vent flow and dust buildup are combined.
- Common at-home checks include inspecting filters, return grilles, and ductwork for obstructions, along with simple airflow tests near return grilles and closed doors, before calling a technician.
- Fixes range from adding or relocating returns and enlarging ducts to sealing leaks and installing transfer grilles, but upsizing the air conditioner without addressing return capacity often worsens issues.
- Proper sizing guidance involves understanding grille free area, keeping airflow velocity under 500 feet per minute, and conducting measured TESP and CFM tests rather than relying on rough rules of thumb.
- A licensed technician's visit includes TESP and CFM measurements, visual duct inspection, and explicit repair proposals, which is essential when recurring problems like coil icing or persistent airflow issues arise.
Table of Contents
- 1. Symptoms that point to insufficient return air
- 2. How a restricted return creates these problems
- 3. At-home checks before you call a technician
- 4. Repair and upgrade options compared
- 5. Sizing guidance and standards worth knowing
- 6. When to call a licensed technician
- 7. What professional diagnosis and repair typically look like
- What homeowners get wrong about return air problems
- Getting your airflow properly diagnosed and fixed
- Sources
- FAQ
1. Symptoms that point to insufficient return air
Return air problems rarely announce themselves clearly. They show up as a collection of small annoyances that, together, tell a consistent story.
The most reliable signal is weak airflow spread across many supply vents rather than just one room. A single weak vent usually means a local blockage. Weak airflow throughout the house points to the system struggling to pull enough air back in.
Other signs to watch for:
- Whistling or suction noise at return grilles, sometimes paired with a faint rattle in the ductwork.
- Interior doors that swing or stick when the system cycles on, a sign of pressure imbalance between rooms.
- Upstairs rooms or rooms far from the return that stay noticeably warmer or colder than the rest of the house.
- A frozen evaporator coil, frequent short cycling, or unusually long run times that never quite reach the set temperature.
- Rising energy bills alongside visible dust buildup around return grilles, which suggests the system is working harder to pull air through a restricted path.
None of these symptoms alone confirms a return air problem. Together, especially the combination of weak whole-house airflow and a frozen coil, they build a strong case that the return side, not the compressor or the ductwork feeding your supply vents, is the bottleneck.
2. How a restricted return creates these problems
A central air system depends on a balanced loop: air leaves the blower, moves through supply ducts, enters the room, and finds its way back through the returns. When the return side cannot keep up, everything downstream suffers.
Technicians measure this imbalance as Total External Static Pressure, or TESP, the resistance the blower has to overcome to move air through the entire duct system. An undersized or blocked return forces the blower to work against higher resistance, which Manual D identifies as a primary reason systems underperform even when the equipment itself is sized correctly.
Higher static pressure means less air actually reaches the evaporator coil. Less airflow across the coil lowers its surface temperature, and if it drops far enough, condensation on the coil freezes into ice. A frozen coil blocks even more airflow, and the cycle worsens. The compressor, meanwhile, runs under conditions it was never designed for, which shortens its working life.

At the room level, an undersized return creates pressure imbalances. Air gets pushed into a room faster than it can escape back to the return, so pressure builds and slows delivery further, sometimes creating stagnant recirculation zones in corners or closed-off rooms. Forcing air through openings too small for the volume moving through them also explains the whistling: high air velocity through a narrow gap generates noise the same way wind does through a cracked window.
3. At-home checks before you call a technician
Before assuming your return ducts are undersized, rule out the cheap and common causes first.
- Check the filter. A clogged filter is the single most common cause of restricted airflow and costs nothing to fix.
- Inspect return grilles for furniture, rugs, or curtains blocking them.
- Look at accessible ductwork for crushed flex duct, disconnected sections, or obvious kinks.
- Confirm supply vents and dampers are open, since closed vents increase system pressure just as much as a blocked return.
- Run a simple visual test: hold a stick of incense or a strip of tissue near a return grille and near a closed door. See whether air is actually moving toward the return or stalling in the room.
- Try the door test: note airflow and comfort with an interior door open, then closed. A big difference suggests the room lacks a proper transfer path back to the return.
- If you have a basic anemometer, compare relative air velocity at several supply vents. Big differences between rooms suggest a distribution or return-path problem rather than one bad vent.
Pro Tip: If closing an interior door noticeably reduces airflow or comfort in that room, the room likely needs a transfer grille or jumper duct, not just a bigger vent.
If you have gone through this list and airflow is still weak, noise persists, or a coil keeps icing over, the issue is very likely with return capacity itself. At that point, a technician needs to put a number on the problem with a TESP and CFM test rather than guessing further. Our balancing airflow workflow guide walks through what that process looks like in more detail.
4. Repair and upgrade options compared
Once a restricted return is confirmed, the fix depends on the house, the budget, and how much disruption you can tolerate.
- Add or relocate a return. Where space allows, this is often the most effective fix. It reduces TESP directly and rebalances airflow across the whole system, though it requires opening a wall or ceiling.
- Enlarge the return drop or trunk duct. This is a permanent structural fix for chronically undersized systems, but it means more demolition and a bigger installation job than adding a single grille.
- Install transfer grilles or jumper ducts. A lower-cost workaround for isolated rooms cut off by closed doors. Done correctly, these preserve privacy while giving the room a real path back to the return, addressing the isolation issue Building America research flags in airtight modern homes where door undercuts alone rarely move enough air.
- Seal ducts, remove compressions, and replace crushed flex. These are frequently the highest-impact, lowest-cost fixes. Small kinks and compressions cause outsized pressure losses, and duct retrofit guidance notes that correcting them, along with sealing leaks, often delivers major airflow gains without a full duct replacement.
- Rework filters and grille free area. Switching to a lower-restriction filter or a larger grille helps at the margins, but it will not fix an undersized trunk line behind it.
One mistake shows up again and again: upsizing the air conditioner itself without fixing the return. A bigger compressor moved by the same restricted duct system usually makes noise, icing, and pressure problems worse, not better, because the bottleneck was never the equipment.
5. Sizing guidance and standards worth knowing
A common starting point contractors use is roughly 400 CFM per ton of cooling capacity. It is a rough baseline for sanity-checking a system, not a design figure, since actual requirements shift with climate, duct layout, and equipment type.
More useful is understanding the difference between a grille's free area and its face area. ACCA's Manual D provides normative tables for sizing return inlets and ducts based on this distinction, along with guidance on keeping grille face velocities low, generally under 500 feet per minute, to avoid the noise and pressure spikes that come with undersized openings.
Rule-of-thumb checks are fine for spotting an obvious problem. Correcting one, especially in a whole-house retrofit, calls for a proper Manual D layout and a measured TESP and CFM test rather than trial and error. Our guide to HVAC airflow and CFM breaks down how these numbers relate to your system's tonnage.
6. When to call a licensed technician
Some signs mean it is time to stop troubleshooting and book a diagnostic visit: a coil that keeps freezing, breakers or safety switches tripping repeatedly, loud mechanical noise from the air handler, a room that never reaches a comfortable temperature no matter the setting, or energy bills that keep climbing without explanation.
A qualified technician brings measurement tools a homeowner typically does not have: a manometer for TESP, an anemometer or flow hood for CFM readings at each register, and often a camera for a visual duct inspection or a leakage test.
A trustworthy estimate should include:
- Multiple scope options, from targeted repairs to a full return upgrade.
- Line-itemed ductwork costs, not a single bundled number.
- Expected CFM gains from the proposed work, not just a promise of "better airflow."
- Any permit requirements and warranty terms in writing.
Worth asking directly: Do you design to Manual D? Will you measure TESP and CFM before and after the work? Can you show me the readings?
7. What professional diagnosis and repair typically look like
A typical field visit starts with a visual inspection of the air handler, filter, and accessible ductwork, followed by grille and filter checks to rule out the easy causes first. From there, a technician measures TESP and CFM to quantify how far the system is from where it should be, reviews repair options based on those numbers, and follows up with a verification test once work is complete. The E320 Air problem solving gallery documents real examples of this kind of diagnosis and repair, showing the before-and-after difference proper return sizing makes.

What homeowners get wrong about return air problems
The most common mistake is treating symptoms as a sign the equipment is failing when the equipment is often fine and simply starved for air. Homeowners chase a bigger, more powerful air conditioner when the real fix is a bigger or better-placed return. That instinct is understandable, since a new unit feels like progress and a duct modification feels invisible, but it usually spends money in the wrong place.
The second mistake is stopping at the easy fixes. Changing a filter and opening a few vents is worth doing, and it solves plenty of cases outright. When it does not, the honest next step is a measured TESP and CFM test, not another round of guesswork. A number on a page, not a hunch, is what tells you whether the return is genuinely undersized or something else is at play.
Prioritize verification over assumption. Fix what you can check yourself, then let a real measurement decide whether more work is needed.
— Edward
Getting your airflow properly diagnosed and fixed
If the checks above point to a real return air problem, professional HVAC technicians handle the full range of work involved, from diagnostics and duct repairs to adding returns, system upgrades, and routine maintenance. Booking a visit typically gets you an on-site inspection, TESP and CFM measurements, and a written set of repair options before any work begins.

| What you get | Details |
|---|---|
| Diagnostic visit | On-site inspection with TESP and CFM measurements |
| Repair options | Written, line-itemed scope with expected airflow gains |
| Service scope | Residential HVAC, installation and upgrades, heater repair |
| Ongoing care | Commercial HVAC and routine maintenance |
Browse real repair examples in the problem solving gallery, or reach out to schedule a diagnostic visit and get your return air sized right the first time.
Sources
FAQ
What happens if return air is undersized?
The blower has to work against higher resistance, which reduces the volume of air moving through the system and lowers airflow across the evaporator coil. Over time this can cause coil icing, weak airflow at supply vents, and added strain on the compressor.
What are the symptoms of not enough return air in an HVAC system?
Common signs include weak airflow at many vents rather than one, whistling noise at return grilles, doors that move when the system cycles, and rooms that stay warmer or colder than the rest of the house. A frozen coil or rising energy bills alongside these signs strengthens the case for a return air problem.
What are the symptoms of undersized air ducts?
Undersized ducts, whether on the supply or return side, tend to produce weak airflow, uneven room temperatures, and unusually high energy use, symptoms that closely mirror a failing HVAC unit. Duct problems can also cause visible dust buildup around grilles and elevated noise from air being forced through restricted openings.
Can you have too much return air in a HVAC system?
Yes, though it is less common than an undersized return. Oversized returns can pull air faster than the system can effectively condition it, sometimes creating short-cycling or uneven distribution, so return sizing needs to match the specific duct layout rather than simply going as large as possible.