
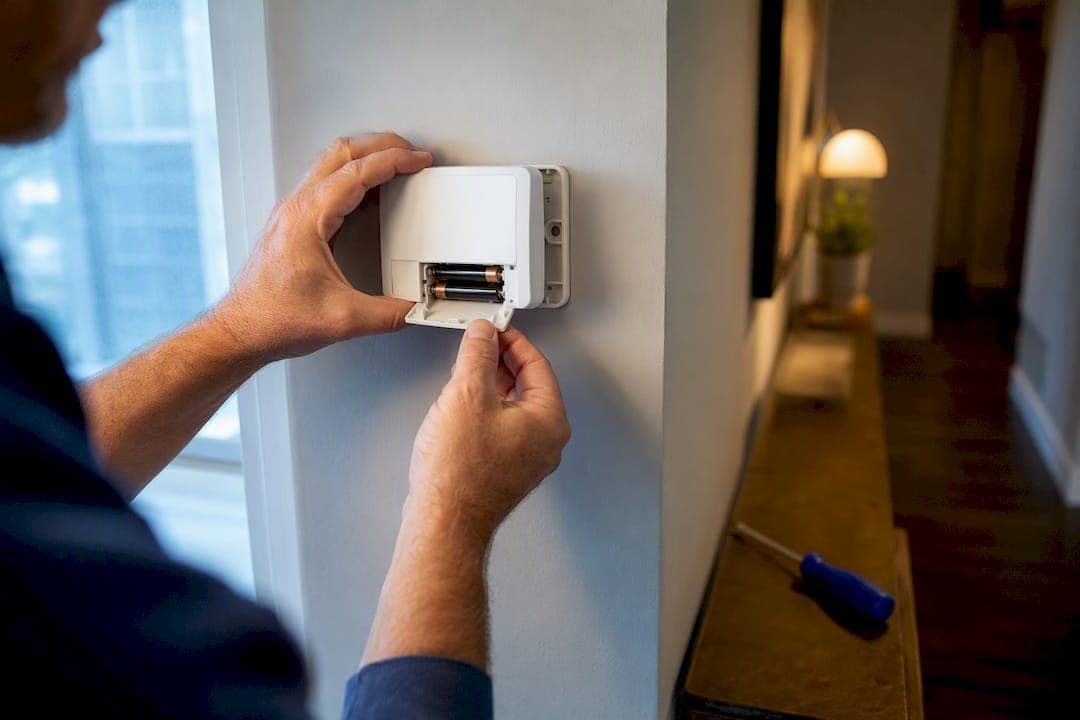
Try three things first: swap the batteries, cycle the HVAC circuit breaker and the furnace or air handler service switch off and back on, then confirm the thermostat is actually set to Heat or Cool with a setpoint several degrees past room temperature. Those three checks resolve a large share of "thermostat not working" calls without a single tool. If the screen is still dark or the system still won't respond after that, keep reading before you touch anything electrical.
TL;DR:
- Most thermostat issues stem from simple causes like dead batteries, tripped breakers, or incorrect mode settings, which can be checked quickly without tools.
- A dark or blank thermostat screen typically indicates a power loss, often caused by tripped breakers, disconnected panels, or blown control board fuses.
- When the thermostat calls for heat or cooling but nothing happens, the fault often lies in the outdoor unit's contactor, capacitor, or safety switches, not the thermostat.
- Wiring problems or missing C-wires are common causes of unresponsive smart thermostats, often solvable by checking connections or installing a power extender kit.
- Recurring failures like tripped breakers, burnt components, or safety switch trips require professional diagnosis, as DIY repairs on high-voltage parts risk safety and damage.
Table of Contents
- Thermostat Not Working: 10 Quick Checks To Run Now
- What To Do When The Thermostat Screen Is Blank
- Thermostat Calls For Heat Or Cool, But Nothing Runs
- How Do You Check Thermostat Wiring And The C-Wire?
- HVAC-Side Failures That Look Like A Broken Thermostat
- How Do You Verify If The Thermostat Or The Equipment Is At Fault?
- What Homeowners Consistently Get Wrong (Practitioner Notes)
- When To Stop Troubleshooting And Call A Licensed Technician
- Checking And Replacing Thermostat Sensors Or Probes
- Updating Thermostat Software Or Firmware On Smart Models
- Testing Wi-Fi Connectivity And App Troubleshooting
- Verifying Thermostat Compatibility With Your HVAC System
- Publisher Perspective: Why E320 Air Draws A Hard Line On DIY
- Fast, Straightforward Thermostat Diagnosis From E320 Air
- Where To Go For Deeper Technical Reference
- Sources
Thermostat Not Working: 10 Quick Checks To Run Now
Most thermostat problems are boring. Not broken. Boring. A dead battery, a tripped breaker, a mode set to Off. Before you assume the thermostat itself has failed, run through this sequence in order. Each step takes under a minute and rules out the most common culprits first.
- Replace the batteries, even if the old ones "look fine." Check the contacts for white or greenish corrosion while you're in there, and wipe it off with a dry cloth or a cotton swab dipped in vinegar.
- Check the mode setting. Confirm it's on Heat or Cool, not Off or Fan Only, and that Auto scheduling hasn't overridden your manual setting.
- Push the setpoint 3 to 5 degrees past room temperature. Most systems have a built-in deadband, so a one-degree nudge won't trigger a call for heat or cooling.
- Find your HVAC breaker in the electrical panel and flip it fully off, wait 10 seconds, then back on. A breaker that looks "on" can still be tripped just enough to cut power.
- Locate the furnace or air handler service switch, usually a light switch style toggle near the unit, and cycle it the same way.
- Check for a fuse box near the outdoor unit or air handler and inspect for a blown fuse if your system has one.
- Look at the furnace or air handler access panel. If it's ajar or not fully latched, the safety interlock inside cuts power to the whole system.
- Check the condensate drain float switch, a small plastic float near the drain pan, for signs it has tripped due to standing water.
- Wait five minutes after any change before deciding the system failed. Compressors have a built-in protection delay and won't restart instantly.
- Listen for the indoor blower. If it kicks on but nothing happens outside, the fault has likely moved from the thermostat to the equipment.
Pro Tip: Breakers can trip "silently," meaning the switch still sits in the on position but the internal contact has released. Always push it firmly to Off first, then back to On. Just nudging it doesn't reset anything.
What To Do When The Thermostat Screen Is Blank
A blank thermostat screen almost always means the unit isn't getting power, not that the thermostat itself is defective. The fix usually lives somewhere between the wall plate and the electrical panel.
Start with batteries. Pull them out, check the contacts, and reinsert with attention to polarity. If your thermostat is hardwired with no batteries, skip to the breaker.
Next, confirm the HVAC circuit breaker and the furnace or air handler service switch are both fully cycled off and on. A tripped breaker, even one that visibly causes a thermostat to lose power, is one of the most common reasons for a completely dark display.
If power still doesn't return, inspect the furnace or air handler's access panel. Most gas furnaces and air handlers have a door safety switch that cuts power the instant the panel isn't seated flush. This one gets missed constantly, especially right after a filter change, because the panel looks closed but isn't fully latched.
From here, the checks get slightly more technical:
- Open the panel (with power off) and look for a small blade fuse on the control board, usually rated 3A or 5A.
- A blown fuse will often show a visibly burnt or broken filament, similar to a car fuse.
- Do not replace it unless you're confident and have the exact replacement amperage on hand.
- If you own a multimeter and know how to use it safely, you can test the transformer's secondary side for a steady 24 volts.
- If you don't, this is the point to call a technician instead of guessing.
Also worth checking: the condensate float switch. On many split systems, a clogged drain line fills the pan, lifts the float, and cuts thermostat power intentionally as a safety measure. It's doing exactly what it's supposed to do, but it looks identical to a dead thermostat from the wall.
Manufacturer guidance from both Trane and Honeywell backs this up: batteries, breakers, and panel switches solve the majority of blank-screen cases before any wiring or board diagnosis is even necessary.
Thermostat Calls For Heat Or Cool, But Nothing Runs
This is a different animal than a blank screen. The thermostat has power, it's displaying "Heat On" or "Cool On," and the equipment simply isn't responding. That tells you the fault has likely moved past the thermostat itself.
- Double check mode and setpoint. For cooling specifically, push the setpoint 3 to 5 degrees below the current room temperature to make sure you're actually past the deadband and forcing a call.
- Give it five full minutes. Compressors have a built-in protection delay to prevent short cycling. If you just adjusted the setpoint or the power just came back on, the outdoor unit may be intentionally waiting.
- Listen at the indoor unit. If the blower motor kicks on and you feel air movement, the thermostat is successfully calling for heat or cool. The problem has shifted to the equipment side.
- Check the outdoor disconnect. Most condensers have a small breaker box mounted on the wall right next to the unit. Confirm it hasn't been pulled or tripped.
- Walk outside and observe the condenser. A humming sound with no fan movement often points to a failed capacitor or a stuck contactor. Total silence can mean a tripped high pressure switch, a bad contactor coil, or in worse cases, a seized compressor.
None of the outdoor unit checks above are DIY repairs. Contactors, start capacitors, and compressors involve high voltage or refrigerant components, and misdiagnosing them by hand risks both your safety and the equipment. If you've confirmed the thermostat is calling correctly but the air conditioner still won't cool, that's your signal to stop testing and start dialing.
Heating systems follow a similar logic. If the furnace or air handler isn't producing heat despite the thermostat correctly calling for it, an igniter, gas valve, or blower motor issue is far more likely than a thermostat malfunction.
How Do You Check Thermostat Wiring And The C-Wire?
Wiring problems cause a specific pattern: intermittent power loss, a thermostat that resets randomly, or a smart thermostat that simply won't stay on. You can check for obvious issues without doing any actual wiring work.
- Gently pull the thermostat faceplate off its base (most snap or slide free) and look at the wire terminals behind it.
- Check for wires that are loose in their terminal screws, visibly frayed, chewed by pests, or showing greenish corrosion at the copper tip.
- Do not tug on the wires or try to reseat them yourself if anything looks damaged. That's a job for a technician.
- If you own a multimeter, you can test for roughly 24 volts AC between the R and C terminals with the system powered on. No reading, or an unstable one, points to a wiring or transformer issue.
- Always shut off the HVAC breaker before doing anything beyond a visual inspection or a live voltage test you're already comfortable performing.
Smart thermostats are especially sensitive to this because most require a dedicated C-wire to hold a constant 24V charge. Without one, Nest's own troubleshooting guidance notes the display can go dark or key features get disabled entirely, since the system has no steady power source to draw from. If your older HVAC system only ran a basic four-wire setup, a missing C-wire is a real possibility, not a defect.
If that's your situation, you have two realistic options: a power extender kit that borrows voltage from an existing wire pair, or having a technician pull an actual C-wire through the wall. Before assuming your system even needs one, it's worth checking thermostat feature requirements against what your HVAC equipment can actually supply.
Pro Tip: Never replace a blown low-voltage fuse with a higher amperage one "just to see if it holds." A 5A fuse in a 3A slot defeats the entire point of the fuse and can damage the control board or create a fire risk.
HVAC-Side Failures That Look Like A Broken Thermostat
Plenty of "my thermostat isn't working" calls turn out to have nothing to do with the thermostat at all. The equipment itself has failed in a way that mimics a dead or unresponsive control.
- A blown 3A or 5A blade fuse on the integrated furnace control board cuts thermostat power instantly, and a failed transformer produces the same blank-screen symptom.
- A clogged condensate drain line lifts the float switch and cuts power as a safety measure. Frozen evaporator coils, usually caused by a dirty air filter restricting airflow, can trigger the same safety cutoff and shut the whole system down.
- A bad run capacitor on the outdoor unit prevents the compressor or fan motor from starting, even though the thermostat is calling correctly.
- A pitted or stuck contactor relay can intermittently fail to send power to the outdoor unit, which shows up as a system that runs sometimes and not others.
- A failing or seized compressor is the most serious of these and requires full diagnostic equipment to confirm.
Every item on that list needs a technician, not a screwdriver. If you're seeing recurring symptoms that point toward the equipment rather than the thermostat, a broader look at your air conditioner's troubleshooting basics can help you describe what's happening more precisely when you call for service. Swapping an air filter costs a few dollars and five minutes. A seized compressor does not.
How Do You Verify If The Thermostat Or The Equipment Is At Fault?
There's one test that separates thermostat problems from equipment problems better than anything else: the jumper test. It's not something most homeowners should perform themselves unless they're comfortable working at the low voltage terminals with power off, but understanding the concept helps you follow along if a technician walks you through it.
- Power down the system at the breaker before touching any thermostat wiring.
- Briefly connect the R and Y terminals with a short jumper wire at the thermostat base or at the control board.
- Restore power and observe. If the outdoor unit starts, the fault sits with the thermostat or its wiring, not the equipment.
- If nothing happens, the fault is downstream in the equipment itself, meaning the thermostat isn't the problem at all.
- Note everything you observe: clicks from the contactor, blower activation, outdoor fan movement, or any error/help code shown on the display.
Write down the timing of each test, what you tried, and what changed. A technician who receives "I checked the breaker at 2pm, cycled the service switch, waited five minutes, blower ran but outdoor unit stayed silent" can often diagnose the problem before they even open a panel.
Pro Tip: Take a photo of your thermostat's model number and any error code on screen before you call. It saves the technician a trip back to the truck and saves you a second visit charge.
What Homeowners Consistently Get Wrong (Practitioner Notes)
After enough service calls, the same invisible failure points show up again and again. A few of them account for a disproportionate share of "my thermostat just stopped working" complaints.
- The furnace or air handler access panel door interlock is the single most overlooked cause of total power loss. After any filter change, push the panel firmly until it clicks flush. A panel that looks closed but isn't fully seated cuts power exactly as if the breaker were off.
- A breaker that visually sits in the "on" position can still be internally tripped. Push it hard to Off first, hold for a few seconds, then push firmly to On.
- Never upsize a control board fuse to stop it from blowing. If a 3A fuse keeps failing, something is drawing too much current, and a bigger fuse just hides the real problem until it becomes a bigger one.
- Keep a simple written timeline of symptoms: when it started, what you tried, and what changed. It cuts diagnostic time on the service call substantially.
A furnace door that's 90 percent closed isn't closed. The interlock switch inside doesn't care about intent. It cares about contact, and a panel that's slightly ajar after a filter swap is one of the most common "phantom" power failures we see in the field.
When To Stop Troubleshooting And Call A Licensed Technician
Some symptoms mean stop immediately, full stop, no more testing.
- A breaker that trips repeatedly the moment you reset it, especially within seconds.
- Any burning smell, visible arcing, or scorch marks near the panel, thermostat, or electrical box.
- Inability to restore power safely after basic breaker and switch checks.
Other symptoms aren't emergencies but still call for a professional rather than more DIY testing: a low-voltage fuse that keeps blowing after replacement, a transformer that tests dead, or an outdoor unit that stays completely silent even after a jumper test confirms the thermostat itself is fine.
When you call, have this ready: your thermostat's brand and model number, exactly what steps you already tried, any error or help code on the display, and the approximate age of your HVAC equipment. A well-prepared call, as outlined in general guidance on what to expect from an HVAC service visit, often means a faster diagnosis and fewer surprises on the invoice.
Checking And Replacing Thermostat Sensors Or Probes
Some thermostats, especially models with remote room sensors or outdoor temperature probes, can misreport the temperature entirely, making the system look "unresponsive" when it's actually just reacting to bad data. If your thermostat consistently reads several degrees off from a separate room thermometer, a failing internal sensor or a disconnected remote sensor is a likely cause.
Start by checking placement. A thermostat near a supply vent, a sunny window, or a heat-generating appliance will misread the room and behave erratically even when every wire and component is healthy. If placement checks out, look for a remote sensor paired to the thermostat. These typically run on a small battery and can be swapped in seconds. A dead sensor battery often causes the main unit to default to its own internal reading or drop the connection entirely.
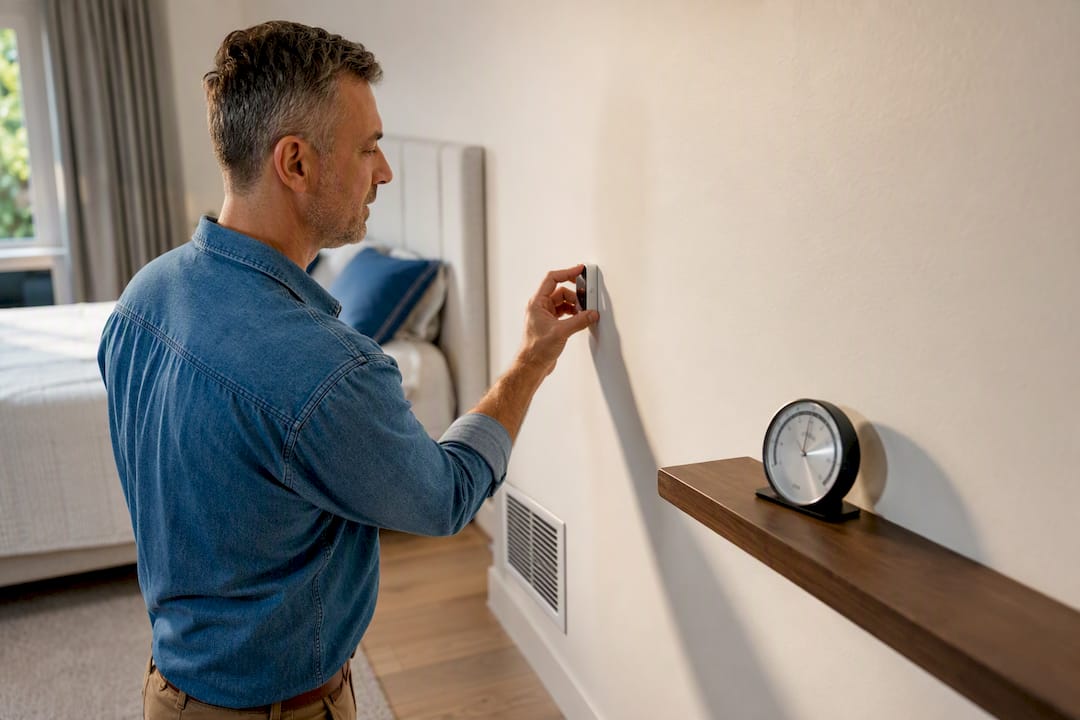
For built-in sensors, most residential thermostats don't offer a user-replaceable internal probe. If the sensor itself has failed rather than the battery or placement, replacing the thermostat is usually more practical than attempting a board-level repair. If you're unsure whether your readings reflect a sensor problem or a genuine calibration drift, a quick calibration check can rule out the simpler explanation before you assume hardware failure.
Updating Thermostat Software Or Firmware On Smart Models
Smart thermostats run on firmware, and an outdated version can cause anything from a frozen screen to a thermostat that stops communicating with its app entirely. Most models update automatically once connected to Wi-Fi, but a stalled update can leave the device stuck mid-process.
If your smart thermostat's screen is frozen or unresponsive rather than blank, check the manufacturer's app first. Nest and Honeywell both display firmware version and update status directly in their apps, and a pending update that failed to install is a common, fixable cause of a sluggish or locked interface.
If an update appears stuck, most manufacturers recommend a soft restart, holding the physical button or menu option for a factory or system reset, rather than pulling the batteries outright. Keep in mind a reset clears your schedule and Wi-Fi credentials, so it should come after you've ruled out power and wiring issues, not before. As Honeywell's own support documentation notes, resets won't resolve a power or wiring fault, so if the screen is fully blank, go back to the breaker and panel checks first.
Testing Wi-Fi Connectivity And App Troubleshooting
A smart thermostat that's fully powered but shows "offline" or won't sync with its app almost always has a network problem, not a hardware one. Start by confirming your home Wi-Fi is actually working on another device in the same room.
If the network is fine, check the thermostat's signal strength in its on-screen settings menu. Thermostats mounted far from the router, or behind thick walls, sometimes show a live display but drop connectivity intermittently. Moving the router closer, adding a mesh extender, or relocating the thermostat during a future upgrade can resolve chronic drops.
Router changes are a frequent, overlooked cause. If you replaced your router or changed your Wi-Fi password recently, the thermostat needs to be manually reconnected through the app; it won't reconnect automatically to a renamed network. Delete the device from the app and re-add it if a standard reconnect attempt fails repeatedly.
Finally, check for an app-side outage. Both major smart thermostat platforms occasionally have server issues that make devices appear offline even when the hardware and home network are both functioning normally. Waiting 20 to 30 minutes before further troubleshooting can save you from chasing a problem that isn't actually yours.
Verifying Thermostat Compatibility With Your HVAC System
A surprising number of "broken" thermostats aren't broken at all. They're mismatched with the HVAC system they're connected to. This shows up most often after a DIY smart thermostat upgrade on an older furnace or a heat pump system with specific staging requirements.
Before assuming failure, confirm your system type: standard gas furnace with central AC, heat pump, dual fuel system, or a system with multiple stages of heating or cooling. Each requires specific wiring terminals, and a thermostat rated for a basic single-stage system can behave erratically, or not run equipment at all, if installed on a multi-stage or heat pump setup.
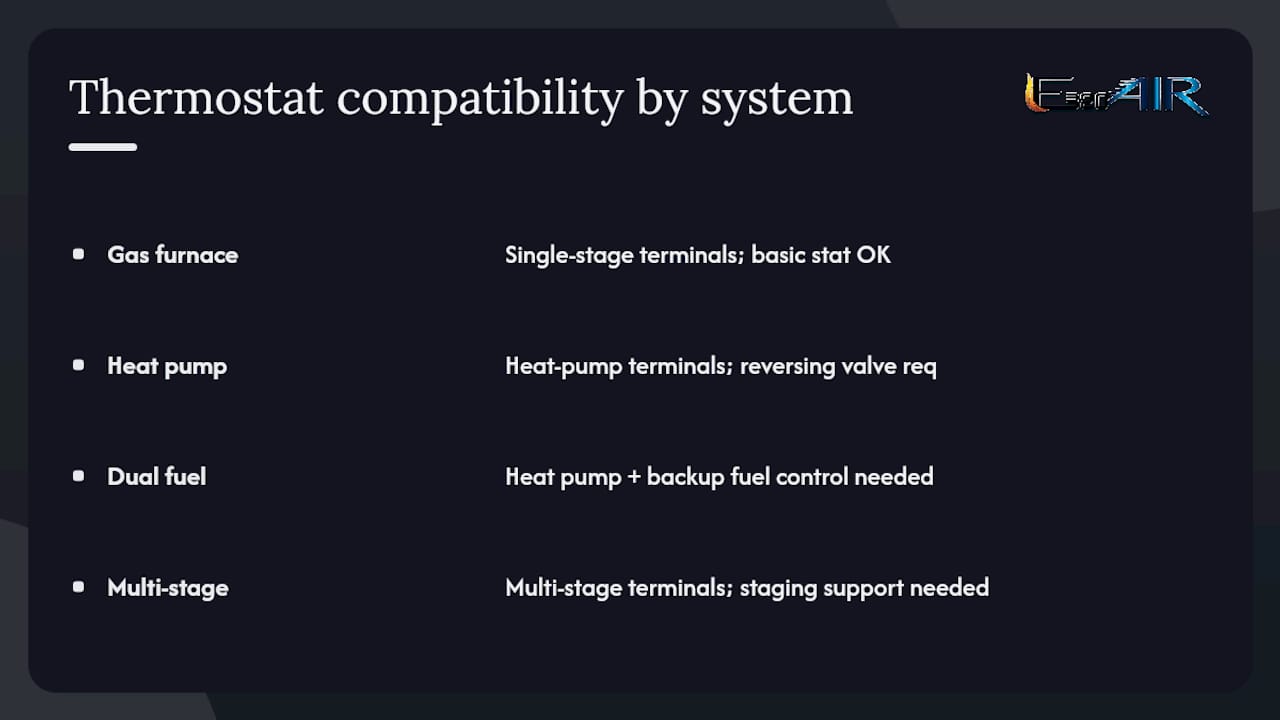
Check the wire labels at your old thermostat's base against your new thermostat's compatibility documentation before installation, not after. Manufacturer compatibility checkers, along with Energy, both stress confirming system type and available wiring before purchase, since a mismatched thermostat is a common reason for a smart upgrade that never quite works right. If your current thermostat previously worked fine and a new one doesn't, compatibility, not damage, is usually the first thing to rule out.
Publisher Perspective: Why E320 Air Draws A Hard Line On DIY
E320 Air stands firmly behind checks like batteries, breakers, filters, and visual inspections. Those are genuinely safe for any homeowner to run, and they solve more cases than people expect. Where we draw the line is anything involving live electrical connections, refrigerant lines, or control board components. That work belongs to a licensed technician, not because homeowners aren't capable, but because a misjudged repair on a high voltage or pressurized system carries real risk to both people and equipment.
We'd rather a customer call us for a five minute diagnosis that turns out to be a flipped breaker than skip a step and get hurt trying to save a service fee. That's the standard we hold every visit to.
— Edward
Fast, Straightforward Thermostat Diagnosis From E320 Air
E320 Air gets to the real cause of a dead or unresponsive thermostat in one visit, not three. Our technicians carry the fuses, transformers, and replacement thermostats needed to fix most calls on the spot, rather than diagnosing today and returning next week with parts.
A typical service call covers full safety protocol first: breaker and disconnect checks, panel interlock inspection, and a voltage test at the control board before anything gets replaced. If your system needs a transformer swap, a control board fuse replacement, a condensate drain cleaning, or a full thermostat replacement because of wiring incompatibility, we handle it in the same visit whenever parts allow. You'll get a clear diagnosis fee upfront and documented findings, including exactly what failed and why, so you're never guessing what you paid for. If your system is old enough that repeated thermostat issues point to a bigger equipment problem, our installation team can walk you through replacement options rather than patching the same failure point every summer.
Ready to get it fixed properly? Schedule a service visit with E320 Air and get a technician out to diagnose the real problem, not just the symptom on your wall.
Where To Go For Deeper Technical Reference
A few official sources are worth bookmarking if you want to go deeper on any of the diagnostics covered here.
- InspectApedia's air conditioner and heat pump won't start guide walks through detailed diagnostic flows for equipment that won't respond to a thermostat call.
- Google Nest's official support page covers model-specific no power troubleshooting and help codes.
- Energy.gov's programmable thermostat guidance explains energy-saving settings and why steady power matters for smart models.
Sources
- Air Conditioner / Heat Pump Won't Start — InspectApedia
- Engineerskill
- Troubleshoot 'No power' on Nest thermostat — Google Nest Help
- Thermostat Not Working: Causes and Solutions — Trane