
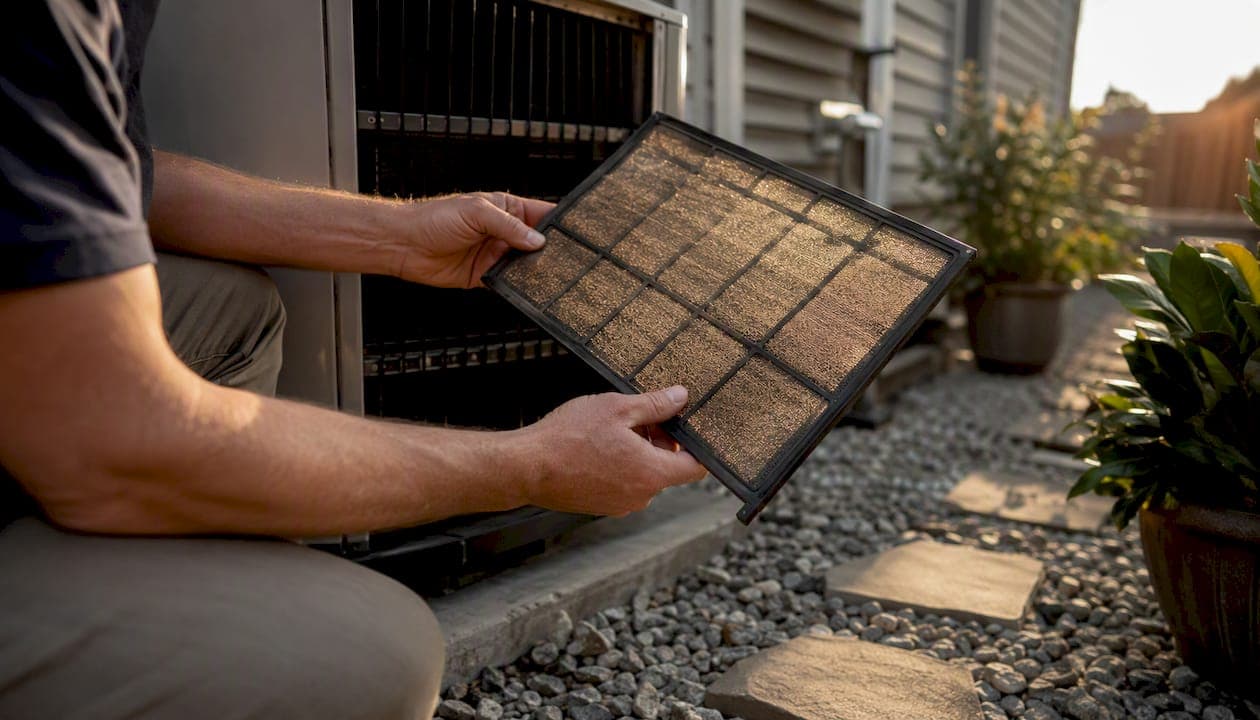
Run through five things every month, deep clean the outdoor unit each season, and book a licensed technician twice a year, once before cooling season and once before heating season. That's the entire strategy behind keeping a residential heat pump alive past its 15-year mark instead of limping to failure at year 10.
Here's the prioritized version you can act on today:
- Check the filter now. If it's dirty, clean or replace it. Filters need attention every 30 days and a full swap every 60 to 90 days.
- Walk outside and confirm nothing sits within 2 feet of the outdoor unit. Leaves, mulch, a fence panel, a stack of firewood. All of it restricts airflow.
- Find the condensate drain line and pour a cup of distilled vinegar through it if you haven't in the last few months. Algae growth here causes more emergency calls than almost anything else.
- Check the thermostat schedule and confirm it matches the season. A heat pump set to swing between extreme setpoints works harder than it should.
- Listen. Grinding, clicking, or a hum that wasn't there last month is worth noting, even if the system still runs fine today.
A professional visit takes 60 to 90 minutes and typically runs $75 to $200 per visit. Two-visit annual plans land between $150 and $500 depending on your region and system size. Anything involving refrigerant, capacitors, or the sealed system belongs to a licensed technician, both for your safety and to keep your manufacturer warranty intact.
Key Takeaways
A reliable heat pump maintenance routine combines monthly homeowner filter and visual checks with a licensed technician tune-up performed in both spring and fall.
| Point | Details |
|---|---|
| Follow the twice-yearly rule | Book professional tune-ups in spring and fall since heat pumps operate in two distinct modes. |
| Handle the monthly basics yourself | Check filters, registers, and listen for noise every month; these tasks need no special tools. |
| Protect the condensate drain | Flush it quarterly with distilled vinegar to prevent the algae clogs that trigger emergency shutdowns. |
| Insist on dual-mode refrigerant checks | Ask whether your technician measured performance in both heating and cooling, not just one. |
| Document every professional visit | Keep readings and receipts on file to protect your warranty and track system trends over time. |
| Book with a licensed provider like E320air | E320air offers seasonal maintenance plans with documented readings and licensed refrigerant handling. |
Table of Contents
- How Often Should You Do Heat Pump Maintenance?
- What Should Be on Your DIY Heat Pump Checklist?
- What Does a Professional Heat Pump Tune-Up Include?
- What Heat Pump Problems Need Immediate Attention?
- How Do Seasons Affect Heat Pump Maintenance?
- What Do HVAC Technicians Notice That Homeowners Miss?
- Printable Heat Pump Maintenance Checklist
- What Homeowners Get Wrong About Heat Pump Maintenance
- How E320air Helps You Stay Ahead of Repairs
- Where to Learn More About Heat Pump Maintenance
- Sources
How Often Should You Do Heat Pump Maintenance?
The honest answer: monthly for you, twice yearly for a professional, with no real gap in between if you follow both tracks. Homeowner tasks are quick and frequent because they catch small issues (a dirty filter, a blocked drain) before they become expensive ones. Professional tune-ups are less frequent but far more technical, covering things you can't safely check yourself, like refrigerant pressure and electrical component wear.
The twice-a-year cadence isn't arbitrary. Unlike a standard air conditioner that only runs in summer, a heat pump operates in two distinct modes year-round, cooling in summer and heating in winter by reversing the refrigerant cycle. A spring visit tunes the system for cooling; a fall visit tunes it for heating. Skipping one means half your system's operating conditions never get checked, and that's exactly when small refrigerant leaks or worn components go unnoticed until the season you need the system most.
Here's what to expect on cost and timing:
| Service Type | Frequency | Time Per Visit | Typical Cost |
|---|---|---|---|
| Homeowner filter/visual checks | Monthly | 5–10 minutes | No cost |
| Seasonal deep clean (coil rinse, drain flush) | Quarterly or as needed | 20–30 minutes | Minimal (hose, vinegar) |
| Professional tune-up (single visit) | Once, minimum | 60–90 minutes | $75–$200 |
| Professional maintenance plan (two visits/year) | Spring and fall | 60–90 min each | $150–$500/year |
A few scheduling notes worth acting on:
- Book your spring visit in March or early April, before every other homeowner in your area calls when their AC fails on the first 90-degree day.
- Book your fall visit in September or October, ahead of the winter rush when technicians are booked solid fixing furnaces and heat pumps that failed on the first cold snap.
- If your budget only allows one professional visit a year, schedule it in fall. Heating failures tend to be more disruptive and more expensive to fix after the fact than cooling issues.
- Property managers overseeing multiple units should stagger visits across the property rather than booking every unit in the same week. It spreads cost and reduces the odds every tenant loses climate control simultaneously.
Regional pricing varies enough that it's worth getting a quote specific to your area rather than assuming national averages apply, particularly if you're in a market where HVAC labor runs higher than average.
What Should Be on Your DIY Heat Pump Checklist?
Your job isn't to fix the system. It's to keep it clean, unobstructed, and monitored so small problems stay small. Everything on this list requires nothing more than basic hand tools, and none of it should involve opening electrical panels or touching refrigerant lines.
Monthly tasks:
- Inspect the air filter and hold it up to a light source. If you can't see light through it clearly, replace it.
- Confirm every supply and return register in the house is open and unblocked by furniture or rugs.
- Check the thermostat display for error codes and confirm the schedule matches your actual routine.
- Stand near the indoor unit for 30 seconds and listen for anything unusual, rattling, whining, or a clicking that repeats on a cycle.
- Glance at the outdoor unit from a distance. Look for ice, debris, or anything leaning against the cabinet.
Quarterly and seasonal tasks:
- Maintain 2 feet of clearance on all sides of the outdoor unit, and check it every season since landscaping grows and shifts.
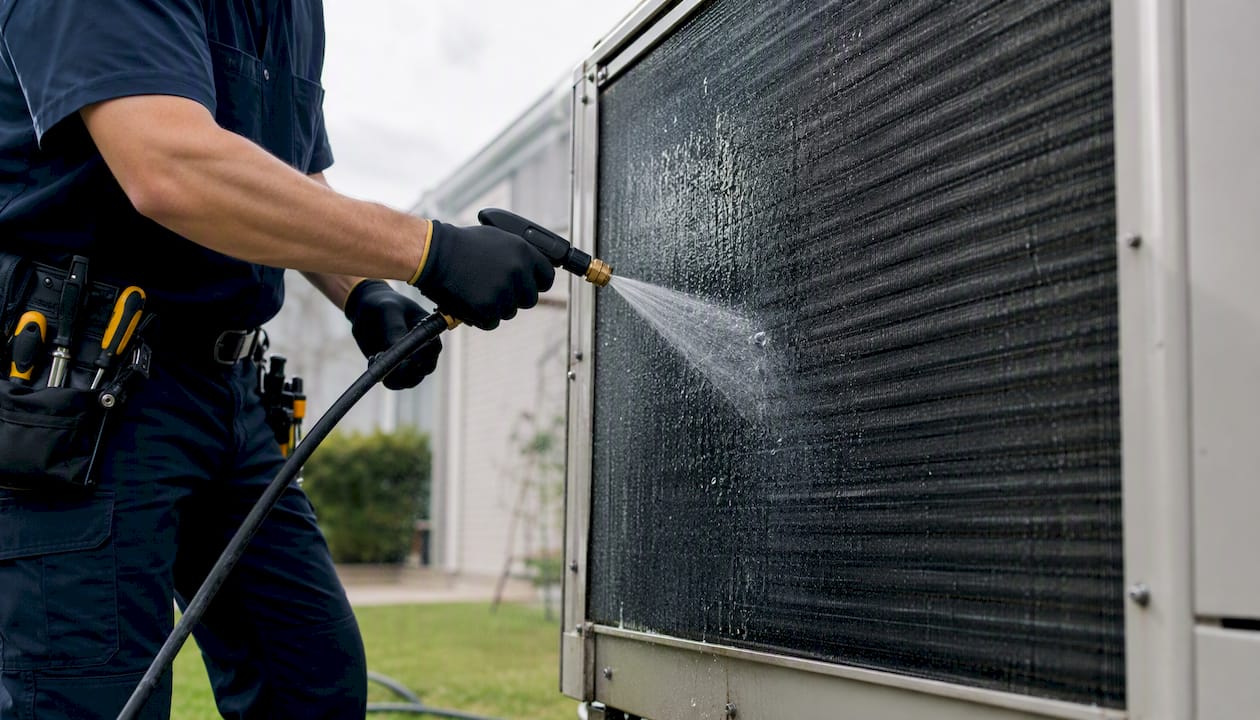
- Rinse the outdoor coil with a garden hose on low pressure, spraying from the inside out to push debris away from the fins rather than deeper into them.
- Flush the condensate drain line with a cup of distilled vinegar to prevent algae buildup, a step ENERGY STAR specifically calls out as a common failure point.
- Inspect the visible refrigerant line insulation for cracks, gaps, or chew marks from animals, and note any damage for your next technician visit.
- Clear snow, ice, and leaf litter from around the unit in winter; clear pollen film and grass clippings in spring.
Tools you actually need: a garden hose, a soft brush or vacuum with a brush attachment, a screwdriver for accessible panel screws, and distilled vinegar for the drain line. That's it.
What you should never touch: capacitors, contactors, refrigerant lines, or anything behind a panel labeled with a high-voltage warning. These require a licensed technician, both because they can injure you and because DIY work on sealed refrigerant components is illegal without EPA certification in most cases.
Pro Tip: Before opening any access panel, even for a filter change, flip the breaker for the system off at your electrical panel. If you can, tag it with painter's tape so nobody flips it back on while you're working.
What Does a Professional Heat Pump Tune-Up Include?
A real tune-up isn't a five-minute filter swap with a invoice attached. A complete professional visit covers four distinct system areas, and each one catches failure modes that are invisible to a homeowner doing a visual check.
Refrigerant and coils. The technician checks refrigerant pressure and looks for leak signs in both heating and cooling modes, since a system can perform fine in one mode while masking a problem in the other. Coils get cleaned of the fine dust and biofilm that a garden hose can't fully remove.
Electrical and controls. Capacitors get tested under load, since a capacitor can read fine at rest and still fail within weeks. Contactors get inspected for pitting, and all terminal connections get tightened, since a loose connection under a heat pump's constant vibration is one of the most common causes of no-heat and no-cool service calls.
Airflow and blower. The technician measures static pressure across the system, cleans the blower wheel (a part that collects dust in a way filters can't prevent), and confirms every register in the ductwork is actually delivering air, not just open.
Defrost and reversing valve. This is heat pump specific. The reversing valve is what lets the system switch between heating and cooling, and the defrost cycle prevents ice buildup on the outdoor coil during winter operation. A technician verifies both function correctly, something no homeowner checklist can replicate.
Behind these four categories sits a set of actual recorded measurements: suction and discharge pressure, superheat and subcooling values, compressor amp draw, and the temperature difference between supply and return air. A technician who records these numbers every visit builds a performance baseline for your specific system. That baseline is what catches a slow refrigerant leak two years before it becomes a full system failure, since the trend line moves gradually long before the symptoms show up.
Pro Tip: Ask for a copy of the readings after every visit, not just a checkmark on a form. A written record with actual pressure and amperage numbers protects your warranty claim if something fails later and gives the next technician a baseline to compare against.
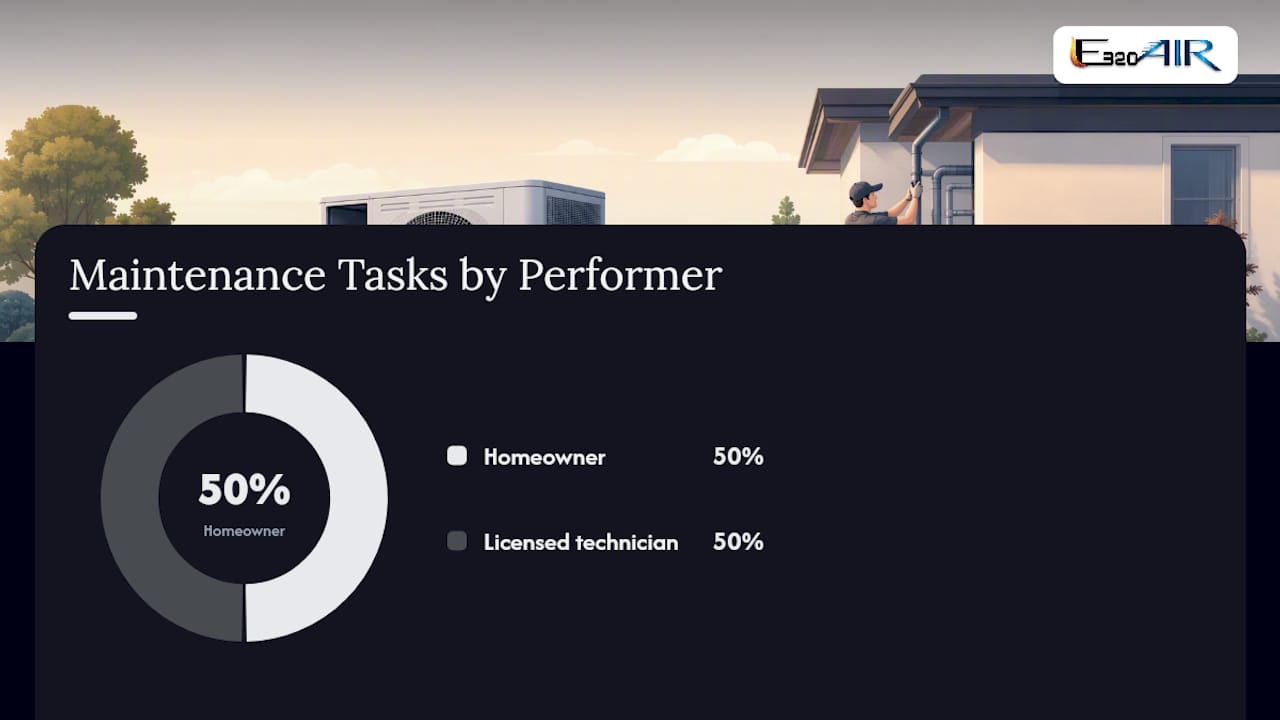
Here's how the responsibilities split in practice:
| Task | Who Handles It |
|---|---|
| Filter cleaning/replacement | Homeowner |
| Outdoor unit clearance and debris removal | Homeowner |
| Condensate drain flush (routine) | Homeowner |
| Coil rinse (garden hose, low pressure) | Homeowner |
| Refrigerant pressure and leak checks | Licensed technician |
| Capacitor and contactor testing | Licensed technician |
| Static pressure measurement | Licensed technician |
| Defrost cycle and reversing valve check | Licensed technician |
What Heat Pump Problems Need Immediate Attention?
Not every noise or performance dip means an emergency. Knowing which symptoms can wait until your next scheduled visit and which ones need a same-day call keeps you from either panicking over nothing or ignoring something that's about to fail completely.
Call today, don't wait:
- No heat or no cool output at all, especially during extreme outdoor temperatures.
- Ice covering the outdoor coil that doesn't clear during a normal defrost cycle (a few minutes every few hours is normal; a coil frozen solid for hours is not).
- A hissing sound near the refrigerant lines or an oily residue on any connection point. Both point to a refrigerant leak.
- Water pooling indoors near the unit or visible ceiling stains below an attic-mounted air handler.
- A burning smell of any kind, or a breaker that trips repeatedly when the system tries to start.
Schedule service within the week:
- Airflow that feels noticeably weaker than usual from the registers.
- A grinding or loud mechanical noise that wasn't present before.
- An energy bill that jumped significantly with no change in weather or usage habits.
- Auxiliary or backup heat kicking on frequently when outdoor temperatures aren't extreme, which usually signals the heat pump itself isn't keeping up.
Monitor, but no rush:
- Slightly uneven temperatures between rooms, common in larger or older homes.
- Occasional, brief fan noise that isn't constant or worsening.
- A small amount of condensation in the drain pan that clears on its own within a day.
If you're unsure which category a symptom falls into, a quick call to a technician to describe what you're seeing costs nothing and beats guessing wrong in either direction.
How Do Seasons Affect Heat Pump Maintenance?
A heat pump outdoors faces a completely different set of stresses in January than it does in July, and your maintenance routine should shift with it.
Before heating season (fall): Clear away summer's accumulated debris, leaves, grass clippings, spider webs in the cabinet vents. Confirm the unit still sits on a level pad with proper drainage, since ground shift over a summer of rain can tilt a unit enough to cause condensate pooling. Once heating season starts, watch the defrost cycle during the first cold snap; brief ice formation followed by a steam-off cycle every few hours is the system working correctly, not a malfunction.
Before cooling season (spring): Rinse the outdoor coil to remove the pollen film that builds up through allergy season, since pollen and cottonwood seed clog coil fins faster than most homeowners expect. Recheck your 2-foot clearance zone, since spring growth (bushes, tall grass, new landscaping) creeps toward outdoor units faster than people notice during winter months when nobody's out in the yard.
Year-round do-not-do list:
- Never use a pressure washer on the outdoor coil. The fins are thin aluminum and bend or tear under high pressure, permanently reducing airflow.
- Never cover a running unit, even during a storm. Heat pumps need continuous airflow, and a tarp or cover traps heat and moisture against the components.
- Never let snow accumulate against the unit's sides. A light dusting on top is fine; piled snow blocking the sides restricts airflow and can damage the fan.
Pro Tip: Rinse the coil no more than once a season unless you're in a heavy pollen or dust environment. Over-rinsing with high water volume can push debris deeper into the fins instead of out.
What Do HVAC Technicians Notice That Homeowners Miss?
The single biggest gap between a thorough tune-up and a rushed one comes down to one habit: checking refrigerant performance in both heating and cooling modes, not just whichever mode happens to be running that day. A heat pump can look perfectly healthy in cooling mode while hiding a slow leak that only shows up once the reversing valve switches for winter. Skip that second check, and you find out about the problem in December, at the worst possible time, instead of in October when it's a simple fix.
Terminal corrosion is another quiet killer. Electrical connections inside the unit vibrate constantly during operation, and that vibration loosens terminals over months and years. Technicians tighten every connection at each visit and often apply a nonconductive coating afterward specifically to prevent corrosion from humidity and temperature swings. It's a two-minute step that prevents a large share of the no-power service calls that happen mid-season.
The condensate drain deserves more respect than it gets. A drain line that's even partially clogged doesn't just risk a water leak. Many systems include a float switch that shuts the entire unit down the moment water backs up, meaning a small algae clog can take down your whole system on the hottest day of summer. Quarterly flushing with distilled vinegar, as ENERGY STAR recommends, prevents nearly all of these shutdowns.
On warranties: most manufacturers require documented professional maintenance to keep coverage valid, and a surprising number of denied warranty claims trace back to homeowners who either skipped professional visits entirely or attempted repairs on sealed or electrical components themselves. Keep every service receipt and readings sheet. If a compressor fails at year 8 and you have five years of documented tune-ups, that paperwork is what gets your claim approved instead of denied.
- Ask your technician to record readings every visit, not just perform a checklist.
- Keep every invoice and service report in one folder, physical or digital. Confirm your technician is checking both modes if you have a heat pump, not just the mode currently in season. Avoid attempting capacitor or refrigerant work yourself, as these require licensed professionals. It's an EPA-regulated procedure for a reason.
Pro Tip: A well-maintained heat pump with documented service history commonly reaches the full 15 to 20-year lifespan manufacturers rate it for. Neglected units often fail closer to the 10 to 12-year mark, sometimes sooner.
Printable Heat Pump Maintenance Checklist
Print this page or screenshot it. Keep it near your thermostat or in a kitchen drawer so it's actually used instead of forgotten in an email folder.
Monthly:
- Check filter, replace if needed (every 60–90 days minimum)
- Confirm all registers open and unblocked
- Check thermostat schedule
- Listen for unusual noises
Before cooling season (spring):
- Rinse outdoor coil with garden hose (low pressure)
- Confirm 2-foot clearance around outdoor unit
- Flush condensate drain with distilled vinegar
- Check refrigerant line insulation for damage
Before heating season (fall):
- Clear debris and leaves from around outdoor unit
- Confirm unit is level with proper drainage
- Watch first defrost cycle for normal operation
- Check filter and replace before heavy heating use
Annual or biannual (professional):
- Refrigerant pressure and leak check (both modes)
- Capacitor and contactor testing
- Coil cleaning (indoor and outdoor)
- Static pressure and airflow measurement
- Defrost cycle and reversing valve verification
- Documented readings provided in writing
Safety note: everything under "Monthly" and seasonal sections is safe for a homeowner with basic tools. Everything under "Professional" requires a licensed technician. If you're ever unsure which category a task falls into, treat it as professional work and make the call.
What Homeowners Get Wrong About Heat Pump Maintenance
Most maintenance advice treats a heat pump like a furnace with extra steps, and that's the wrong mental model entirely. A furnace only has to perform one job in one direction. A heat pump reverses its entire refrigerant cycle twice a year, and that dual function is exactly why the standard "check it once before winter" advice most homeowners grew up with falls short.
The conventional wisdom oversells filter changes as the whole maintenance story. Filters matter, but they're the easy part, the part every checklist online already covers. What actually determines whether your heat pump reaches year 20 instead of year 10 is whether someone measured refrigerant performance in both modes and caught a slow leak before it became a compressor failure. That's not a task you'll find emphasized on most consumer blogs, because it requires equipment and training most writers don't have. It's also the single detail that separates a real tune-up from a technician who shows up, glances at the outdoor unit, and leaves.
If I had to tell a homeowner to prioritize exactly one thing beyond the monthly filter check, it wouldn't be the coil rinse or the drain flush, useful as those are. It would be this: don't accept a professional visit that only checks the system in whatever mode happens to be running that day. Ask directly whether the technician checked both heating and cooling performance. If the answer is no, you've paid for half a tune-up and won't find out what you missed until the season changes.
How E320air Helps You Stay Ahead of Repairs
Most of what keeps a heat pump running smoothly, the filter checks, the coil rinses, the debris clearing, you can handle yourself with the checklist above. What you can't do yourself is the part that actually prevents the expensive failures: measuring refrigerant pressure in both modes, testing capacitors under load, and building a performance baseline that catches problems while they're still cheap to fix.

That's where E320air's maintenance plans come in. We offer single-visit tune-ups and two-visit seasonal plans built around the spring and fall schedule outlined here, and every visit ends with a documented service report listing the actual readings our technicians recorded, not just a checked box. That paperwork is what protects your manufacturer warranty if a covered part fails down the road. Our technicians are licensed to handle refrigerant and electrical work safely, and property managers overseeing multiple units can look at our commercial HVAC services for contracted maintenance across a portfolio. If you'd rather see real repair outcomes before booking, our problem-solving gallery walks through actual before-and-after cases. Ready to get your spring or fall tune-up on the calendar? Schedule your heat pump service with E320air and get a written checklist of exactly what was checked.
Where to Learn More About Heat Pump Maintenance
A few sources back the recommendations throughout this checklist, and each one is worth bookmarking if you want model-specific detail beyond what a general guide can cover.
- The Department of Energy's heat pump operating guide covers the fundamentals of duct inspection, filter care, and coil cleanliness that apply across nearly every residential system.
- ENERGY STAR's maintenance checklist lays out the homeowner-facing tasks, filter intervals, clearance requirements, and drain care, in the clearest consumer-friendly format available.
- Manufacturer pages like Trane's maintenance tips and Bryant's maintenance guide matter because they cover model-specific details, elevation requirements, warranty conditions, that generic advice can't address.
- Filterbuy's tune-up checklist and the MapTrack technician checklist template offer a closer look at the actual measurements a technician records during a visit.
- For indoor air quality context alongside your HVAC filter routine, this homeowner's guide to air filter maintenance covers the health angle that a strictly mechanical checklist leaves out.
Always check your unit's owner's manual first. Manufacturer-specific torque values, filter dimensions, and clearance minimums vary enough between brands that a generic checklist can only get you most of the way there.
Sources
- Maintenance Checklist | ENERGY STAR
- Heat Pump Maintenance: Complete Checklist & Guide | Bryant
- Heat Pump Maintenance Service Cost | Forbes