

TL;DR:
- Homeowners can improve indoor air quality by cleaning accessible parts of their ductwork through DIY methods. Professional cleaning is necessary for deep contamination, mold, or pest issues, which require specialized equipment and expertise. Regular maintenance, such as vent covers and filter replacement, helps preserve system efficiency and safety.
Cleaning air ducts step by step is the most direct way homeowners and tenants can reduce dust buildup, improve airflow, and protect indoor air quality without waiting for a service call. DIY duct cleaning targets accessible vent covers, duct boots, and the first few feet of ductwork. It does not replace professional cleaning for mold, pests, or deep contamination. The National Air Duct Cleaners Association (NADCA) sets the standard for professional duct cleaning, and professional services typically cost $300–$700 depending on home size and system complexity. Knowing where DIY ends and professional work begins is what makes this process safe and effective.
What tools do you need for step-by-step duct cleaning?
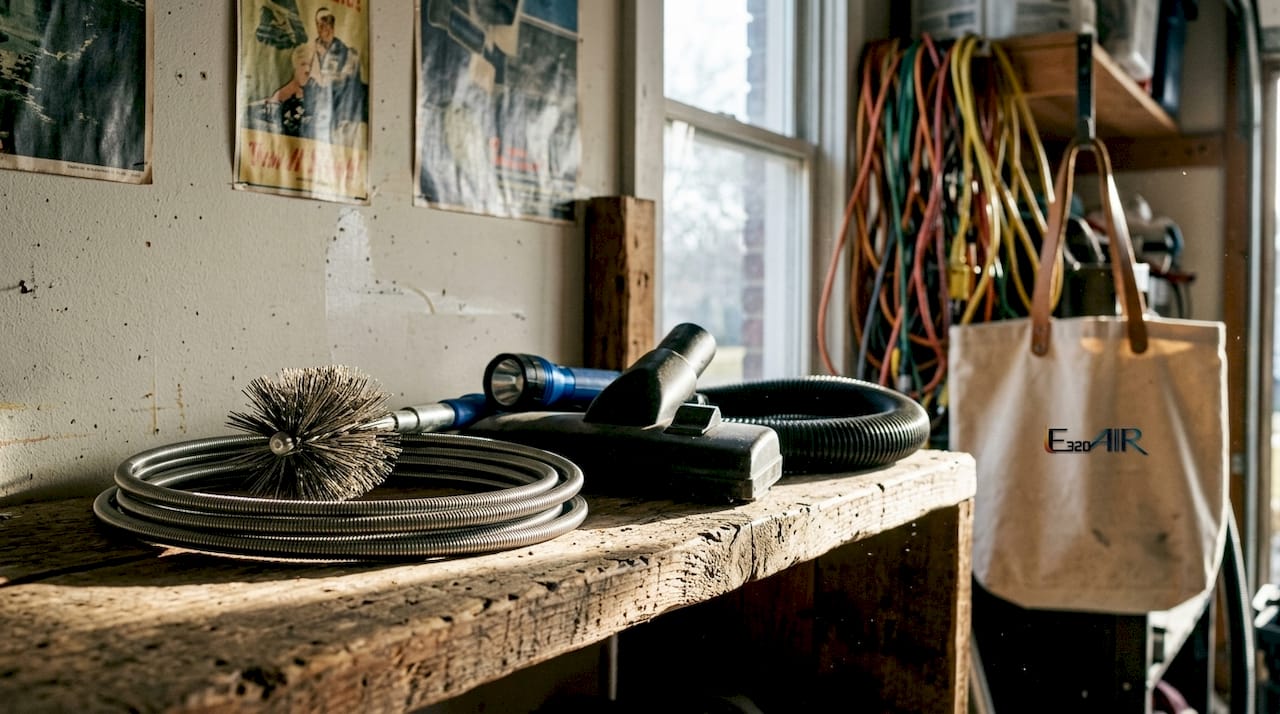
The right tools make the difference between a thorough cleaning and a wasted afternoon. You do not need specialized contractor equipment for surface-level duct maintenance, but a few specific items are non-negotiable.
Tools and materials checklist:
- HEPA-filtered shop vacuum with a long, flexible hose attachment (standard household vacuums lack the suction and filtration needed)
- Stiff-bristled duct brush or a brush set with flexible extensions to loosen caked-on dust
- Microfiber cloths and warm soapy water for washing vent covers
- Screwdriver or cordless drill to remove vent and register covers
- Flashlight or phone flashlight for inspecting duct openings before you insert any tool
- N95 mask, safety goggles, and disposable gloves to protect against dust and allergens during cleaning
Each tool serves a specific purpose. The HEPA filter on your vacuum keeps loosened particles from recirculating into the room. The stiff brush dislodges dust that vacuum suction alone cannot pull free. The flashlight is not optional. You need to see what is inside before you reach in.
Pro Tip: Buy a duct brush set with a flexible rod system. These extend 6–10 feet and let you clean further into straight duct runs without forcing a rigid tool that could damage duct seals.
A step-by-step ductwork inspection always starts with the right gear. Skipping protective equipment is the fastest way to turn a cleaning project into a respiratory irritation.
How to clean air ducts step by step safely and effectively
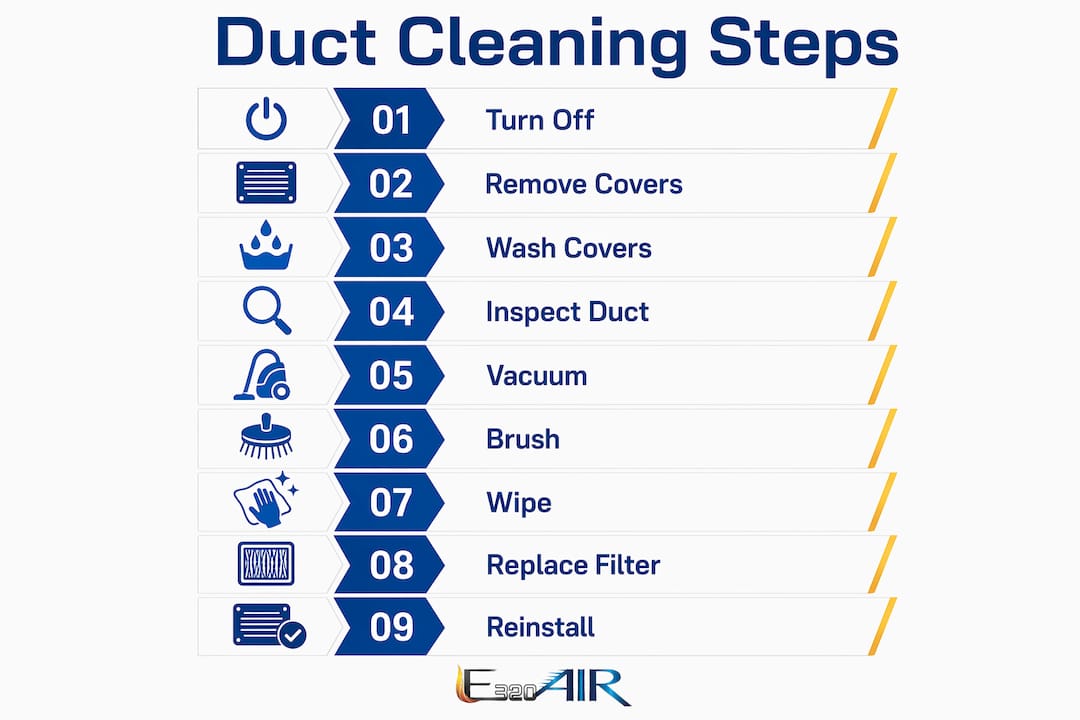
This process covers the full DIY scope: vent covers, duct boots, and accessible duct interiors. A basic register and duct boot cleaning takes about 30 minutes per vent using a HEPA vacuum and microfiber cloths. Work through each step in order and do not skip the inspection phase.
Step 1: Turn off the HVAC system
Switch off the system at the thermostat first, then cut power at the breaker. This prevents the system from cycling on while you work and stops it from pulling loosened dust deeper into the ductwork. Never clean with the system running.
Step 2: Remove and label all vent and register covers
Use a screwdriver or drill to remove every supply and return vent cover in the area you are cleaning. Label each cover with a piece of tape and a marker so you know exactly where it goes back. Covers are not always interchangeable, especially in older homes with non-standard sizing.
Step 3: Wash and fully dry the covers
Wash vent covers in warm soapy water and scrub off dust with a stiff brush or old toothbrush. Rinse thoroughly and set them aside to dry completely. Reinstalling damp vent covers is the most common DIY mistake and the leading cause of moisture buildup and mold growth inside ducts. Bone dry means bone dry.
Step 4: Inspect duct openings with a flashlight
Before inserting any tool, shine a flashlight into each duct opening and look carefully. You are checking for visible mold (dark or fuzzy patches), pest droppings or nesting material, standing moisture, and damaged or deteriorating insulation. If you find mold, moisture, pests, or insulation breakdown, stop immediately and call a professional. Proceeding past this point without expert help can spread contamination through the entire system.
Step 5: Vacuum inside the ducts
Insert the HEPA vacuum hose into the duct opening and vacuum as far as the hose reaches comfortably. DIY cleaning typically reaches only the first 2–6 feet of ductwork. That is the limit of safe DIY scope. Forcing a hose or rigid tool deeper risks damaging duct seals and dispersing contaminants further into the system.
Step 6: Brush duct surfaces to loosen dust
After vacuuming, insert the flexible duct brush and scrub the interior walls of the duct boot and the first accessible section of the duct run. Work the brush in short back-and-forth strokes. Follow immediately with the vacuum to capture loosened debris before it settles.
Step 7: Wipe duct boots and surrounding areas
Use a damp microfiber cloth to wipe the duct boot (the metal collar connecting the duct to the vent opening) and the surrounding drywall or flooring. Dust accumulates heavily in these areas and gets pulled back into the duct every time the system runs.
Pro Tip: Wrap a microfiber cloth around the end of a ruler or paint stir stick to reach the back corners of duct boots without straining your wrist.
Step 8: Replace the air filter
Before reinstalling vent covers, replace your HVAC air filter. Upgrading to a MERV 8–11 filter after cleaning helps the system run more efficiently and captures finer particles going forward. A clean duct with a clogged or low-rated filter defeats the purpose of the whole process. For more on filter selection, the HVAC filter essentials guide covers MERV ratings in detail.
Step 9: Reinstall covers and run the system
Reinstall the fully dry vent covers using your labels as a guide. Turn the system back on at the breaker, then set the thermostat to run a full cycle. Stand near each vent and check for steady airflow. Reduced airflow from a specific vent after cleaning can indicate a blockage deeper in the duct run that needs professional attention.
| Step | Action | Key check |
|---|---|---|
| 1 | Turn off HVAC at thermostat and breaker | Power fully off before touching any duct |
| 2 | Remove and label vent covers | Label prevents mismatched reinstallation |
| 3 | Wash and dry covers completely | Must be bone dry before reinstalling |
| 4 | Inspect duct openings with flashlight | Stop if mold, pests, or moisture present |
| 5 | Vacuum first 2–6 feet of ductwork | HEPA filter required; do not force deeper |
| 6 | Brush and re-vacuum duct surfaces | Loosen then capture dust in sequence |
| 7 | Wipe duct boots and surroundings | Removes dust that re-enters the system |
| 8 | Replace air filter (MERV 8–11) | Sustains air quality after cleaning |
| 9 | Reinstall covers and test airflow | Verify steady flow at each vent |
What are the common mistakes and safety precautions in DIY duct cleaning?
Most DIY duct cleaning errors fall into two categories: rushing the drying process and overreaching the safe cleaning depth. Both cause more damage than doing nothing at all.
Mistakes to avoid:
- Reinstalling damp covers. Moisture trapped inside ducts creates the exact conditions mold needs to grow. Wait until covers are fully dry, even if that means overnight.
- Using liquid cleaners inside ducts. Spraying any liquid into ductwork introduces moisture and can damage insulation or duct lining. Dry methods only inside the duct.
- Forcing vacuum hoses or brushes too deep. Rigid tools pushed past the first few feet can puncture duct seals, disconnect joints, or tear flexible duct sections.
- Skipping the mask and goggles. Loosened duct dust contains fine particulates, mold spores, and allergens. An N95 mask and goggles are the minimum protection.
- Ignoring warning signs during inspection. Pest droppings, dark staining, or a musty smell are not cosmetic issues. They require professional remediation, not a vacuum.
"Early identification of mold, moisture, pest signs, or insulation damage during inspection is essential for safe, effective duct cleaning. Proceeding without professional intervention can worsen air quality."
Pro Tip: Take a photo inside each duct opening with your phone before cleaning. This gives you a baseline to compare against on your next cleaning cycle and documents any changes worth reporting to a technician.
Understanding when duct cleaning requires professional help protects both your health and your HVAC system from well-intentioned but damaging DIY attempts.
When should you hire a professional for air duct cleaning?
DIY duct cleaning handles surface maintenance well. It does not handle contamination, mechanical issues, or deep duct runs. Recognizing the line between the two protects your home and your health.
Call a professional when you observe any of the following:
- Visible mold or microbial growth inside ducts or on vent covers. Professional services include containment protocols and biocidal treatments that DIY cannot replicate.
- Pest infestation evidence such as droppings, nesting material, or live insects. Pest remediation must happen before any cleaning.
- Severe dust accumulation or post-renovation debris. Construction dust contains fine silica and other particles that require truck-mounted vacuum systems with negative-pressure containment to prevent redistribution.
- Worsening allergy or asthma symptoms that correlate with HVAC use. This signals contamination beyond the accessible duct sections.
- Older systems with flexible or fiberglass duct board. These materials are fragile and tear easily under DIY tools.
- No improvement in airflow after DIY cleaning. Blockages deeper in the system need professional diagnosis.
Proper professional cleaning uses mechanical agitation combined with continuous negative air pressure and HEPA filtration. This process removes contaminants at the source without displacing dust into living spaces. It also covers internal components like blower motors and coils that DIY never reaches. That combination is physically impossible to replicate with a shop vacuum and a brush set.
A professional HVAC cleaning also includes a full system inspection, giving you documentation of the duct condition before and after service. That documentation matters if you are selling a home or managing a rental property.
Key Takeaways
DIY duct cleaning reduces surface dust and improves airflow, but professional cleaning with HEPA containment and mechanical agitation is the only method that removes deep contamination safely.
| Point | Details |
|---|---|
| DIY scope is limited | Safe DIY cleaning reaches only the first 2–6 feet of ductwork; deeper cleaning requires professional equipment. |
| Dry covers before reinstalling | Damp vent covers cause moisture buildup and mold growth inside ducts. |
| Inspect before you clean | A flashlight check for mold, pests, and moisture must happen before any tool enters the duct. |
| Upgrade your filter after cleaning | A MERV 8–11 filter sustains air quality gains and helps the system run more efficiently post-cleaning. |
| Know when to stop | Mold, pests, worsening symptoms, or post-renovation debris all require professional remediation, not DIY tools. |
What I have learned from years of duct cleaning calls
The homeowners who call E320air after a DIY attempt usually made the same mistake: they went further than the job required. They forced a vacuum hose deep into a duct run, heard a pop, and suddenly had a disconnected duct joint pushing conditioned air into a wall cavity instead of a room. That repair costs more than a professional cleaning would have.
The step-by-step ductwork cleaning process described here is genuinely useful maintenance. Washing vent covers, vacuuming duct boots, and replacing filters on a regular schedule keeps surface dust from accumulating and makes professional cleanings more effective when you do schedule them. Think of it the way you think about brushing your teeth. Daily brushing matters. It does not replace a dental cleaning.
What surprises most homeowners is how much the filter does. A clogged MERV 4 filter after a thorough DIY cleaning will undo most of the air quality benefit within a few weeks. Upgrading to a MERV 10 or 11 after cleaning is the single highest-return action you can take. The relationship between ductwork and HVAC efficiency is tighter than most people realize.
My honest recommendation: do the DIY cleaning twice a year, schedule a professional inspection every 3–5 years, and call sooner if you see anything unusual during your flashlight check. That combination keeps your system healthy without overspending on services you do not need yet.
— Edward
E320air professional duct cleaning for deeper results
DIY maintenance keeps your vents clean between service visits. When your inspection reveals something beyond surface dust, E320air's certified technicians handle the rest.
E320air provides professional duct cleaning services that follow NADCA standards, using mechanical agitation and HEPA-filtered negative-pressure equipment to remove contaminants from the full duct system, not just the first few feet. Every service includes before and after documentation so you can see exactly what changed. The problem-solving gallery shows real examples of what professional cleaning uncovers and resolves. Schedule a service visit when your DIY inspection flags mold, pests, or airflow problems that a brush and vacuum cannot fix.
FAQ
How often should you clean air ducts yourself?
Clean vent covers and duct boots every 6–12 months as part of regular home maintenance. Replace your HVAC filter every 1–3 months depending on filter rating and household conditions.
Can DIY duct cleaning remove mold?
No. DIY mold removal risks spreading harmful spores through the duct system. Visible mold requires professional containment and biocidal treatment.
What MERV filter rating should you use after cleaning?
A MERV 8–11 filter is the recommended range after a DIY duct cleaning. It captures finer particles than standard filters without restricting airflow in most residential systems.
How deep can you safely clean ducts yourself?
Safe DIY cleaning reaches the first 2–6 feet of ductwork from each vent opening. Forcing tools deeper risks damaging duct seals and dispersing contaminants further into the system.
What are the signs that you need professional duct cleaning?
Visible mold, pest evidence, post-renovation dust, worsening allergy or asthma symptoms, and no airflow improvement after DIY cleaning all indicate that professional service is needed.