
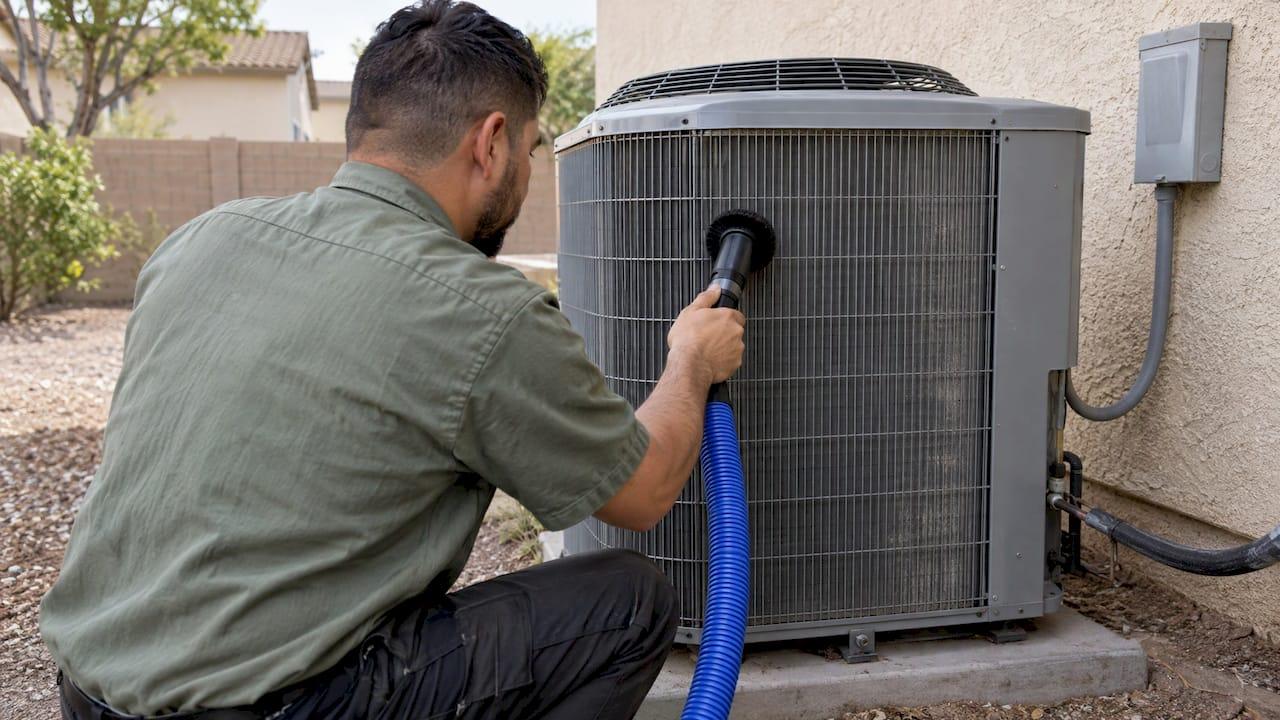
The safest coil cleaning method for most Inland Empire homes is a two-part routine. You clear the area around the outdoor unit and rinse the condenser coil gently with a garden hose. A licensed technician handles chemical cleaning, microchannel coils and the indoor evaporator coil. Manufacturers say the same: Bryant tells homeowners to leave deep cleaning of the indoor coil to a professional, and Carrier says heavy-duty coil cleaner and rinsing belong with a local HVAC dealer. At E320air, our technicians do this work on residential and commercial systems across the Inland Empire.
TL;DR
- Turn off power at the disconnect or breaker before you touch the outdoor unit, and keep at least two feet of clear space around it.
- Rinse the condenser coil with a garden hose, from the inside out, at a 45-degree angle. Never use a pressure washer, because it can crush the fins.
- Dish soap is not a coil cleaner. Coil chemicals must suit aluminum fins and, on microchannel coils, stay in a narrow pH range.
- Clean the outdoor coil at least once a year. Dirty coils make the system run longer and use more energy.
- The indoor evaporator coil, e-coated coils and any coil that stays dirty after a rinse are a technician's job.
Table of Contents
- Two coils, two different jobs
- How to tell a coil needs cleaning
- The homeowner method: dry clean, then a gentle rinse
- Special case: microchannel and e-coated coils
- Cleaners: what works and what to avoid
- The indoor evaporator coil: leave it to a technician
- When cleaning is no longer enough
- What we do when you want it done right
- Perspective: why we favor a maintenance visit over a one-off rinse
- FAQ
- Sources
Two coils, two different jobs
Your air conditioner has two coils, and the cleaning methods differ for each.
The condenser coil sits in the outdoor unit. It releases the heat your home has absorbed. It looks like a metal cage of thin aluminum fins, and it collects whatever the wind carries: dust, leaves, grass clippings, cottonwood fluff and pollen.
The evaporator coil sits indoors, above the furnace or inside the air handler. It absorbs heat and moisture from your indoor air. It is enclosed, wet, and sits above a drain pan that is often only about an inch deep, which is why NADCA, the air duct cleaning trade association, stresses water control when cleaning it.
This article gives you the full outdoor method, explains why the indoor coil is different, and shows where each approach goes wrong.
How to tell a coil needs cleaning
A clean condenser coil shows bare metal fins you can see through. A dirty one shows a mat of grass, fluff or gray film packed between the fins. BTU Size lists the other signs: weaker cooling, longer run times, an outdoor unit that feels very hot, and rising electric bills.
The cause is simple. A clogged condenser coil expels less heat, so the system has to run longer or work harder to do the same cooling, as NADCA's industry guidance on coil cleaning explains. A longer runtime means a higher bill and more wear on the compressor. For more on that wear, see our list of compressor failure symptoms.
How often to clean
For most homes, once a year is the baseline, usually in spring before the hot season starts. Some equipment is stricter. AAON's manual for its RQ Series units says microchannel condenser coils need cleaning at least once a year, and more often where there is heavy debris, dirt or grease. The same manual requires quarterly cleaning of e-coated coils to keep the coating warranty valid. Check your equipment's manual or ask your technician which coil type you have.
The homeowner method: dry clean, then a gentle rinse
This is the routine the major manufacturers and university guides agree on. Each step has a place where it commonly goes wrong.

Step 1: Cut the power
Switch off the outdoor disconnect box, usually a small gray box on the wall near the unit, and the AC breaker at your panel. The University of Illinois EnergySense guide also advises locking out or tagging the switches, wearing gloves and eye protection, and shielding electronics from water.
Where it goes wrong: rinsing a unit that still has power to it. Water and live electrical parts are the main safety risk of this job. If you cannot find the disconnect, stop and have a technician do it.
Step 2: Clear the surroundings
Cut back shrubs, weeds and vines so you have at least two feet of open space on every side. Sweep away leaves and loose debris from the base and top. Good Housekeeping gives the same two-foot clearance advice.
Where it goes wrong: clearing only the front. Air enters from several sides, and a blocked side starves that part of the coil.
Step 3: Remove surface dirt dry
Use a vacuum with a soft brush attachment on the outside of the fins. Move straight up and down along the fins, not across them. Carrier's guide describes this up-and-down motion with a soft brush attachment.
Where it goes wrong: pressing hard or sweeping sideways. Aluminum fins are fragile. EnergySense notes that bent fins permanently restrict airflow, and straightening them takes care to avoid more damage. The goal is a coil that air flows through easily, not a shiny one.
Step 4: Rinse gently with a garden hose
Set the hose to a mist or shower setting. Spray from the inside of the coil out, so you push dirt away from the center instead of packing it deeper. Bryant recommends hosing at a 45-degree angle, working your way down the front, sides and back.
Where it goes wrong: removing the top cover and fan without knowing how to reconnect the wiring, or aiming straight at the fins at close range. Fan removal is where a simple cleaning turns into a service call.
Step 5: Never use a pressure washer
Bryant, Carrier and Good Housekeeping all say not to use one. High pressure flattens fins and can force dirt into the coil. This is the most common way a well-meant cleaning ruins a coil.
Step 6: Let it dry and restore power
Wait until the unit is dry, put back any panels you removed, turn the disconnect and breaker back on, and run the system. Listen for new noises and check that the fan spins freely.
Special case: microchannel and e-coated coils
Many newer systems use microchannel coils, which are flat aluminum tubes with tightly packed fins, instead of the older round copper tube design. Some commercial and rooftop units use e-coated coils, which have a protective coating. Both are less forgiving of the wrong method.
Luvata's published procedure for microchannel coils, reported in ACHR News, calls for water only, with no chemicals. It starts with a soft-attachment vacuum, then compressed air from the inside out, then a gentle rinse from at least 24 inches away. Luvata's engineer also suggests putting a thumb over the hose end instead of using a nozzle, for a softer spray.
Trane's service bulletin, quoted in the same article, says a chemical cleaner should be used on microchannel coils only in extreme cases. It must be pH neutral, between 6 and 8, and free of hydrofluoric acid, with a thorough rinse afterward.
For e-coated coils, AAON requires rinse water below 130°F and pressure below 100 psig. It also bans bleach, harsh chemicals and acid cleaners. Use the wrong product and the manual says you can expect coil damage, lost performance and possibly leaks that need coil replacement.
What this means for you: if you are unsure which coil your unit has, treat it as the most delicate type: low pressure, plain water, no chemicals. If the coil needs more than that, have a technician do it.
Cleaners: what works and what to avoid
Most of the time, plain water is enough. EnergySense says that on regularly maintained coils water should be all that is necessary, and that mild soap or the gentlest available chemical is the fallback.
For coils that have gone a few seasons without cleaning, a coil cleaner is applied and left to soak. Soak times vary by product and equipment. AAON's manual lists a 4-to-1 water solution of a neutral-pH biodegradable cleaner for its microchannel coils, with a 10 to 15 minute soak and a rinse. Lennox says aluminum coils can be damaged by solutions below pH 5 or above pH 9, and calls for potable water at under 50 psi, a thorough rinse, and a trained technician for maintenance.
Can you use dish soap on AC coils?
It is a common question, and the safe answer is no. Dish soap is not formulated for coil metals, and its pH can swing too high or too low for aluminum fins. Some products also contain salt, which speeds corrosion. Coil damage is slow and silent: the fins corrode over months, and you only notice when cooling drops or a leak appears. A technician uses a coil cleaner matched to your coil type, the right dwell time, and a full rinse.
Also avoid bleach, acid cleaners, vinegar mixtures and solvents. A cleaner that works on a baking pan can eat a coil.
Why pressure and flow matter
Professional tools differ from a garden hose. Coil cleaning equipment makers say that rinsing a dense commercial coil takes both adequate pressure and enough water flow, and that typical pressure washers and weak pump sprayers each fail in different ways. That is why the right pressure depends on the coil: Lennox sets under 50 psi for its aluminum coils, AAON under 100 psi for its units, and heavier commercial coils tolerate more. A technician reads the equipment label and sets the method to match.
The indoor evaporator coil: leave it to a technician
The indoor coil is behind panels, near electrical controls, and above a shallow drain pan. NADCA outlines a four-step professional process: assessment, visual inspection, dry cleaning, then wet cleaning. It also stresses reading chemical labels and knowing dilution ratios.

The stakes are real. NADCA's guidance notes that debris getting past the filter can settle on the coil and later travel into the ductwork. Moisture from a dirty evaporator coil can raise humidity, cause odors and encourage microbial growth. Both manufacturers quoted above, Bryant and Carrier, tell homeowners to leave this coil to a professional.
Signs to call about include ice on the indoor coil or refrigerant line, a musty smell when the system starts, water around the air handler, or weak airflow after you have replaced the filter. If you see signs of a leak, read our guide to diagnosing evaporator coil leaks and have a technician look at it. If water or electrical trouble appears, our emergency shutoff procedure for California homeowners shows how to stop the system safely first.
When cleaning is no longer enough
Some coils cannot be rescued by cleaning. Corroded or crushed fins, a coil with refrigerant leaks, or a system that has run on dirty coils for years may need repair or replacement. Both Bryant and Carrier say to contact a dealer for suspected refrigerant or electrical issues. When replacement is the right call, plan for the old unit as well: air conditioner disposal is its own job, and it is best arranged before installation day.
Cleaning also helps a system last. It is one of the habits in our guide to extending HVAC lifespan.
What we do when you want it done right
If your coils need more than a rinse, or you would rather not work around live electrical parts, we handle it. Our licensed and insured technicians work on all major brands, so the method and cleaner are matched to your equipment instead of improvised. We offer routine maintenance for residential and commercial systems, as well as repairs and emergency service around the clock, including weekends and holidays. Flexible payment options, including financing, are available when a repair or upgrade is larger than expected.
You can book maintenance through our routine maintenance and commercial HVAC page, or start from our homepage for residential service.

We serve homeowners, landlords, property managers and business owners across the Inland Empire, from Riverside, Corona and Fontana to Hemet, Redlands and Rancho Cucamonga.
Perspective: why we favor a maintenance visit over a one-off rinse
A hose rinse once a year is a good habit, and we would never talk a homeowner out of clearing leaves from their unit. But the coil is only one part of the system, and the way it gets cleaned matters as much as whether it gets cleaned.
What we want for the customers we serve is a system that is checked as a whole. A technician who cleans the coil can also look at the fan, the electrical connections, the drain and the refrigerant side in the same visit. Problems found early are cheaper to fix than problems found in the middle of a heat wave.
That is why we talk about maintenance, not just cleaning. Our technicians are licensed and insured, we work on all major brands, and we aim for energy-efficient results with minimal disruption to your day. If a coil is beyond saving, we can talk through repair or an upgrade, and financing is available so the decision does not have to wait.
Clean coils are one of the simplest ways to help your system run as it was designed to. Do the easy outdoor basics yourself if you like, and let us take care of the rest.
Edward
FAQ
How do I know if my condenser coil is clogged?
Look at the outdoor unit with the power off. If you see a mat of grass, fluff or gray film between the fins, or cannot see daylight through them, it is clogged. Weak cooling, long run times, a very hot outdoor unit and rising electric bills point to the same problem. A technician can confirm whether dirt is the cause or something else is.
Can I use Dawn dish soap on my AC coils?
We recommend against it. Dish soap is not made for coil metals, and its pH and any salt content can corrode aluminum fins over time. Plain water is the safest homeowner option. If the coil needs a cleaner, a technician will use a coil product suited to your equipment and rinse it thoroughly.
How often should condenser coils be cleaned?
Once a year is the usual baseline, ideally in spring. Some equipment has stricter requirements: AAON, for example, requires quarterly cleaning of its e-coated coils to keep coating warranty coverage. Homes near construction, dusty lots or lots of trees may need cleaning more often.
Can I use a pressure washer on my condenser coil?
No. Bryant, Carrier and Good Housekeeping all warn against it because high pressure bends and crushes the fins and drives dirt deeper into the coil. A garden hose on a gentle setting, held at a 45-degree angle and spraying from the inside out, is the safe method for homeowners.
Should I clean the indoor evaporator coil myself?
No. The indoor coil is near electrical parts, sits over a shallow drain pan and needs the right chemicals and water control. Manufacturers say to leave it to a professional. Call a technician if you notice ice, musty smells or water near the air handler.
Sources
- How to Clean an AC Unit: Step-by-Step Guide, Bryant
- How to Clean an AC Unit, Carrier
- Cleaning Condensing Units, University of Illinois EnergySense
- Cleaning Microchannel Coils, ACHR News
- How to Clean an Air Conditioner, Good Housekeeping
- RQ Series (2-5 ton) Installation and Operating Manual, AAON
- Installation Instructions, Lennox
- All About Coil Cleaning, NADCA
- How to Clean Your AC Condenser Coils, BTU Size
- Coil Cleaning e-book, SpeedClean