
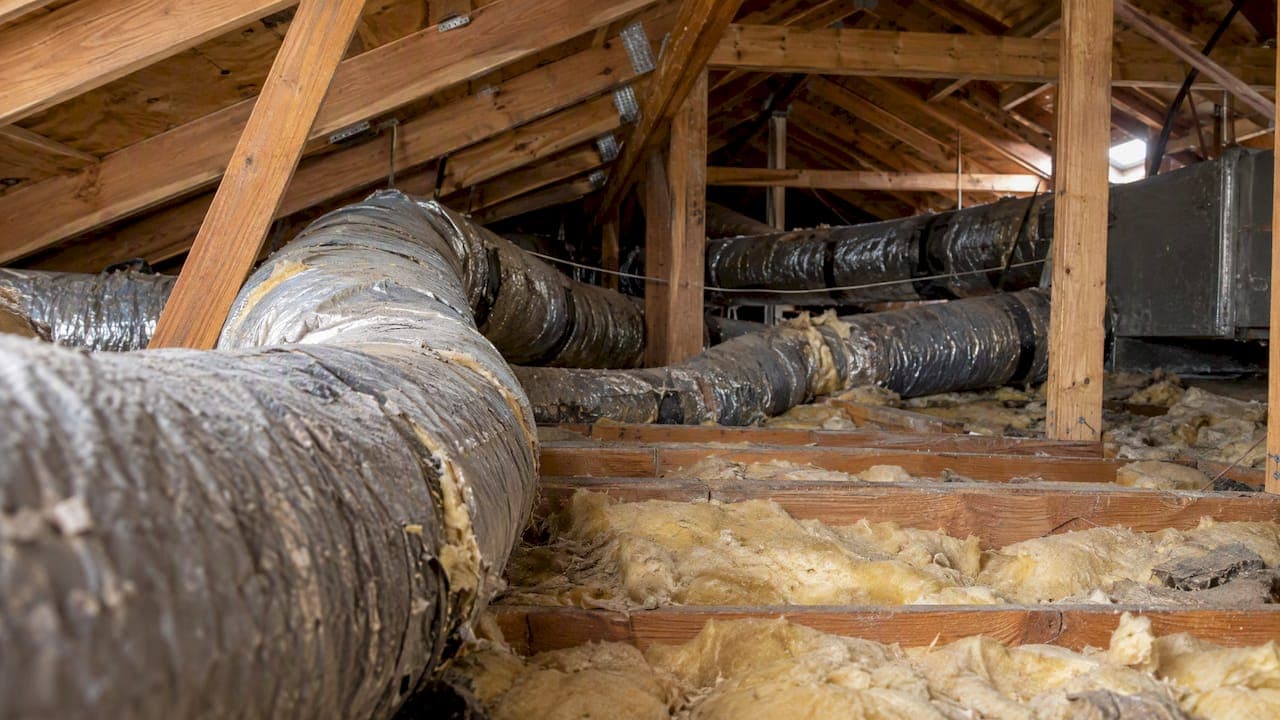
The best HVAC upgrade for an older home starts with the house, not the equipment. Check the ducts, seal the air leaks, have the load calculated room by room, and only then pick a system sized to what the home needs today. A new unit hooked to leaky, original ductwork rarely delivers the comfort or the savings you paid for. Done in the right order, the same project can cool and heat a 1960s ranch in Moreno Valley or a 1940s bungalow in Redlands far better than the system it replaces.
TL;DR
- Inspect and seal the ducts first. In older homes, duct leakage can reach 30% to 50% of airflow, so a new unit can lose much of its output before it reaches a room.
- Air sealing comes before insulation, and both should be settled before you size new equipment.
- Ask for a room-by-room Manual J load calculation. Never accept a replacement sized by matching the old unit.
- Ducted heat pumps can replace a central AC and furnace, and ductless mini-splits suit homes or additions where ducts do not exist or cannot be extended.
- Check utility, state and federal incentives before you sign. Programs change, so confirm the current terms.
Table of Contents
- Why older homes need a different approach
- Step 1: Inspect what you already have
- Step 2: Air sealing, insulation and new HVAC, in the right order
- Step 3: Get the sizing right
- Step 4: Choose a system that fits the house
- Step 5: Add controls, then check incentives
- A realistic upgrade sequence
- Our perspective
- Plan your older home upgrade with E320 Air
- Frequently asked questions
- Sources
Why older homes need a different approach
A house built decades ago was designed around different expectations. Ducts were often run through hot attics, joints were sealed with cloth tape that has long since dried out, and insulation was thin or has settled. Windows and framing leak. Many homes also gained rooms, garages or casitas over the years that the original system was never sized for.
That is why a straight swap of old unit for new unit disappoints so often. The equipment is only one part of a system that also includes the duct network, the building shell and the controls. Federal building science guidance says the same thing: before an upgrade, assess the existing equipment and distribution system to determine its scope, capacity and capabilities, and repair what does not work and clean what is dirty.
In the Inland Empire, where cooling season is long and attic temperatures get punishing, those distribution and envelope problems cost you every summer afternoon.
Step 1: Inspect what you already have
Before you compare brands or tonnage, get a clear picture of the current system. A thorough inspection covers four areas.
Ducts
The Department of Energy's heat pump checklist for homeowners tells you to inspect exposed ducts, repair or replace damaged or disconnected sections and seal visible leaks. Look for crushed flex duct, sections pulled apart at the boot or plenum, torn insulation wrap and mastic that has cracked. Typical home duct systems leak about 20% of their airflow, and in older homes that figure can climb to 30% to 50%.
When leaks sit in places a technician cannot reach, aerosol-based sealing such as Aeroseal is described in the same federal guideline as an effective alternative to hand-applied mastic for inaccessible areas of older homes.
The heating and cooling equipment
Note the age, refrigerant type, condition of the coil, the furnace heat exchanger and how often it has needed repair. If the system is more than 10 to 15 years old and repair bills are climbing, replacement usually makes more sense than another patch. A technician can also check that the blower, filter rack and return air path are working as they should.
Electrical capacity
Older panels may not have room for a new heat pump, a larger condenser or a dedicated circuit. Have a licensed professional check the panel, the breaker size and the disconnect before you commit to equipment, because a panel upgrade changes the project budget and timeline.

The shell of the house
Attic insulation, window condition, gaps around penetrations and the state of the attic floor all affect how hard the system works. In a hot climate, a radiant barrier in the attic is one option: one federal retrofit case study notes it can reflect as much as 97% of the sun's energy.
Step 2: Air sealing, insulation and new HVAC, in the right order
Homeowners often ask whether to air seal first or buy new HVAC. The answer is that they work together, and the sequence matters.
Air sealing versus insulation
Air sealing blocks the holes and gaps where conditioned air escapes and outside air enters. Insulation slows heat flow, but only when air is not moving through it. The Department of Energy's insulation guide states that air sealing should be done before adding insulation because air flowing through insulation reduces its effectiveness. Seal leaks in walls, ceilings and around windows first, then insulate.
Air sealing versus new HVAC
It is not a choice of one or the other. Sealing the envelope and the ducts reduces the load your system has to meet. The Department of Energy says homeowners can save 10% to 20% on heating and cooling bills by sealing uncontrolled air leaks. A smaller load means a smaller, less expensive and better-matched system.
That is the reason to do envelope and duct work before final equipment selection, or at least to size the equipment with those improvements in mind. Federal guidance for contractors notes that fixing leaky ducts is a prerequisite for correctly downsizing equipment to modern loads.
If your current system has already failed in July, you do not have to wait on a full envelope project. Install the right-sized replacement, seal the ducts during the installation, and schedule the rest later.
| Work | What it does | When it fits |
|---|---|---|
| Duct repair and sealing | Delivers the air your system makes to the rooms | Before or during any equipment replacement |
| Air sealing the shell | Cuts uncontrolled air leakage and the load on the system | Before insulation and before final sizing |
| Insulation | Slows heat flow through attic, walls and floors | After air sealing |
| New HVAC equipment | Provides cooling and heating efficiently | When the old unit is failing or inefficient, sized after the load is known |
| Smart thermostat | Better scheduling and control | Once the system is running properly |
Step 3: Get the sizing right
Oversizing is the most common mistake in older home replacements. Contractors sometimes install a unit as big as, or bigger than, the old one "to be safe." Short runtimes in oversized systems increase cyclic losses, weaken humidity control and are linked to earlier compressor or fan failure.
The fix is a proper calculation. The Department of Energy checklist calls for a room-by-room ACCA Manual J load calculation, followed by selecting a heat pump sized according to Manual S. Our own guides explain the process in plain language: how the Manual J calculation works, how Manual J and Manual S differ, and why insulation changes the right equipment size. If you live in our service area, the central air conditioner sizing guide for Inland Empire homes applies local conditions.
When you ask for quotes, ask each contractor to show the load calculation, not just a tonnage.

Step 4: Choose a system that fits the house
The right equipment depends mainly on whether your home has usable ducts.
Homes with existing ductwork
If the ducts are in decent shape or can be repaired, you have several routes: a conventional central air conditioner with a furnace, or a ducted heat pump that does both jobs. ENERGY STAR notes that ducted air source heat pumps can, depending on climate zone, replace a central air conditioner or furnace. It also says a heat pump can reduce cooling costs compared with a conventional air conditioner and can deliver up to three times more heat energy than the electrical energy it uses in winter.
For most Inland Empire homes, where cooling dominates and winters are mild, a heat pump is worth a serious look. Our guide to top HVAC replacement options for California homes compares the main choices, and best types of HVAC systems for home comfort covers how each type works.
Homes with no ducts or hard-to-reach ducts
Some older houses were built with wall furnaces, floor heaters or baseboard heat and never had air conditioning ducts. Cutting new duct runs through finished plaster ceilings and tight attics can be disruptive. ENERGY STAR points to ductless mini-splits as the option for older homes without existing ductwork, and for additions or outbuildings where extending ducts is difficult. Federal building science researchers add that mini-splits avoid the losses of leaky, unconditioned ducts.
A mini-split setup can be a single head for a converted garage or several heads for each bedroom and living area. It lets you condition rooms individually, which suits houses with uneven use.
Quick decision guide
- Good ducts, one central system: replace with a right-sized central system or ducted heat pump, and seal the duct joints at the same time.
- Leaky or undersized ducts that can be repaired: repair and seal first, then size the equipment to the corrected system.
- No ducts, or ducts that cannot be reached: consider ductless mini-splits.
- Addition, sunroom or casita: a ductless unit often avoids loading the main system.
- Mixed situation: a ducted system for the main floor plus ductless heads for the problem rooms.
For homeowners in Moreno Valley, our walkthrough of home AC upgrade options for Moreno Valley homeowners puts these choices in a local context.
Step 5: Add controls, then check incentives
Once the equipment and ducts are right, controls are the cheap finishing touch. Scheduling and remote control only help if the system is properly sized and wired, and older homes sometimes lack a common wire at the thermostat. A smart thermostat wiring guide can help you spot compatibility issues before you buy.
Then look at money. The Department of Energy checklist advises confirming that the work complies with relevant codes and standards and checking with utilities and with state, local and federal programs for rebates and incentives. Federal guidance also suggests checking your local utility's website and the DSIRE database for available programs. Terms and deadlines change often, so confirm current amounts and eligibility before you sign, and ask your contractor which rebates apply to the model you are considering. ENERGY STAR also says that combining a heat pump with other high-impact efficiency improvements can produce significant energy and cost savings.
For a ranked look at where your dollars work hardest, see our guide to HVAC energy efficiency upgrades that pay back fastest.
A realistic upgrade sequence
Most older-home projects follow a pattern like this:
- Inspect. A technician checks the equipment, the ducts, the airflow and the electrical capacity.
- Repair what is broken. Disconnected ducts, clogged components and failed parts are fixed so the load calculation reflects reality.
- Seal and insulate. Air sealing first, then insulation, where the shell needs it.
- Calculate. A Manual J load calculation sets the real heating and cooling needs, and Manual S guides equipment selection.
- Install. The new system goes in with sealed duct connections, correct airflow and proper commissioning.
- Tune and maintain. Set controls and schedule routine maintenance so the system keeps its efficiency.
Our article on the stages of HVAC replacement explains what happens at each stage and what to expect on installation day.
Our perspective
We see the same pattern in older Inland Empire homes again and again. A homeowner calls because the AC cannot keep up, and the instinct is to buy a bigger unit. Most of the time the better answer is a system sized to the real load, connected to ducts that actually deliver what it makes.
That is why we start with the house. We look at the equipment, the duct system, the airflow and how the home is used, and we explain what we find in plain terms. Our technicians are licensed and insured, we work on all major brands, and we offer flexible payment options, including financing, so a sound upgrade does not have to wait.
We also know that a broken system in a Riverside or Fontana summer cannot wait, which is why our service is available around the clock, including weekends and holidays. Whether you need a repair, a system enhancement or a full installation, our goal is a tailored, energy-efficient solution with as little disruption to your home as possible.
Edward
Plan your older home upgrade with E320 Air
If your system is struggling, or you are weighing repair against replacement, we can inspect your equipment and ducts, explain your options and recommend a system that fits your house. We serve homeowners, landlords, property managers and business owners across the Inland Empire, from Corona and Ontario to Hemet and Banning. Learn more about our HVAC installation services, or see our residential HVAC and system enhancements for upgrades to an existing system.

If the system has stopped working, our heater repair service and emergency repairs are there when you need them, and for rental or commercial properties our commercial HVAC team can help with maintenance and upgrades.
Frequently asked questions
Should I air seal my older home before replacing the HVAC system?
Ideally, yes, or at least plan the two together. Sealing leaks lowers the load, which lets you install a smaller and better-matched system. If your unit has already failed, replace it with a right-sized system now and handle sealing and insulation afterward, since the load calculation can account for planned improvements.
Do I need to replace my ducts when I get a new system?
Not always. Ducts that are intact can often be repaired and sealed, and hard-to-reach leaks can sometimes be sealed with aerosol methods. Ducts that are crushed, undersized or badly damaged may need to be replaced, and a technician can tell you which applies after an inspection.
Is a ductless mini-split a good fit for an older home?
Often it is, especially where there are no ducts or where adding them would mean opening up finished ceilings and walls. Mini-splits also work well in additions and converted spaces. A load calculation tells you how many heads you need and where.
How do I know if the new system is the right size?
Ask for the Manual J load calculation results. A properly sized system comes from a room-by-room calculation and equipment chosen with Manual S, not from the size of the old unit. Oversized equipment cycles on and off, which hurts comfort, humidity control and equipment life.
Are there rebates for upgrading HVAC in an older home?
There may be. Check your local utility's website and the DSIRE database, and ask your contractor which programs match the equipment you are considering. Because incentives change, always confirm the current terms before you buy.
Sources
- Clean Heating and Cooling, ENERGY STAR
- Building America Best Practices Series Vol. 14: Energy Renovations, HVAC
- Measure Guideline: Sealing and Insulating of Ducts in Existing Homes
- DOE Home Improvement Expert Fact Sheet and Checklist: Heat Pumps
- Existing HVAC System Upgrade or Expansion, Building America Solution Center
- HVAC Improvements for Existing Homes, OSTI
- Energy Saver: Tips on Saving Money and Energy in Your Home, US Department of Energy
- Building America Best Practices Series Volume 12: Energy Renovations, Insulation
- Building America Comprehensive Energy Retrofit case study
- Smart thermostat wiring guide