
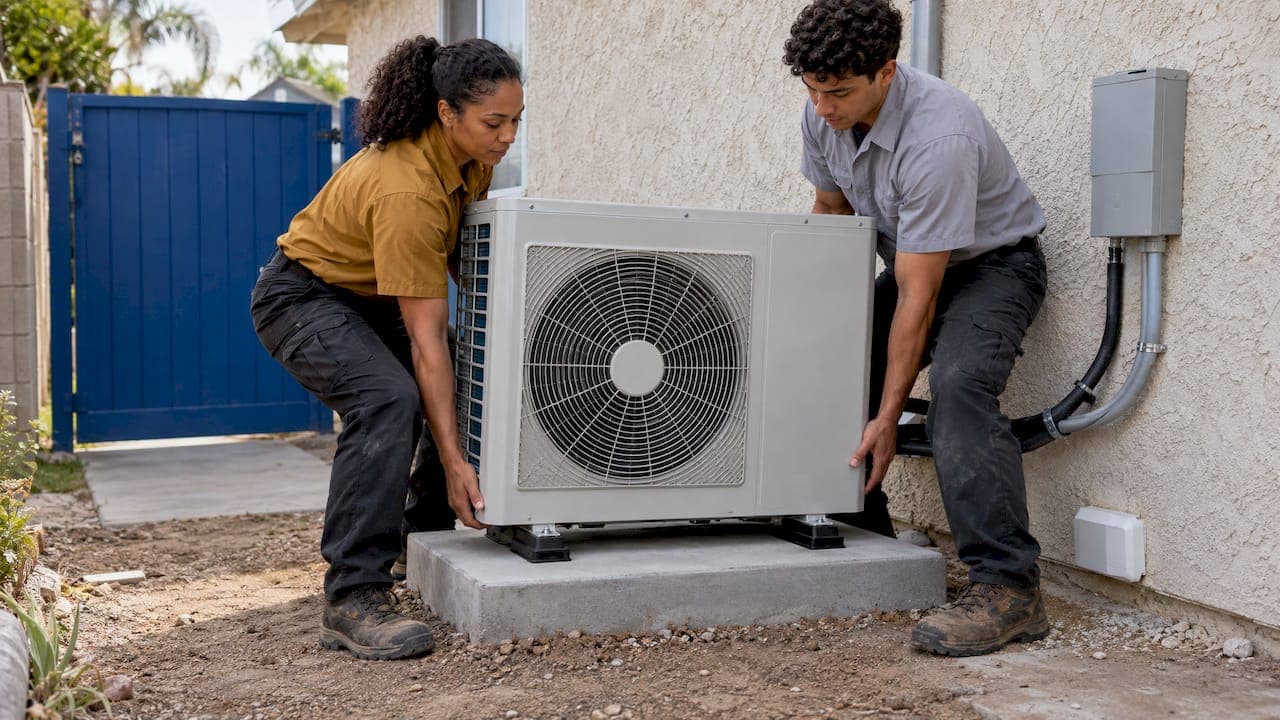
A professional heat pump installation moves through the same stages every time: a home assessment and load calculation, equipment selection, a permit, site preparation, setting the indoor and outdoor units, refrigerant and electrical connections, testing, and a walkthrough with you. For a straightforward replacement, the hands-on work is usually done in about one working day. Ductwork changes, electrical upgrades or a tricky site can add time. Here is what happens at each stage, what to ask before work starts, and what to look for when the crew packs up.
TL;DR
- The work starts days before install day: a home assessment, a Manual J load calculation, equipment selection and a permit.
- Install day covers site prep, removing the old equipment, setting both units, brazing and testing refrigerant lines, wiring, and thermostat setup.
- In California, replacing or altering an HVAC unit requires a permit, and your contractor should be the one to pull it.
- Commissioning is the step that proves the job was done right: refrigerant charge, airflow, controls and a documented handoff.
- Ask that your written estimate spells out haul-away, permit fees and any electrical panel work, so two quotes can be compared fairly.
Table of Contents
- Before install day: assessment and sizing
- The permit comes before the work
- Install day, step by step
- How long does it take?
- Commissioning: how you know it was done right
- What your estimate should spell out
- Our perspective
- Plan your heat pump installation with E320air
- FAQ
- Sources
Before install day: assessment and sizing
A good installation is decided before anyone carries equipment to your yard. The first visit is a consultation where the technician looks at your home's size, insulation, layout, existing ducts, electrical panel and where the units can physically go. That visit produces the information needed to choose the right system.
The key document is the heat load calculation. ACCA's Manual J method estimates how much heating and cooling your house needs in BTUs, and it should drive the equipment choice, including efficiency ratings under the DOE standards that took effect in January 2023. If you want the detail on how it works, we walk through it in our Manual J calculation guide.
Why not just match the size of the old unit? Because houses change. Windows get replaced, attics get insulation, rooms get added. ENERGY STAR advises sizing equipment from your home's actual characteristics rather than rules of thumb, since oversized equipment may cycle too often, reduce comfort and shorten its own lifespan. Inland Empire homes are especially prone to this because summer peaks push people toward "bigger is safer." Our central air sizing guide for Inland Empire homes and our piece on insulation and HVAC sizing explain how to avoid it.
What to settle at the consultation
- Outdoor unit location. Clearance, noise near bedrooms or a neighbor's fence, a level pad and a short, direct path for the line set.
- Indoor unit type. An air handler in an attic, closet or garage, or a furnace with a coil if you want a dual-fuel setup.
- Duct condition. Whether existing ducts can carry the airflow a heat pump needs, or need repair, sealing or modification.
- Electrical capacity. Whether your panel has room for the new breaker and whether the disconnect and wiring meet current code.
- Thermostat and controls. Compatibility with the new equipment and what you want to control from your phone.
- Scope of removal. Who hauls away the old equipment and recovers its refrigerant.
The permit comes before the work
The California Energy Commission states that a permit is required when an HVAC unit is replaced or altered, so the installed system is checked against building code. Permit paperwork typically includes a combined application for electrical, mechanical and plumbing, scaled floor plans, the mechanical design, an electrical line diagram, load calculations and manufacturer specifications, as laid out in a federal heat pump permitting checklist.
Two practical points:
- Confirm the contractor will pull the permit. The 3C-REN homeowner checklist tells you to confirm the contractor will pull the permit, even if someone presents it as optional.
- Do not let work begin early. Starting before the permit is issued can mean having completed work torn out, according to one industry installation overview.
Every city runs its own process. For a local example, see our Moreno Valley permit checklist, and for the general picture read what an HVAC permit requirement means. California installs can also involve duct sealing and testing, and a third-party HERS rater may verify equipment installation and duct leakage, as described in a quality installation guide. Ask your contractor whether your job triggers that verification and who schedules it.
Install day, step by step
A typical day follows the order below. Your crew may reorder a few items, but the logic stays the same: protect the house, remove the old system, set the new one, connect it, then prove it works.
1. Site preparation
The crew lays down floor protection, shuts off power at the breaker, and walks the route between the indoor and outdoor locations. Furniture and storage near the air handler should already be cleared. If your equipment sits in an attic, expect the crew to need a clear path to it.
2. Removing the old equipment
Before anything is disconnected, a licensed technician recovers the refrigerant from the old system. Recovery is a legal requirement for certified technicians, not a courtesy. Then the old outdoor unit comes off its pad, the indoor coil or air handler is disconnected and the old equipment is removed for disposal, assuming haul-away is in your estimate.

3. Setting the outdoor unit
The outdoor unit goes on a level pad or wall bracket, with the clearances the manufacturer specifies. Level matters: a tilted unit can stress the compressor and drain poorly. In our region, shade, airflow and distance from fences and dryer vents all deserve a second look.
4. Setting the indoor unit
The air handler or coil goes in at its planned location, supported properly, with a drain line and a secondary drain pan or float switch where required. The drain is a common source of callbacks, so it is worth asking how it will be routed and where the condensate ends up.
5. Line sets and refrigerant connections
Refrigerant lines connect the two units. On the technical side, the line set is brazed, pressure-tested and evacuated before the system is charged, as outlined in one installation guide. Connections follow the manufacturer's specifications. Nitrogen is typically flowed through the lines during brazing to keep scale out of the system, and a vacuum test confirms there is no moisture or leak before refrigerant goes in.

6. Electrical and low-voltage wiring
The outdoor unit needs a properly sized circuit and a disconnect within sight of the unit. Separate low-voltage wiring links the thermostat, air handler and outdoor unit. If your panel needs a new breaker or an upgrade, it is handled here, and it is the kind of work that should be spelled out in the estimate.
7. Ductwork connections
The air handler is connected to the supply and return ducts. Where ducts are altered, they should be sized using ACCA's Manual D and sealed to SMACNA standards, per the same guide. A heat pump moves air at lower temperatures than a gas furnace, so undersized or leaky ducts show up quickly as weak airflow and uneven rooms.
8. Charging, startup and testing
Once the vacuum holds, the technician releases the refrigerant charge, powers up the system and runs it in both heating and cooling modes. This leads into commissioning, covered below. If you want a plain-language look at this stage, read our HVAC system startup guide for homeowners.
9. Cleanup and walkthrough
The crew cleans up, removes debris and walks you through the thermostat, filter location, and what normal operation sounds and feels like. A heat pump in heating mode sometimes runs a defrost cycle with a burst of steam from the outdoor unit, which is normal, and you should hear about it before you see it.
How long does it take?
Plan on a full working day for a straightforward swap of an air-source system with healthy ducts. A published industry overview puts air-source installs at roughly 3 to 8 hours, with ductwork work stretching to a day or more. The same source notes that geothermal systems are a different project entirely and can take weeks once surveying and excavation are included.
What tends to lengthen the schedule:
- Ductwork changes. New runs, a new plenum or sealing a leaky system.
- Electrical upgrades. A new circuit, a larger breaker or a panel replacement.
- Difficult access. Tight attics, second-floor mechanical closets, or a long line set path.
- Inspection timing. The work itself may be done in a day while the city inspection happens separately.
Tell your contractor about your constraints, such as pets, working from home or an attic that is hard to reach, so the schedule is realistic. Our write-up on the installation workflow for California homes covers how a job is sequenced from first call to final sign-off.
Commissioning: how you know it was done right
Installation ends when the system has been tested, not when it first turns on. Commissioning is that proof. It should include:
- Refrigerant charge verified against manufacturer specifications. ENERGY STAR notes that verifying the charge helps reduce energy consumption and the risk of system failure.
- Airflow checked across the coil and at the registers.
- Heating and cooling modes tested, including the reversing valve and defrost operation.
- Thermostat configured for a heat pump, with the right staging and any auxiliary or backup heat settings.
- Drain and condensate confirmed to flow freely.
- Electrical connections checked for tightness and correct breaker size.
Ask for documentation. A quality installation guide recommends recording the installation and commissioning with photos, test results and notes when the work is complete. Keep those along with the permit, the final inspection sign-off, the model and serial numbers and the warranty registration. They matter later if you sell the house or make a warranty claim.
What your estimate should spell out
Cost is the main reason homeowners compare quotes, and quotes are easiest to compare when each one says exactly what is in it. A May 2026 national cost estimate lists what a typical heat pump price includes: equipment, basic labor, supplies, optional removal of the old unit, debris disposal, delivery, site preparation, setup, cleanup and testing. The same page notes what it leaves out, including code-compliance upgrades, sales tax, and permit or inspection fees. Real costs vary with your project's conditions, requirements and materials.
So before you sign, check that the estimate explicitly defines what is included, such as haul-away of old equipment, permit fees or electrical panel upgrades. A short list of questions makes this easy:
- Does the price include the permit and inspection fees, and who handles them?
- Is a Manual J load calculation part of the job, and can I see it?
- Are duct repairs, sealing or testing included?
- Is any electrical work, such as a breaker or disconnect, included?
- Who removes and disposes of the old equipment?
- What warranties cover parts and labor, and who registers them?
- Is there financing if I want to spread the cost?
Common pitfalls show up when these answers are vague. Our guide to common installation mistakes California homeowners should avoid goes deeper, and the 2026 efficiency standards guide helps you check that the equipment you are quoted meets current requirements.
Our perspective
Most heat pump problems we hear about did not start with the equipment. They started with a skipped step: a guessed size, a rushed charge, a permit nobody pulled. The installation process is where the efficiency you paid for is either built in or lost.
That is why we treat the assessment and the commissioning as seriously as the day the units go in. In the Inland Empire, long cooling seasons and cool winter nights mean your system works hard in both directions. A properly sized system, with sealed ducts and a verified charge, runs the way the brochure says it should.
We would rather spend an extra hour explaining what we are doing and why than leave you guessing. You should know who is pulling the permit, what the estimate covers and what the finished job looks like. Licensed, insured technicians, clear communication and a tidy site are the standard we work to, and we are glad to talk through financing if it helps you move forward.
Edward
Plan your heat pump installation with E320air
If you are weighing a heat pump for your home or building, our team handles residential and commercial installations, system upgrades, repairs and maintenance across the Inland Empire, from Riverside and Moreno Valley to Fontana, Corona and Redlands. We work with all major brands, offer flexible payment options including financing, and are available around the clock, including weekends and holidays.

Start with our HVAC installation service to request an assessment, or see what else we do for homes on our residential HVAC page. Ask for the load calculation, the permit plan and a written scope, and compare them with any other quote you have.
FAQ
What is the process of installing a heat pump?
It runs from a home assessment and load calculation to equipment selection, a permit, site preparation, setting the indoor and outdoor units, refrigerant and electrical connections, testing and a walkthrough. Most of the physical work happens on one install day. Commissioning and inspection follow to confirm everything performs as designed.
Do I need a permit to install a heat pump in California?
Yes, in general. California's Energy Commission says a permit is needed when an HVAC unit is replaced or altered so the work can be checked against building code. Ask your contractor to pull it, and confirm requirements with your city or county building department, since procedures differ by jurisdiction.
How long does heat pump installation take?
A straightforward air-source installation commonly takes several hours up to a full day. Ductwork changes, electrical upgrades or hard-to-reach equipment locations can extend that to more than one day. Inspection timing may add a separate visit after the main work is done.
What should be included in a heat pump installation quote?
A clear quote lists the equipment model, labor, materials, permit and inspection fees, haul-away of old equipment, any duct or electrical work, and testing. Estimates that leave these out make comparisons unreliable, so ask for each item in writing.
Can I install a heat pump myself?
The job involves handling refrigerant, high-voltage wiring and a permit and inspection process, so it belongs with a licensed contractor. A professional also protects your equipment warranty and documents the work, which matters when you sell or file a claim.
Sources
- HVAC Quality Installation | ENERGY STAR
- Building Energy Efficiency Resources for Single Family Homes | California Energy Commission
- Heat Pump Space Heating Permitting & Inspection Checklist
- Ask a Contractor checklist | 3C-REN
- Air Source Heat Pumps: Quality Installation and Thorough Commissioning Guide
- HVAC System Installation Process: What to Expect
- How Long Does It Take to Install a Heat Pump? | HVAC.com
- Cost to Install Heat Pump, 2026 Cost Calculator | Homewyse
- Pre-Installation Checklist for Homeowners